Are you drowning in a sea of data, struggling to keep your applications afloat? 🌊 In today’s digital landscape, efficient database management is the lifeboat that can save your business from sinking. But with so many AWS database services available, how do you know which one to deploy and how to do it effectively?
Fear not! We’ve got your back with this comprehensive guide to deploying AWS database services. Whether you’re looking to harness the power of Amazon RDS, the flexibility of DynamoDB, the performance of Aurora, the analytics capabilities of Redshift, or the caching prowess of ElastiCache, we’ve got you covered. 💪
In this step-by-step journey, we’ll navigate through the choppy waters of database deployment, starting with understanding AWS database services and preparing for deployment. Then, we’ll dive deep into deploying each service, from RDS to ElastiCache, and finally, we’ll explore how to monitor and maintain your newly deployed databases. So, buckle up and get ready to set sail on your AWS database adventure! 🚀
Understanding AWS Database Services
A. Overview of RDS, DynamoDB, Aurora, Redshift, and ElastiCache
AWS offers a diverse range of database services to cater to various application needs. Let’s explore the key features of each:
| Service | Type | Key Features |
|---|---|---|
| RDS | Relational | Managed MySQL, PostgreSQL, Oracle, SQL Server |
| DynamoDB | NoSQL | Serverless, auto-scaling, low-latency |
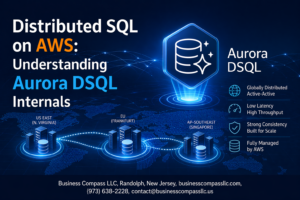
| Aurora | Relational | MySQL/PostgreSQL compatible, high performance |
| Redshift | Data Warehouse | Petabyte-scale, columnar storage |
| ElastiCache | In-memory | Redis and Memcached support, sub-millisecond latency |
B. Comparing features and use cases
- RDS: Ideal for traditional applications requiring ACID compliance
- DynamoDB: Perfect for high-traffic web apps, gaming, and IoT
- Aurora: Suitable for enterprise applications needing high availability
- Redshift: Best for complex analytics and big data processing
- ElastiCache: Excellent for real-time applications and caching layers
C. Choosing the right database for your needs
Selecting the appropriate database depends on several factors:
- Data structure: Relational (RDS, Aurora) vs. Non-relational (DynamoDB)
- Scalability requirements: Automatic (DynamoDB) vs. Manual (RDS)
- Performance needs: In-memory (ElastiCache) vs. Disk-based (others)
- Data volume: Petabyte-scale (Redshift) vs. Gigabyte-scale (RDS, Aurora)
Consider your application’s specific requirements, expected growth, and budget constraints when making your decision. Now that we’ve covered the basics of AWS database services, let’s move on to preparing for database deployment.
Preparing for Database Deployment
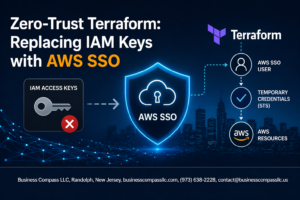
A. Setting up AWS account and IAM roles
Before deploying any database on AWS, it’s crucial to set up your AWS account and configure the necessary IAM roles. This process ensures secure access and proper permissions for your database resources.
- Create an AWS account if you haven’t already
- Set up Multi-Factor Authentication (MFA) for enhanced security
- Create IAM users and groups
- Implement the principle of least privilege
Here’s a quick guide to creating IAM roles for database deployment:
- Navigate to the IAM console
- Click on “Roles” in the left sidebar
- Choose “Create role”
- Select the AWS service that will use this role (e.g., RDS, DynamoDB)
- Attach the necessary permissions policies
- Review and create the role
| IAM Role | Common Use Case | Recommended Permissions |
|---|---|---|
| Database Admin | Managing databases | AmazonRDSFullAccess, AmazonDynamoDBFullAccess |
| Read-Only User | Viewing database info | AmazonRDSReadOnlyAccess, AmazonDynamoDBReadOnlyAccess |
| Backup Operator | Creating backups | AmazonRDSBackupFullAccess |
B. Configuring VPC and security groups
After setting up IAM roles, it’s time to configure your Virtual Private Cloud (VPC) and security groups. This step is crucial for network isolation and controlling access to your databases.
- Create a new VPC or use an existing one
- Set up public and private subnets
- Configure route tables and internet gateways
- Create security groups for your databases
Here’s a basic security group configuration for a database:
- Inbound Rules:
- Allow traffic on the database port (e.g., 3306 for MySQL) from your application servers
- Allow SSH access (port 22) from your bastion host
- Outbound Rules:
- Allow all outbound traffic
Remember to regularly review and update your security group rules to maintain a strong security posture.
C. Planning for high availability and disaster recovery
Deploying Amazon RDS
A. Selecting instance type and storage options
When deploying Amazon RDS, choosing the right instance type and storage options is crucial for optimal performance and cost-efficiency. Consider the following factors:
- Workload requirements
- Performance needs
- Budget constraints
- Scalability expectations
Here’s a comparison of RDS instance types:
| Instance Type | Use Case | vCPUs | Memory (GiB) |
|---|---|---|---|
| t3.micro | Dev/Test | 2 | 1 |
| m5.large | General | 2 | 8 |
| r5.xlarge | Memory | 4 | 32 |
| c5.2xlarge | Compute | 8 | 16 |
For storage, choose between:
- General Purpose SSD (gp2): Balanced performance and cost
- Provisioned IOPS SSD (io1): High-performance, mission-critical workloads
- Magnetic storage: Legacy applications, infrequent access
B. Configuring database parameters
Optimize your RDS instance by configuring key database parameters:
- Set appropriate buffer pool size
- Adjust query cache size
- Configure max connections
- Tune transaction isolation level
Use parameter groups to manage these settings across multiple instances. Remember to test changes in a non-production environment before applying them to your production database.
C. Implementing multi-AZ deployment
Multi-AZ deployment enhances availability and durability. Key benefits include:
- Automatic failover to standby replica
- Synchronous replication across Availability Zones
- Minimal downtime during maintenance
To implement:
- Enable Multi-AZ during instance creation or modify existing instance
- Configure DNS endpoints for automatic failover
- Test failover scenarios to ensure business continuity
D. Setting up read replicas for scalability
Read replicas improve performance and scalability by offloading read traffic from the primary instance. To set up:
- Create read replicas from the RDS console or AWS CLI
- Configure application to distribute read queries across replicas
- Monitor replication lag and adjust as needed
Consider cross-region read replicas for global applications to reduce latency and improve disaster recovery capabilities.
Now that we’ve covered RDS deployment, let’s explore how to launch Amazon DynamoDB for NoSQL database needs.
Launching Amazon DynamoDB
A. Designing table structure and partition keys
When launching Amazon DynamoDB, designing an efficient table structure and choosing appropriate partition keys are crucial for optimal performance. Consider the following best practices:
- Identify your access patterns
- Choose a primary key that distributes data evenly
- Use composite keys for hierarchical data
Here’s a table comparing different primary key options:
| Primary Key Type | Description | Use Case |
|---|---|---|
| Simple Key | Single attribute | When one attribute uniquely identifies items |
| Composite Key | Partition key + Sort key | For hierarchical data or multiple query patterns |
B. Configuring read/write capacity units
DynamoDB offers two capacity modes:
- Provisioned Throughput
- On-Demand
Provisioned Throughput requires you to specify Read Capacity Units (RCUs) and Write Capacity Units (WCUs). On-Demand automatically scales based on workload. Choose the mode that best fits your application’s needs and budget.
C. Implementing global tables for multi-region deployment
Global tables provide a fully managed solution for deploying multi-region, multi-active databases. To implement:
- Enable DynamoDB Streams on your table
- Choose regions for replication
- Add replica tables in selected regions
D. Enabling DynamoDB Streams for real-time data processing
DynamoDB Streams capture table activity in real-time. To enable:
- Navigate to your table’s “Overview” tab
- Click “Manage Stream”
- Choose the information to include in the stream
Streams can trigger Lambda functions for real-time processing, enabling powerful event-driven architectures.
Now that we’ve covered launching DynamoDB, let’s explore setting up Amazon Aurora for relational database needs.
Setting up Amazon Aurora
Choosing between MySQL and PostgreSQL compatibility
When setting up Amazon Aurora, one of the first decisions you’ll need to make is choosing between MySQL and PostgreSQL compatibility. Both options have their strengths, and your choice will depend on your specific needs and existing infrastructure.
| Feature | Aurora MySQL | Aurora PostgreSQL |
|---|---|---|
| Compatibility | MySQL 5.6, 5.7, 8.0 | PostgreSQL 10, 11, 12, 13 |
| Performance | Up to 5x faster than MySQL | Up to 3x faster than PostgreSQL |
| Use Cases | Web apps, e-commerce, gaming | Analytics, geospatial apps, financial systems |
Consider the following factors when making your decision:
- Existing applications and their compatibility
- Team expertise and familiarity
- Specific feature requirements
- Performance needs for your workload
Configuring Aurora Serverless for variable workloads
Aurora Serverless is an excellent choice for applications with unpredictable or variable workloads. It automatically scales compute and memory resources as needed, allowing you to optimize costs and performance.
Key configuration steps:
- Choose the Aurora Serverless option when creating your cluster
- Set minimum and maximum capacity units
- Configure auto-pause and auto-resume settings
- Define scaling rules based on CPU utilization or connections
Implementing Aurora Global Database for low-latency access
For applications requiring global reach and low-latency access, Aurora Global Database is the ideal solution. It replicates your database across multiple AWS Regions, providing fast local reads and disaster recovery capabilities.
To set up an Aurora Global Database:
- Create a primary Aurora cluster in your main region
- Add secondary regions through the AWS Management Console
- Configure read-only instances in each secondary region
- Set up monitoring and failover priorities
Utilizing Aurora parallel query for enhanced performance
Aurora parallel query can significantly improve query performance for analytical workloads. This feature distributes query processing across multiple nodes, reducing response times for complex queries.
To enable and optimize parallel query:
- Ensure your Aurora version supports parallel query
- Enable the feature at the cluster level
- Identify queries that can benefit from parallelization
- Monitor query performance and adjust as needed
With these configurations in place, your Aurora database will be well-equipped to handle various workloads and provide optimal performance for your applications. Next, we’ll explore how to deploy Amazon Redshift for your data warehousing needs.
Deploying Amazon Redshift
Selecting node type and cluster size
When deploying Amazon Redshift, choosing the right node type and cluster size is crucial for optimal performance and cost-efficiency. Consider the following factors:
- Data volume
- Query complexity
- Concurrency requirements
- Budget constraints
Here’s a comparison of Redshift node types:
| Node Type | vCPUs | RAM (GiB) | Storage (TB) | Use Case |
|---|---|---|---|---|
| RA3 | 4-96 | 32-768 | 64-16,384 | Large datasets, complex queries |
| DC2 | 2-32 | 15.25-244 | 0.16-2.56 | Small to medium workloads |
| DS2 | 16-36 | 244-768 | 2-16 | Legacy, high storage needs |
For cluster size, start small and scale up as needed. A typical starting point is:
- 1 leader node
- 2-3 compute nodes
Configuring data distribution and sort keys
Proper data distribution and sort keys are essential for Redshift performance:
- Distribution keys: Determine how data is distributed across nodes
- Sort keys: Define the order of data within each node
Best practices:
- Choose distribution key based on join patterns
- Use compound sort keys for frequently filtered columns
- Avoid skewed data distribution
Implementing workload management (WLM)
Workload Management (WLM) helps optimize query performance and resource allocation:
- Create separate queues for different workload types
- Set concurrency limits for each queue
- Configure memory allocation per queue
- Implement short query acceleration (SQA)
Setting up Redshift Spectrum for querying data in S3
Redshift Spectrum allows querying data directly in S3 without loading it into Redshift:
- Create an external schema
- Define external tables
- Grant necessary permissions
- Query external data alongside Redshift tables
By leveraging Spectrum, you can analyze vast amounts of data cost-effectively while maintaining the performance benefits of Redshift.
Now that we’ve covered Redshift deployment, let’s explore how to launch Amazon ElastiCache for in-memory data storage and caching needs.
Launching Amazon ElastiCache
Choosing between Redis and Memcached engines
When launching Amazon ElastiCache, the first crucial decision is selecting between Redis and Memcached engines. Both offer distinct advantages, and your choice depends on your specific use case:
| Feature | Redis | Memcached |
|---|---|---|
| Data Types | Complex (strings, lists, sets, hashes) | Simple (string-based) |
| Persistence | Supports data persistence | In-memory only |
| Replication | Multi-AZ replication | No built-in replication |
| Pub/Sub | Supports Pub/Sub messaging | Not available |
| Scaling | Vertical and horizontal | Horizontal only |
Choose Redis for complex data structures, persistence, and advanced features. Opt for Memcached for simpler caching needs and horizontal scaling.
Configuring cache node type and cluster size
Selecting the appropriate node type and cluster size is crucial for optimal performance:
- Evaluate your workload requirements (CPU, memory, network)
- Consider future growth and peak usage patterns
- Start with a smaller configuration and scale up as needed
- Use Amazon CloudWatch metrics to monitor resource utilization
Implementing Redis replication groups for high availability
Redis replication groups enhance reliability and fault tolerance:
- Configure a primary node with one or more read replicas
- Enable Multi-AZ for automatic failover
- Distribute read workloads across replicas for improved performance
Optimizing cache invalidation strategies
Effective cache invalidation ensures data consistency:
- Time-based expiration: Set TTL for cache entries
- Event-driven invalidation: Update cache when data changes
- Version-based invalidation: Use versioning to track data freshness
- Lazy loading: Fetch and cache data only when requested
Implement a combination of these strategies based on your application’s needs and data access patterns.
Monitoring and Maintaining Deployed Databases
Setting up CloudWatch alarms and metrics
CloudWatch is essential for monitoring your AWS databases. Set up the following key metrics:
- CPU Utilization
- Free Storage Space
- Database Connections
- Read/Write IOPS
Create alarms for each metric to receive notifications when thresholds are exceeded. For example:
| Metric | Threshold | Action |
|---|---|---|
| CPU Utilization | > 80% for 5 minutes | Send SNS notification |
| Free Storage Space | < 20% | Trigger auto-scaling |
| Database Connections | > 90% of max | Alert DBA team |
Implementing automated backups and snapshots
Ensure data safety with automated backups:
- Configure daily automated backups
- Set appropriate retention periods (e.g., 7 days)
- Create manual snapshots for critical milestones
Scaling resources based on performance needs
Monitor performance and scale as needed:
- Use CloudWatch metrics to identify bottlenecks
- Implement auto-scaling for DynamoDB and Aurora
- For RDS and Redshift, manually adjust instance sizes
Applying security patches and version upgrades
Stay current with updates:
- Enable automatic minor version upgrades
- Schedule maintenance windows for major upgrades
- Test upgrades in a staging environment first
- Keep track of end-of-life dates for database versions
Now that we’ve covered monitoring and maintenance, you have a comprehensive understanding of managing your AWS database deployments effectively.
AWS offers a robust suite of database services to cater to diverse application needs. From relational databases like RDS and Aurora to NoSQL solutions like DynamoDB, data warehousing with Redshift, and in-memory caching with ElastiCache, each service has its unique strengths. By following the step-by-step deployment processes outlined in this guide, you can confidently set up and manage these database services on AWS.
Remember, successful database deployment is just the beginning. Regular monitoring, maintenance, and optimization are crucial for ensuring optimal performance and security. Stay proactive in managing your AWS database services, and you’ll be well-equipped to handle the data requirements of your applications as they grow and evolve.