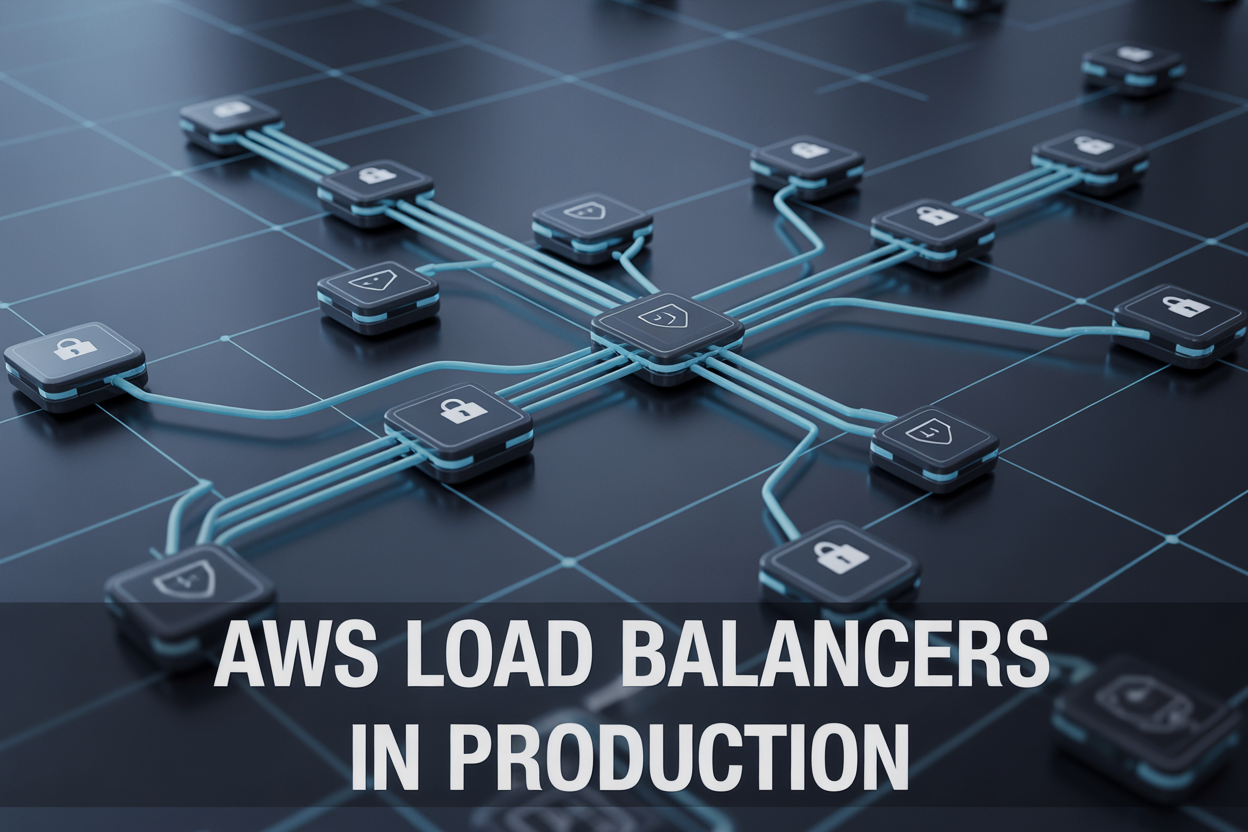
AWS Load Balancers in Production: Architecture, Scaling, and Security
Running applications at scale on AWS means your load balancer setup can make or break your uptime. One wrong configuration and you’re looking at dropped connections, failed deployments, or a security gap that costs you more than just sleep.
This guide is for backend engineers, DevOps teams, and cloud architects who are either building a production-grade AWS load balancer setup for the first time or trying to fix one that’s already causing problems.
Here’s what we’ll walk through:
- Which AWS load balancer type to pick — ALB, NLB, or CLB — and why the wrong choice affects everything downstream
- How to design a resilient architecture that holds up during traffic spikes without manual intervention
- How to lock down security at the load balancer layer so you’re not leaving the front door open while protecting everything else
By the end, you’ll have a clear picture of how to build a load balancer setup that’s production-ready, not just functional.
Understanding AWS Load Balancer Types and When to Use Each
Application Load Balancer for Intelligent HTTP and HTTPS Routing
The Application Load Balancer (ALB) operates at Layer 7, meaning it actually understands HTTP and HTTPS traffic rather than just blindly forwarding packets. This makes it the go-to choice for web applications, microservices, and containerized workloads.
Key capabilities that make ALB stand out:
- Content-based routing – Route requests based on URL paths (
/api/*goes to one target group,/images/*goes to another), HTTP headers, query strings, or host headers - Native support for WebSockets and HTTP/2 – Critical for real-time applications and modern front-end frameworks
- AWS WAF integration – Apply web application firewall rules directly at the load balancer layer without additional infrastructure
- Lambda function targets – Route specific requests directly to serverless functions, mixing compute types within a single application
- Sticky sessions – Maintain user session affinity using load balancer-generated cookies or application-based cookies
- Authentication offloading – Integrate with Amazon Cognito or any OIDC-compatible identity provider to handle authentication before requests ever reach your backend
ALB shines brightest in microservices architectures where you need a single entry point routing traffic to dozens of different backend services based on request characteristics.
Network Load Balancer for Ultra-Low Latency and High Throughput
When milliseconds matter and you’re dealing with millions of requests per second, the Network Load Balancer (NLB) is the right tool. It operates at Layer 4, handling TCP, UDP, and TLS traffic without inspecting the content of packets, which is exactly why it’s so fast.
Where NLB genuinely earns its place:
- Gaming backends – Sub-millisecond latency requirements that ALB simply cannot match
- Financial trading platforms – High-frequency transaction processing where any routing overhead is unacceptable
- IoT device fleets – Massive numbers of persistent TCP connections from devices sending small payloads continuously
- Custom protocols – Any application using non-HTTP protocols like MQTT, gRPC over TCP, or proprietary binary protocols
- Static IP addresses – NLB provides a fixed IP per availability zone, which is critical when clients, partners, or firewall rules need to whitelist specific IPs
One thing that catches people off guard: NLB preserves the client’s source IP address by default, unlike ALB which uses proxy behavior. Your backend servers will see real client IPs without any additional configuration, which simplifies logging and security controls.
Performance characteristics worth knowing:
| Feature | ALB | NLB |
|---|---|---|
| Layer | 7 (Application) | 4 (Transport) |
| Latency | ~400ms | ~100ms |
| Protocol support | HTTP, HTTPS, WebSocket | TCP, UDP, TLS |
| Source IP preservation | Requires X-Forwarded-For | Native |
Gateway Load Balancer for Third-Party Appliance Integration
Gateway Load Balancer (GWLB) solves a very specific problem that most teams don’t encounter until they’re running security-sensitive or compliance-heavy workloads at scale. It lets you run third-party virtual appliances — firewalls, intrusion detection systems, deep packet inspection tools — in a horizontally scalable, highly available way without creating network chokepoints.
The architecture works like this:
- Traffic enters your VPC and gets transparently intercepted by GWLB before reaching its destination
- GWLB distributes that traffic across a fleet of appliance instances (your Palo Alto, Fortinet, or Check Point VMs)
- Those appliances inspect and process the traffic, then return it to GWLB
- GWLB forwards the traffic to its original destination as if nothing happened
This transparent bump-in-the-wire model uses the GENEVE protocol on port 6081, which preserves original packet data so appliances see unmodified traffic.
GWLB makes the most sense when:
- Your security team mandates third-party NGFW inspection for all east-west or north-south traffic
- You’re running in a regulated industry (finance, healthcare) with specific appliance certification requirements
- You need to scale inspection capacity dynamically rather than over-provisioning fixed appliance capacity
- You want centralized inspection in a security VPC that multiple spoke VPCs route through
Choosing the Right Load Balancer for Your Production Workload
Picking the wrong load balancer type is a costly mistake to fix later — it touches security groups, target group configurations, listener rules, and potentially your application code. Getting it right upfront saves a painful migration.
Use this decision framework:
- Start with ALB if you’re running web applications, REST APIs, GraphQL endpoints, or anything HTTP/HTTPS-based. The routing flexibility and security integrations are hard to pass up.
- Switch to NLB when you hit latency requirements below ~100ms, need static IPs, handle non-HTTP protocols, or process raw TCP/UDP traffic at massive scale.
- Reach for GWLB when your architecture requires network traffic inspection through third-party appliances and you need that to scale automatically.
- Consider combining types — a common production pattern puts NLB in front of ALB to get static IPs with WAF protection, or uses GWLB in a security VPC with ALB handling application routing in each spoke VPC.
Quick reference by use case:
| Workload Type | Recommended LB |
|---|---|
| Web app / REST API | ALB |
| Microservices on ECS/EKS | ALB |
| Real-time gaming / trading | NLB |
| IoT with MQTT | NLB |
| Third-party firewall / IDS | GWLB |
| Mixed: static IP + WAF | NLB → ALB |
One practical tip: if you’re unsure between ALB and NLB for an HTTP workload, default to ALB. The feature set around routing, authentication, and WAF integration will pay off as your application grows in complexity.
Designing a Resilient Load Balancer Architecture for Production

Multi-AZ Deployment for Maximum Fault Tolerance
Spreading your load balancer across multiple Availability Zones is one of the smartest moves you can make in production. If one AZ goes down — hardware failure, network hiccup, whatever — traffic automatically shifts to healthy AZs without your users ever noticing. AWS recommends at least two AZs, but three gives you a much stronger safety net.
- Always enable at least two AZs when creating an ALB or NLB
- Use three AZs in regions where your traffic volume or SLA demands it
- Attach subnets from each AZ to your load balancer during setup — you cannot add subnets to a Classic Load Balancer after creation
- Avoid relying on a single AZ even for dev/staging environments; bad habits carry over
Target Group Configuration for Efficient Traffic Distribution
Target groups are where the real routing magic happens. Getting them right means your backend services get clean, predictable traffic instead of a chaotic mess.
- Choose the right target type:
instance,ip, orlambda— each has different use cases - For microservices running in ECS with Fargate, always pick
ipas the target type - Set load balancing algorithms carefully: round robin works for most stateless apps, but least outstanding requests is better when response times vary
- Match the protocol and port of your target group to what your application actually listens on — mismatches cause silent routing failures
Cross-Zone Load Balancing to Eliminate Hotspots
Without cross-zone load balancing, a zone with fewer registered targets ends up overloaded because each AZ only handles its share of incoming traffic. Turning it on distributes requests evenly across all targets regardless of which AZ they live in.
- For ALBs, cross-zone load balancing is enabled by default and there is no data transfer charge between AZs
- For NLBs and Gateway Load Balancers, it is disabled by default and enabling it does incur inter-AZ data transfer charges — worth it if your backend instance counts are uneven across zones
- Monitor the
RequestCountPerTargetCloudWatch metric to spot distribution imbalances before they become outages
Health Check Tuning to Remove Unhealthy Targets Instantly
Default health check settings are conservative — they keep unhealthy targets in rotation longer than they should. In production, slow detection means real users hit broken instances.
- HealthyThresholdCount: Set to
2so a target is marked healthy after just two consecutive passing checks - UnhealthyThresholdCount: Set to
2as well — you want bad targets out fast, not after five failures - Interval: Drop this to
10seconds instead of the default30 - Timeout: Keep it shorter than the interval —
5seconds is a safe starting point - Use a dedicated health check endpoint like
/healththat checks internal app dependencies (database connectivity, cache availability) rather than just returning a 200 OK at the root path - Avoid health checking paths that require authentication — the load balancer will constantly get 401s and mark targets unhealthy
Integrating Load Balancers with Auto Scaling Groups
The load balancer and Auto Scaling Group need to talk to each other seamlessly — if they do not, you end up with instances that are being scaled in while they are still processing requests, or new instances that get traffic before they are fully warmed up.
- Register ASGs directly with target groups rather than managing instance registration manually
- Enable connection draining (called deregistration delay in ALB/NLB) — set it to
30–60seconds so in-flight requests complete before a target is pulled out - Use lifecycle hooks on scale-in events if your app needs more time to drain gracefully — this pairs perfectly with a custom Lambda that signals completion
- Set warm-up periods on your ASG scaling policies so new instances are not immediately flooded with traffic before they finish initializing
- If you are running ECS services, let the ECS service scheduler handle target group registration automatically — do not fight it with manual overrides
Scaling Strategies to Handle Traffic Spikes Without Downtime

Pre-Warming Load Balancers Before Anticipated Traffic Surges
AWS Application Load Balancers and Classic Load Balancers scale their underlying infrastructure automatically, but that scaling takes time. If you know a traffic spike is coming — a product launch, a major sale event, or a scheduled broadcast — waiting for auto-scaling to kick in on its own can leave you with dropped connections and degraded response times during those critical first minutes.
Pre-warming is the practice of getting ahead of that curve. You can request pre-warming directly from AWS Support by submitting a ticket before your anticipated event. In your request, include:
- Expected start date and time of the traffic increase
- Peak requests per second (RPS) you anticipate
- Average request and response sizes (in bytes)
- Percentage of traffic that will use HTTPS vs HTTP
AWS engineers use this information to pre-provision the load balancer capacity before your traffic arrives. This is especially critical for Classic Load Balancers, which are more sensitive to sudden bursts. ALBs handle gradual scaling better, but for sharp, sudden spikes — think flash sales or viral content — pre-warming still makes a meaningful difference.
One practical tip: even if the event is internal, like a scheduled batch process hitting your API hard, treat it the same way. Submit the ticket, describe the load pattern, and give AWS at least 24–48 hours of lead time whenever possible.
Dynamic Scaling Policies Tied to Real-Time Demand
Pre-warming handles known events, but real traffic is unpredictable. Dynamic scaling policies tied to your actual load metrics are what keep your backend healthy when traffic behaves unexpectedly.
The cleanest approach combines your load balancer metrics with AWS Auto Scaling groups using target tracking policies. Instead of reacting after something goes wrong, target tracking continuously adjusts your backend capacity to maintain a specific metric value. Useful targets include:
- ALBRequestCountPerTarget — keeps the number of requests per registered target at a level your application can comfortably handle
- CPU utilization on your EC2 instances — good for compute-heavy workloads
- Custom CloudWatch metrics — useful when neither CPU nor request count fully captures your app’s stress signals (memory pressure, queue depth, etc.)
Step scaling policies give you more control over how aggressively you scale. You define thresholds and specify exactly how many instances to add or remove at each threshold breach. For example:
- Add 2 instances when CPU crosses 50%
- Add 5 instances when CPU crosses 75%
- Remove 2 instances when CPU drops below 30%
Scheduled scaling completes the picture for recurring patterns. If your application consistently sees heavier traffic on Monday mornings or at the top of every hour, scheduled scaling lets you pre-position capacity on a cron-like schedule without relying on reactive policies to catch up.
The key is layering all three: scheduled scaling for predictable patterns, target tracking for steady-state management, and step scaling for aggressive or sudden load changes.
Connection Draining to Gracefully Remove Instances at Scale
Scaling down is just as important as scaling up. When Auto Scaling removes an instance from your load balancer’s target group, any in-flight requests on that instance need time to complete. Without connection draining — called deregistration delay in ALB and NLB terminology — those requests get cut off immediately, which means errors for your users.
Connection draining tells the load balancer to stop sending new requests to a deregistering instance while giving existing connections time to finish naturally. You configure this with a timeout value, and the defaults are worth revisiting:
- Default deregistration delay: 300 seconds (5 minutes)
- Recommended range for most web apps: 30–120 seconds
- For long-lived connections (file uploads, streaming, WebSockets): set this higher, closer to your maximum expected request duration
Setting this too low means long requests get cut short. Setting it too high slows down your scale-in events, which keeps unnecessary instances running longer and drives up cost. Match the value to your actual application behavior — check your access logs for p95 and p99 request durations and use that as a guide.
A few things to keep in mind when tuning connection draining:
- If your Auto Scaling cooldown period is shorter than your deregistration delay, instances may hang in a “draining” state longer than expected. Align these values.
- Health checks continue during draining, so a truly unhealthy instance won’t get stuck draining forever — the load balancer will force-deregister it after the timeout.
- For Lambda targets in ALB, deregistration delay behaves differently and is generally less of a concern since Lambda handles concurrency at the function level.
Getting connection draining right means your users experience clean, uninterrupted service even as your infrastructure scales up and down underneath them.
Strengthening Security Across Your Load Balancer Layer

Enforcing TLS Termination and Certificate Management with ACM
Handling TLS at the load balancer level keeps your backend instances from wrestling with encryption overhead. AWS Certificate Manager (ACM) makes this straightforward — you provision and renew certificates automatically, cutting out the manual renewal headaches that cause unexpected outages.
- Always redirect HTTP (port 80) to HTTPS (port 443) using ALB listener rules
- Use ACM to attach certificates directly to your ALB or NLB listeners — no manual private key management needed
- Prefer TLS 1.2 or 1.3 security policies; drop older protocols like TLS 1.0 and 1.1 from your listener configuration
- Enable SNI (Server Name Indication) support when hosting multiple domains behind a single ALB, letting you attach multiple certificates cleanly
For internal services, ACM Private CA gives you the same automated experience for private certificates within your VPC.
Restricting Access Using Security Groups and NACLs
Security groups and NACLs work as two complementary layers sitting in front of your load balancer. Think of security groups as stateful gatekeepers that track connection state, while NACLs act as stateless subnet-level filters — both matter.
Security Group best practices for ALB/NLB:
- Allow inbound 443 and 80 only from known IP ranges or CloudFront prefix lists
- Never open
0.0.0.0/0on ports beyond what the application genuinely needs - Backend EC2 instances or ECS tasks should only accept traffic from the load balancer’s security group — not from the internet directly
- Use security group referencing: reference the ALB security group ID in backend instance rules instead of hardcoding IP ranges (those change during scaling)
NACL considerations:
- NACLs operate at the subnet level and are stateless, so you need explicit inbound AND outbound rules
- Use them as a coarse-grained filter — block known bad IP ranges at the subnet boundary before traffic even reaches your security groups
- Avoid over-relying on NACLs for fine-grained control; security groups handle that role better
Enabling AWS WAF to Block Malicious Traffic at the Edge
AWS WAF sits in front of your ALB (and CloudFront distributions) and filters HTTP/HTTPS traffic before it reaches your application. It’s one of the most practical tools you have for blocking common attack patterns without touching application code.
Core WAF capabilities to enable:
- AWS Managed Rule Groups — pre-built rulesets covering OWASP Top 10 threats, SQL injection, XSS, and known bad bots. Start here before writing custom rules
- Rate-based rules — automatically block IPs sending requests above a defined threshold per 5-minute window. Great for slowing down brute-force login attempts
- IP set rules — maintain allow lists or block lists for specific IP ranges, useful for geo-restriction or blocking known malicious ASNs
- Custom rules with regex patterns — match specific URI patterns, header values, or query strings that your app-specific attack surface requires
Getting started cleanly:
- Deploy WAF in Count mode first — this logs what would have been blocked without actually blocking it
- Review CloudWatch metrics and WAF sampled requests to check for false positives
- Switch to Block mode once you’re confident the rules aren’t catching legitimate traffic
Associate your WAF web ACL directly with your ALB through the AWS console or via CloudFormation/Terraform. Pair WAF logs with CloudWatch Logs or S3 for forensic analysis when something odd shows up.
Protecting Against DDoS Attacks with AWS Shield
AWS Shield comes in two tiers, and knowing the difference helps you decide where to invest.
AWS Shield Standard:
- Automatically included at no extra cost for all AWS customers
- Protects against common network and transport-layer DDoS attacks (SYN floods, UDP reflection attacks) targeting your ALB, NLB, and CloudFront
- Works passively — no configuration needed
AWS Shield Advanced:
- Paid tier (~$3,000/month per organization, though it covers multiple resources)
- Adds layer 7 DDoS protection with near real-time attack visibility through the AWS Shield Response Team (SRT)
- Automatic application-layer attack mitigation when paired with WAF
- Cost protection — AWS credits data transfer costs incurred during a DDoS event, which can be significant during sustained attacks
- Access to the SRT for hands-on help during active attacks
Architectural decisions that strengthen DDoS resilience:
- Place CloudFront in front of your ALB — this absorbs volumetric attacks at edge locations globally before they reach your origin
- Use Route 53 with health checks so traffic shifts away from a region under attack
- Keep your ALB internal where possible and expose only CloudFront or API Gateway publicly
- Set up CloudWatch alarms on
RequestCountandTargetResponseTimemetrics so unusual spikes trigger alerts before they cascade into downtime
Optimizing Cost Without Sacrificing Load Balancer Performance

Right-Sizing Load Balancer Capacity Units to Reduce Waste
AWS Application Load Balancers bill based on Load Balancer Capacity Units (LCUs), which factor in new connections, active connections, processed bytes, and rule evaluations. Blindly provisioning for peak load means you’re paying for capacity that sits idle most of the day.
- Check CloudWatch metrics like
ConsumedLCUsregularly to understand your actual usage patterns - Compare peak vs. average LCU consumption — a big gap signals over-provisioning
- For predictable workloads, use AWS Cost Explorer to forecast LCU trends and adjust reserved capacity accordingly
- Network Load Balancers charge per NLCU, so profiling your TCP connection volume helps you avoid surprise bills
Consolidating Target Groups to Minimize Redundant Resources
Running too many separate load balancers when a single ALB with path-based or host-based routing could do the job is one of the most common (and quietly expensive) mistakes teams make.
- A single ALB supports up to 100 listener rules, so routing
/api/*and/web/*to separate target groups on one ALB beats spinning up two ALBs - Consolidating reduces fixed hourly charges and simplifies certificate management
- Review your listener rules monthly — orphaned rules pointing to decommissioned target groups still cost you
Using Access Logs and Metrics to Identify Cost Inefficiencies
Access logs stored in S3 are a goldmine for spotting waste you’d otherwise miss.
- Enable ALB access logs and run Athena queries against them to find high-volume endpoints driving up LCU consumption
- Look for bots or scrapers inflating request counts — blocking them at the WAF or listener level directly cuts costs
- Track
RequestCount,ProcessedBytes, andTargetResponseTimetogether to find traffic patterns worth caching at CloudFront instead of hitting the load balancer repeatedly
Monitoring and Troubleshooting Load Balancers in Production

Leveraging CloudWatch Metrics to Track Latency and Error Rates
CloudWatch gives you a real-time window into how your load balancer is actually performing. The metrics you want to watch closely include:
- TargetResponseTime – how long your backend targets take to respond
- RequestCount – total requests hitting your load balancer per interval
- HTTPCode_ELB_5XX_Count – errors thrown by the load balancer itself
- HTTPCode_Target_5XX_Count – errors coming from your backend targets
Set up custom dashboards that group these metrics together so you can spot patterns fast. A sudden spike in TargetResponseTime alongside rising 5XX counts almost always points to a backend issue rather than a networking problem.
Analyzing Access Logs to Diagnose Traffic Anomalies
Enable access logging on your ALB or NLB and ship those logs to S3. From there, you can query them with Athena without moving data anywhere. Access logs capture the full request details including client IP, request path, response code, and processing time. When something weird happens in production, these logs are your best friend. Run Athena queries to filter by specific status codes, identify heavy-hitting IP addresses, or pinpoint which endpoints are slowing things down during a traffic spike.
Setting Up Alarms for Unhealthy Host Count and 5XX Errors
- Create a CloudWatch alarm on UnHealthyHostCount that fires the moment any target drops out of rotation
- Set a separate alarm for HTTPCode_Target_5XX_Count with a threshold tuned to your normal error baseline
- Route alarm notifications through SNS to Slack, PagerDuty, or your on-call tool
- Use anomaly detection alarms instead of static thresholds when your traffic patterns vary significantly throughout the day
Getting paged on unhealthy host count before your users notice degraded performance is exactly what these alarms are built for.
Using AWS X-Ray to Trace Requests Across Distributed Services
X-Ray lets you follow a single request as it moves through your load balancer, into your application, and across any downstream services like databases or third-party APIs. Instrument your application with the X-Ray SDK, and you get a service map showing where latency actually lives. This is especially useful in microservices architectures where a slow response could be hiding three hops deep. X-Ray’s trace filtering lets you zero in on requests above a specific duration threshold, making it much faster to reproduce and diagnose intermittent slowdowns that are otherwise nearly impossible to catch.

Getting your AWS load balancer setup right can make or break your production environment. From picking the right load balancer type to locking down security, building a resilient architecture, and keeping costs in check — every decision adds up. When these pieces work together, you get a system that handles traffic spikes gracefully, stays secure under pressure, and doesn’t quietly drain your AWS budget.
Don’t wait for an outage or a surprise bill to push you into action. Start by auditing your current setup against what you’ve learned here — check your architecture for single points of failure, review your scaling policies, tighten your security rules, and make sure you have solid monitoring in place. Small, deliberate improvements today can save you a lot of headaches down the road.