

Stop Shipping Containers You Can’t Actually Trust
If you’re running containerized workloads on AWS, you already know the basics of building and deploying images. But knowing what’s inside those images, who signed them, and whether your pipeline rejects anything suspicious—that’s where most teams have real gaps.
This guide is for DevSecOps engineers, platform teams, and cloud architects who are ready to move past surface-level container security and build something that actually holds up in production.
Here’s what we’ll walk through:
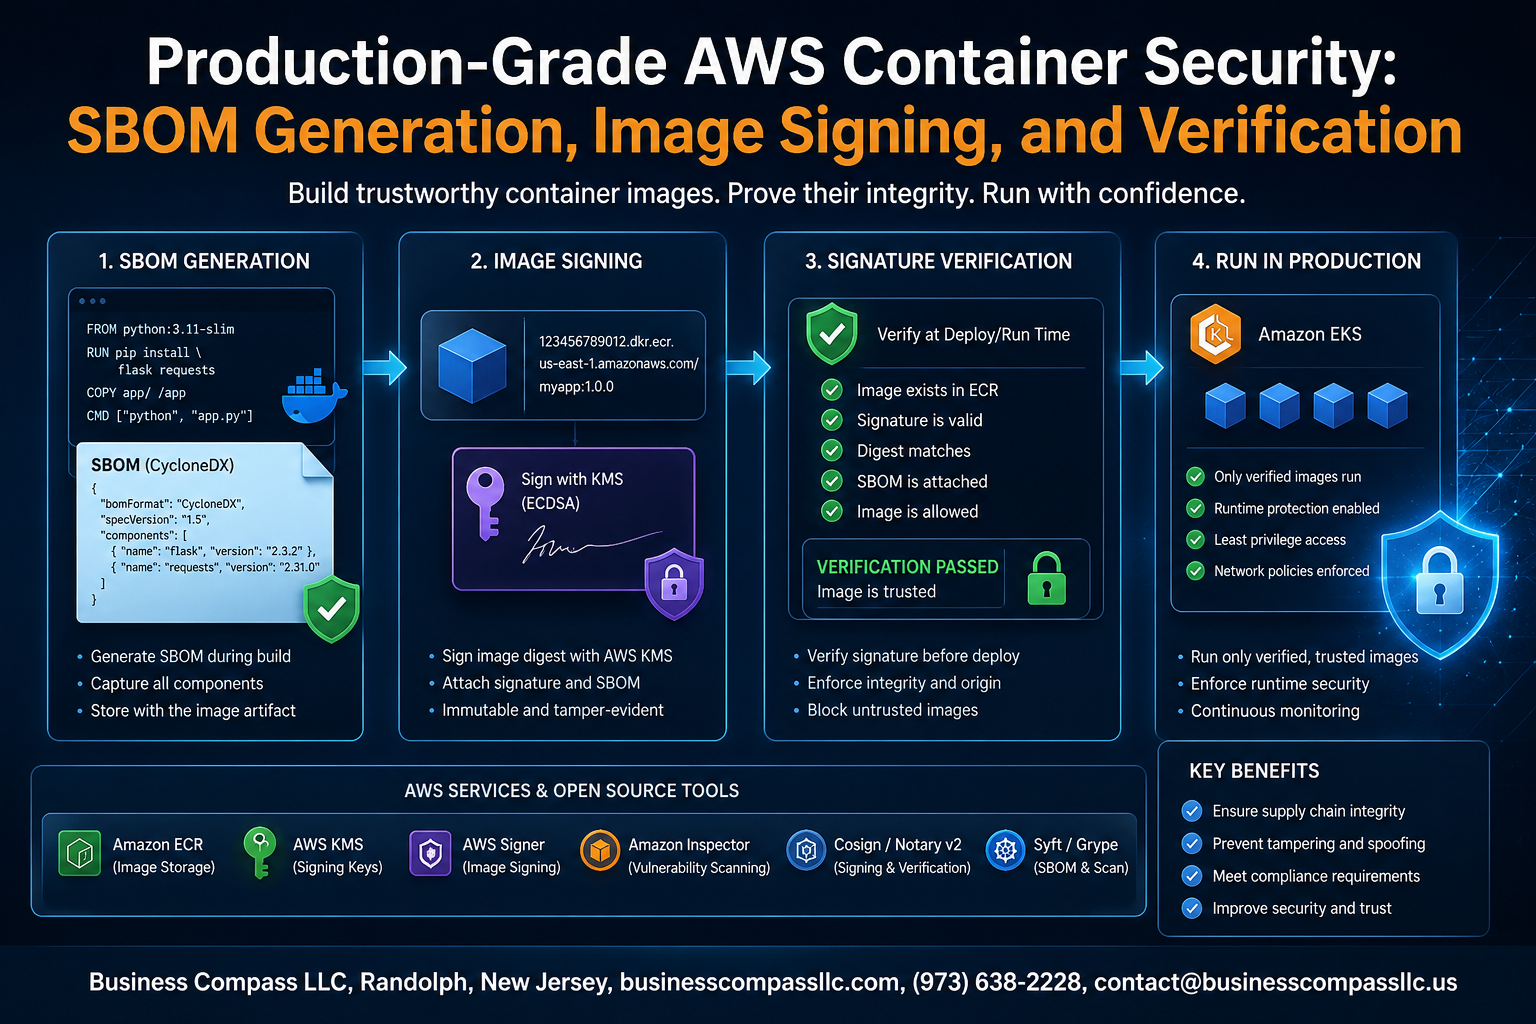
- SBOM generation for containers — how to create a software bill of materials so you always know exactly what’s running in your environment
- Container image signing on AWS — setting up a Docker image verification pipeline so only trusted, signed images make it to production
- Bringing it all together — combining scanning, signing, and SBOM tracking into one unified workflow that keeps you audit-ready without slowing your team down
AWS container security isn’t a one-time checkbox. It’s a pipeline problem, and this post treats it that way.
Understanding Container Security Risks in AWS Environments
Common Vulnerabilities That Threaten AWS Container Workloads
AWS container workloads face threats from outdated base images, misconfigured IAM roles, exposed secrets in Dockerfiles, and unpatched dependencies buried deep in container layers. Attackers actively scan for these weak points, and a single compromised image pulled into your pipeline can cascade across every service running that image.
Why Traditional Security Approaches Fall Short for Containers
Perimeter-based security tools and VM-era vulnerability scanners weren’t built for the speed and scale of containerized environments. Containers spin up and tear down in seconds, share kernels, and bundle their own dependencies — meaning a firewall rule or a weekly patch cycle simply can’t keep up with what’s actually running inside your AWS clusters at any given moment.
The Business Cost of Ignoring Container Supply Chain Security
- Regulatory fines: Non-compliance with SOC 2, PCI-DSS, or FedRAMP can result in heavy penalties when untracked software components are discovered during audits.
- Breach costs: The average data breach now exceeds $4 million, and container supply chain attacks are a growing entry point.
- Reputation damage: A single supply chain incident erodes customer trust faster than almost any other security event.
- Operational downtime: Compromised workloads force emergency rollbacks, pulling engineering teams away from product work for days.
Skipping AWS container security fundamentals like SBOM generation for containers and container image signing isn’t just a technical debt decision — it’s a business risk decision with a very real price tag.
Building a Robust SBOM Strategy for AWS Containers

What an SBOM Contains and Why It Matters for Compliance
A Software Bill of Materials (SBOM) is essentially a detailed ingredient list for your container image — every library, package, dependency, and version baked into it. For AWS container security, this matters because regulations like FedRAMP, SOC 2, and NIST 800-218 increasingly expect you to know exactly what’s running in your environment. Without an SBOM, you’re flying blind when a zero-day vulnerability drops and scrambling to figure out which workloads are affected.
A well-structured SBOM typically includes:
- Component names and versions — every OS package, language runtime, and third-party library
- Unique identifiers — CPE (Common Platform Enumeration) or PURL (Package URL) references that vulnerability scanners can match against CVE databases
- Dependency relationships — direct vs. transitive dependencies, so you understand the full blast radius of a vulnerability
- License information — critical for open-source compliance and avoiding legal exposure
- Supplier and origin data — where each component came from, which matters for supply chain integrity
Choosing the Right SBOM Format: SPDX vs CycloneDX
Both formats are widely adopted, but they serve slightly different purposes. Here’s a straight comparison:
| Feature | SPDX | CycloneDX |
|---|---|---|
| Governing Body | Linux Foundation | OWASP |
| Primary Focus | License compliance | Security and vulnerability tracking |
| Supported Formats | JSON, YAML, RDF, tag-value | JSON, XML, Protocol Buffers |
| VEX Support | Limited | Native |
| Tooling Ecosystem | Broad | Broad, especially security tools |
| AWS Inspector Support | Yes | Yes |
For teams prioritizing SBOM generation for containers in a security-first pipeline, CycloneDX tends to be the better pick because its schema maps cleanly to vulnerability data and it has native support for VEX (Vulnerability Exploitability eXchange) documents. If your organization has strong open-source license governance requirements, SPDX is equally solid. Many mature teams generate both formats simultaneously — storage is cheap, and flexibility is valuable.
Automating SBOM Generation with Amazon Inspector and Syft
Amazon Inspector natively generates SBOMs as part of its container scanning workflow. When you push an image to Amazon ECR, Inspector can automatically scan it and export an SBOM in either SPDX or CycloneDX format via the BatchGetAccountStatus and ListFindings APIs, or directly through the Inspector console export feature.
For teams wanting more control or pipeline-level generation before pushing to ECR, Syft by Anchore is the go-to open-source tool:
# Generate a CycloneDX SBOM from a local Docker image
syft my-app:latest -o cyclonedx-json > sbom.json

# Generate an SPDX SBOM and attach it to the image
syft my-app:latest -o spdx-json > sbom.spdx.json

# Scan directly from ECR
syft registry:123456789.dkr.ecr.us-east-1.amazonaws.com/my-app:latest -o cyclonedx-json
A practical automation pattern in a CI/CD pipeline looks like this:
- Build the container image in CodeBuild or GitHub Actions
- Run Syft immediately after the build to generate an SBOM before any external exposure
- Push the image to ECR — Inspector kicks off its own scan automatically
- Export Inspector’s SBOM via the AWS CLI for archival
- Attach the SBOM as an OCI artifact to the image in ECR using tools like
oras
# Attach SBOM as an OCI artifact alongside the image in ECR
oras attach \
  123456789.dkr.ecr.us-east-1.amazonaws.com/my-app:latest \
  --artifact-type application/vnd.cyclonedx+json \
  sbom.json:application/vnd.cyclonedx+json
This approach keeps your SBOM co-located with the image, making retrieval straightforward and keeping your Docker image verification pipeline coherent.
Storing and Managing SBOMs in AWS for Easy Retrieval
Storing SBOMs effectively is just as important as generating them. You have a few solid options in AWS, each with trade-offs:
Option 1: S3 with a structured prefix convention
s3://your-sbom-bucket/
  ecr-repo-name/
    image-digest-sha256-abc123/
      sbom-cyclonedx.json
      sbom-spdx.json
      scan-timestamp.txt
Use S3 Object Tags to index by image digest, repository, and scan date. Enable S3 Versioning and Object Lock for tamper-evident storage — this directly supports audit readiness.
Option 2: OCI-native storage in ECR
Attaching SBOMs as OCI referrers directly in ECR keeps everything in one place. Your image, its signature, and its SBOM all live under the same repository. The referrers API makes programmatic retrieval clean:
# List all artifacts attached to an image
aws ecr describe-images \
  --repository-name my-app \
  --image-ids imageTag=latest \
  --query 'imageDetails[*].artifactMediaType'
Option 3: AWS Security Hub + Inspector integration
Inspector findings and SBOM data flow into Security Hub automatically when the integration is enabled. This gives you a centralized view across accounts and regions, which is valuable in multi-account AWS Organizations setups.
For most production environments, a combination of OCI-native storage in ECR for operational use and S3 archival for long-term compliance retention hits the right balance between accessibility and durability.
Implementing Image Signing to Establish Trust in Your Pipeline
How AWS Signer and Notation Protect Your Container Images
AWS Signer pairs with the Notation CLI to cryptographically sign container images, giving your pipeline a reliable way to prove an image hasn’t been tampered with between build and deployment. Every signed image gets an attached signature stored alongside it in Amazon ECR, so verification happens automatically without extra storage gymnastics.
Integrating Image Signing into Your CI/CD Workflow
Drop image signing right after your build and push steps in CodePipeline or any third-party CI tool. A typical flow looks like this:
- Build the Docker image
- Push to Amazon ECR
- Run
notation signusing your AWS Signer profile - Trigger downstream vulnerability scanning
- Gate deployment on signature verification
Managing Signing Keys Securely with AWS KMS
AWS KMS backs every signing operation, meaning your private keys never leave the service. You reference a KMS key ARN in your Notation trust store config, and AWS handles all the cryptographic heavy lifting. This is a big deal for container image signing on AWS because it removes the risk of key exposure through developer laptops or CI runners.
Setting Up Signing Policies That Enforce Organizational Standards
Notation trust policies let you define exactly which signing identities are trusted for which image registries. A basic policy looks like:
| Policy Element | Example Value |
|---|---|
| Trusted Identity | arn:aws:signer:us-east-1:123456789012:/signing-profiles/MyProfile |
| Scope | 123456789012.dkr.ecr.us-east-1.amazonaws.com/my-app |
| Signature Verification Level | strict |
Setting strict mode means any image without a valid, trusted signature gets blocked outright.
Handling Certificate Rotation Without Disrupting Deployments
Rotate signing certificates by adding the new certificate to your trust store before retiring the old one. AWS Signer handles certificate lifecycle automatically within a signing profile’s validity window, so existing signed images stay verifiable even after you switch to a new key. Keep at least one overlap period where both certificates are trusted to avoid blocking running workloads mid-rotation.
Enforcing Image Verification Before Workloads Run
Configuring Amazon EKS to Block Unsigned Images Automatically
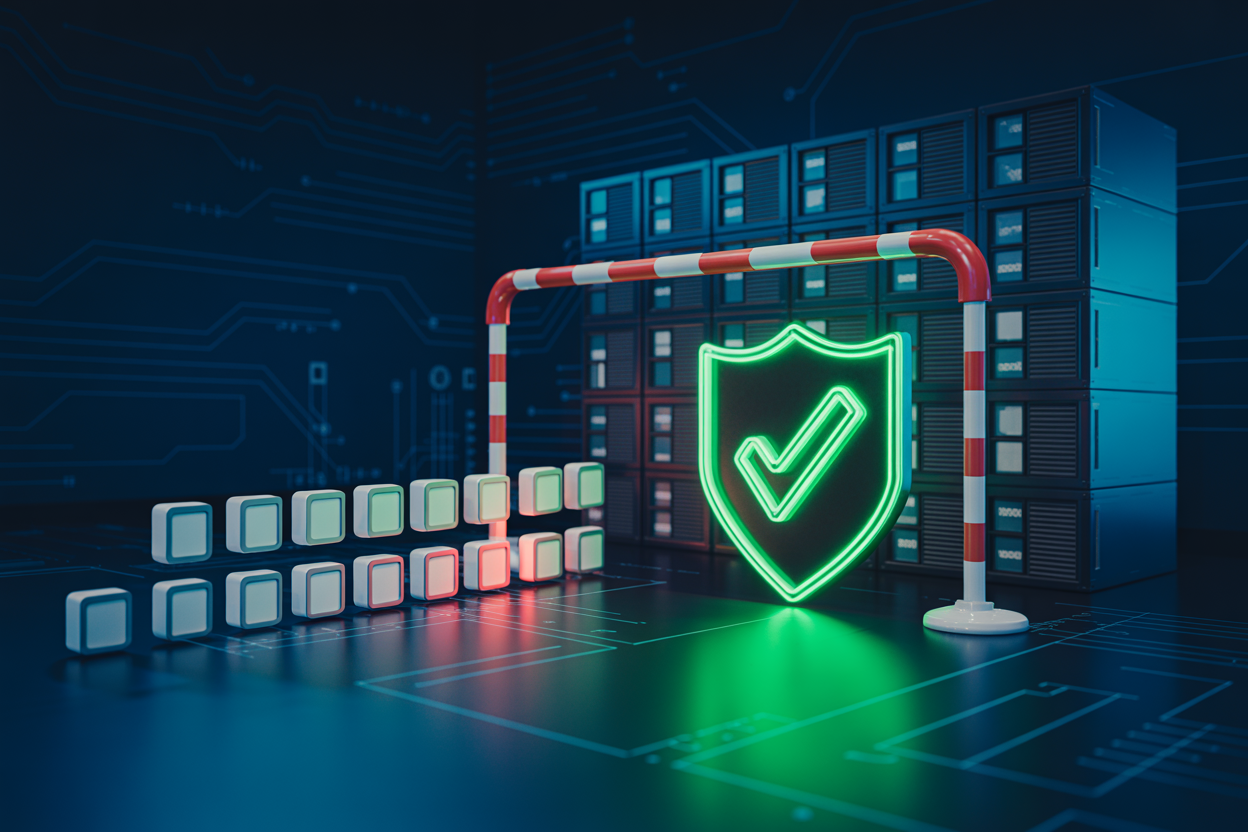
AWS container security gets a serious upgrade when you wire Amazon EKS to reject unsigned images before they ever spin up a pod. Using admission controllers like Kyverno or OPA Gatekeeper, you can write policies that check Notary or Cosign signatures against your trusted keys, blocking anything unverified dead in its tracks.
Using AWS Lambda and EventBridge to Trigger Verification Checks
Pair AWS Lambda with EventBridge rules that fire on ECR push events, running automated Docker image verification pipeline checks the moment a new image lands. This catches tampered or unsigned images before any deployment workflow even picks them up, giving your security team real-time alerts without slowing down developers.
Preventing Tampered Images from Reaching Production Environments
A layered approach combining container image signing AWS workflows, cryptographic digest pinning, and continuous SBOM generation for containers creates a tight chain of custody. Even if an attacker pushes a modified image, the signature mismatch gets caught at multiple checkpoints, keeping your production environment clean and your audit logs clear.
Scanning Container Images for Vulnerabilities at Scale

Enabling Continuous Scanning with Amazon ECR and Inspector
Amazon ECR’s native integration with Amazon Inspector makes continuous vulnerability scanning genuinely straightforward. Once enabled, Inspector automatically scans every image pushed to your registry and keeps rescanning as new CVEs are discovered — meaning an image that was clean last week can surface findings today without you lifting a finger.
- Turn on enhanced scanning in ECR (not basic scanning) to get Inspector’s full CVE database coverage
- Inspector scans both OS packages and application dependencies (Python, Node, Java, etc.)
- Findings appear directly in the ECR console, AWS Security Hub, and EventBridge for downstream automation
Prioritizing Critical CVEs to Reduce Remediation Time
Not every vulnerability deserves the same urgency. A CVSS 9.8 RCE with a public exploit is a five-alarm fire; a CVSS 4.0 with no known exploit path can wait.
| Severity | CVSS Range | Typical Action |
|---|---|---|
| Critical | 9.0–10.0 | Block deployment immediately |
| High | 7.0–8.9 | Remediate within 24–72 hours |
| Medium | 4.0–6.9 | Scheduled patch cycle |
| Low | 0.1–3.9 | Track and review quarterly |
Focus your team’s energy on Critical and High findings that have a known exploit or are reachable from the network. Inspector surfaces exploitability context directly, so use it.
Automating Image Rejection Based on Severity Thresholds
Manual review doesn’t scale when you’re pushing dozens of images a day. Wire EventBridge to catch Inspector findings and trigger a Lambda that updates an ECR lifecycle policy or flips a tag that your deployment pipeline checks before pulling.
# Pseudo-logic for Lambda rejection handler
if finding.severity in ["CRITICAL", "HIGH"] and finding.exploit_available:
    tag_image_as_rejected(image_digest)
    notify_security_team(finding)
    block_deployment(image_digest)
Pair this with OPA/Gatekeeper policies in Kubernetes or AWS Container Admission Controller patterns so that even if a bad image sneaks through ECR, the cluster refuses to run it. Defense in depth here is your best friend.
Generating Actionable Vulnerability Reports for Security Teams
Raw CVE dumps are noise. Security teams need reports that tell them what to fix, in what order, and where it’s running right now.
- Pull Inspector findings via the AWS Inspector API and map each CVE to the running containers in ECS or EKS using resource tags
- Group findings by application team ownership so the right people get the right alerts
- Include remediation guidance — upgraded package version, base image replacement, or workaround — directly in the report
- Export to Security Hub for a unified dashboard, or push to your ticketing system (Jira, ServiceNow) automatically via EventBridge + Lambda
Tying findings back to your SBOM data is where AWS container security really clicks — you can instantly answer “which of our services uses log4j 2.14?” across your entire fleet without guessing.
Integrating SBOM, Signing, and Scanning into a Unified Pipeline

Designing a Shift-Left Security Workflow in AWS CodePipeline
Running security checks at the end of a deployment is like finding a leak after the flood. Shift-left means you catch problems early — at the commit or build stage — before anything risky even gets close to production. In AWS CodePipeline, you can wire together build stages that trigger SBOM generation the moment a Docker image is built, run vulnerability scans through Amazon Inspector, and sign the image with AWS Signer before it ever lands in ECR. Each stage becomes a checkpoint, not an afterthought.
- Stage 1 – Build: CodeBuild compiles the image and runs
syftordocker sbomto generate a software bill of materials - Stage 2 – Scan: Inspector scans the image layers against known CVE databases
- Stage 3 – Sign: AWS Signer attaches a cryptographic signature tied to your signing profile
- Stage 4 – Push: Only signed, scanned images reach ECR
Connecting ECR, Inspector, and Signer for End-to-End Coverage
These three services actually talk to each other really well when configured correctly. ECR enhanced scanning integrates directly with Amazon Inspector, so every image push automatically triggers a deep vulnerability assessment — no manual intervention needed. AWS Signer then attaches signatures that ECR stores alongside the image metadata, giving you a clean chain of custody from build to deployment.
| Service | Role in Pipeline | Key Output |
|---|---|---|
| Amazon ECR | Image storage and registry | Image URI + metadata |
| Amazon Inspector | Vulnerability scanning | CVE findings + severity scores |
| AWS Signer | Cryptographic signing | OCI-compatible image signature |
This trio covers AWS container security from multiple angles — you know what’s inside the image, you know whether it’s vulnerable, and you can prove nobody tampered with it after it was signed.
Enforcing Security Gates That Block Risky Builds Automatically
A pipeline without gates is just automation with no guardrails. The real power comes from teaching CodePipeline to say no. You can set up Lambda functions or CodeBuild steps that query Inspector findings after a scan completes, check whether the SBOM generation for containers succeeded, and verify the container image signing status in AWS before allowing the pipeline to move forward.
- Critical CVEs found → Pipeline fails immediately, team gets notified via SNS
- SBOM missing or malformed → Build stage exits with a non-zero code
- Image not signed → Admission controller in EKS blocks deployment at the cluster level
- Signing profile mismatch → Docker image verification pipeline rejects the artifact
Combining these gates means a risky build literally cannot reach production without someone manually overriding the block — and that override gets logged, keeping your audit trail clean.
Maintaining Compliance and Audit Readiness Over Time
Mapping Your Container Security Controls to SOC 2 and FedRAMP
AWS container security controls map cleanly to SOC 2 Trust Service Criteria and FedRAMP control families when you think about them as layers. SBOM generation for containers satisfies CC7.1 (change management) and SA-10 (developer configuration management). Container image signing on AWS covers CC6.1 (logical access) and SI-7 (software integrity). Docker image verification pipeline steps address CC8.1 (change management). Here’s a quick reference:
| Security Control | SOC 2 Criteria | FedRAMP Control |
|---|---|---|
| SBOM Generation | CC7.1, CC8.1 | SA-10, CM-3 |
| Image Signing | CC6.1, CC6.8 | SI-7, CM-5 |
| Image Verification | CC8.1, CC6.7 | SI-7, AC-3 |
| Vulnerability Scanning | CC7.1, CC7.2 | RA-5, SI-2 |
Using AWS CloudTrail to Create Tamper-Proof Security Audit Logs
Every push to ECR, every Cosign signing event, and every admission controller decision should flow into CloudTrail and land in an S3 bucket with Object Lock enabled. Turn on CloudTrail Lake to run SQL queries directly against your event history without exporting anything. Set up EventBridge rules to catch ecr:PutImage and ecr:InitiateLayerUpload events, then ship them to CloudWatch Logs with a retention policy matching your compliance window — typically 1 year for SOC 2 and 3 years for FedRAMP. Never let anyone delete those logs; S3 Object Lock in Compliance mode makes that physically impossible.
Automating Compliance Reports to Satisfy Regulators Faster
Stop generating reports manually. Wire AWS Security Hub to pull findings from Amazon Inspector, ECR image scanning, and your Cosign verification results into one aggregated view. Use AWS Config rules to check that every running EKS workload references a signed, scanned image. Schedule a Lambda function weekly to query Security Hub findings, format them as a PDF or CSV, and drop the output into an S3 bucket that your auditors can access directly. That single workflow cuts audit prep from days to hours.
- Security Hub Custom Insights — filter by resource type
AwsEcrContainerImageto isolate container-specific findings - AWS Config Conformance Packs — deploy the
Operational-Best-Practices-for-NIST-800-53pack as a baseline - Automated evidence collection — tag every ECR image with
compliance:verified=truepost-signing so Config can track drift
Keeping SBOMs Current as Container Dependencies Evolve
An SBOM is only useful if it stays accurate. Every time a base image updates, a dependency gets patched, or a new package gets added, your SBOM needs to regenerate — not quarterly, not monthly, on every build. Plug Syft directly into your CI pipeline so it runs automatically after each docker build command. Store the new SBOM in ECR as an OCI artifact attached to that specific image digest, so the SBOM version always matches exactly what’s running in production. Set up a cron-triggered pipeline that rescans images still in production using Grype against their stored SBOMs, catching vulnerabilities introduced in software dependencies even when no new image build happened.
- Reattach the SBOM artifact to ECR whenever a base image rebuild happens
- Use image digests, not tags, as SBOM identifiers — tags are mutable and will mislead you
- Alert on any running workload whose SBOM is older than your defined threshold, typically 30 days

Securing containers in AWS is not a one-time checkbox—it’s an ongoing practice that touches every stage of your pipeline. From building a solid SBOM strategy that gives you full visibility into what’s inside your images, to signing those images so your team always knows they can be trusted, to enforcing verification before anything actually runs—each layer works together to reduce risk and keep your workloads safe. Add vulnerability scanning at scale and a unified pipeline that ties it all together, and you have a security posture that’s genuinely production-ready, not just good enough on paper.
Compliance and audit readiness are not an afterthought when these practices are baked into your daily workflow from the start. If your team hasn’t started yet, pick one piece—maybe SBOM generation or image signing—and build from there. Small, consistent steps add up fast, and getting started today puts you miles ahead of where most teams are. Your future self dealing with an incident response or a compliance audit will seriously thank you.