

Stop Running a Separate MLflow Server for Every AWS Account
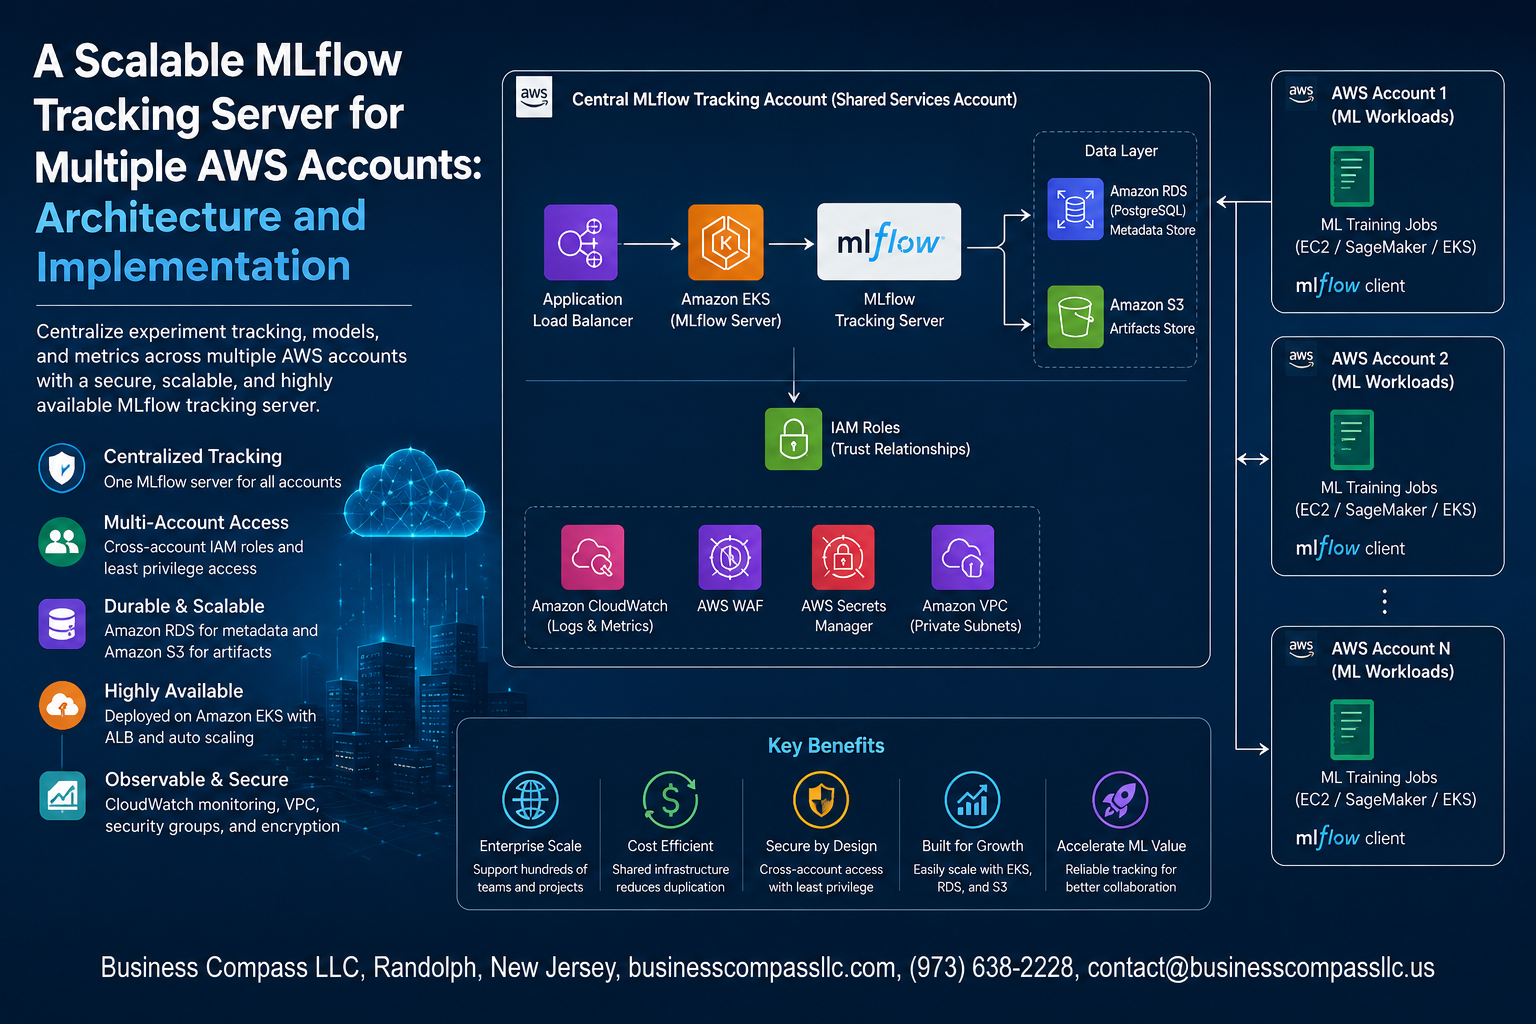
If your ML team is spread across multiple AWS accounts, you’ve probably hit the same wall: duplicated infrastructure, no single place to compare experiments, and a growing headache keeping everything in sync.
This guide is for ML engineers and platform teams who want one centralized MLflow tracking server on AWS that every account can talk to — without the chaos of managing N separate deployments.
Here’s what we’ll cover:
- Why centralized MLflow architecture beats the per-account approach — and when the pain gets real enough to act on it
- How to design cross-account AWS access so client accounts can securely log experiments to a shared MLflow server using IAM roles
- What it takes to run MLflow in production at scale — from the right AWS services to security controls that hold up under real workloads
By the end, you’ll have a clear picture of how to build a multi-account MLflow setup that actually scales, stays secure, and doesn’t require a dedicated ops person to keep the lights on.
Understanding the Need for a Centralized MLflow Tracking Server
Challenges of Managing ML Experiments Across Multiple AWS Accounts
Running ML experiments across separate AWS accounts quickly turns into a coordination nightmare. Teams end up with scattered experiment logs, duplicated model versions, and no clear picture of what’s working across the organization. When data scientists in different accounts each spin up their own local MLflow instances, you get data silos that make cross-team comparison nearly impossible.
- Experiment metadata lives in isolated environments with no shared visibility
- Artifact storage gets duplicated across multiple S3 buckets, driving up costs
- No consistent tagging or naming conventions across account boundaries
- Debugging production issues becomes painful when logs are fragmented across accounts
Why a Shared Tracking Server Improves Collaboration and Consistency
A centralized MLflow tracking server AWS setup gives every team a single place to log runs, compare metrics, and register models. Instead of chasing down experiment results from five different accounts, everyone looks at one dashboard. This shared visibility speeds up decision-making and cuts down on duplicated work significantly.
- Teams can directly compare experiments running in different accounts
- Model registry becomes a single source of truth for production deployments
- Consistent experiment tracking at scale becomes achievable without extra tooling overhead
Key Benefits of Centralizing MLflow Metadata and Artifacts
A multi-account MLflow setup with a central server pays off fast in production environments:
- Cost efficiency — One managed backend store instead of many
- Unified governance — MLflow IAM cross-account access policies applied consistently
- Faster onboarding — New teams connect to an existing server rather than building their own
- Audit-ready logging — All experiment activity flows through one trackable location
Core Components of the Multi-Account MLflow Architecture
A. MLflow Tracking Server as the Central Hub
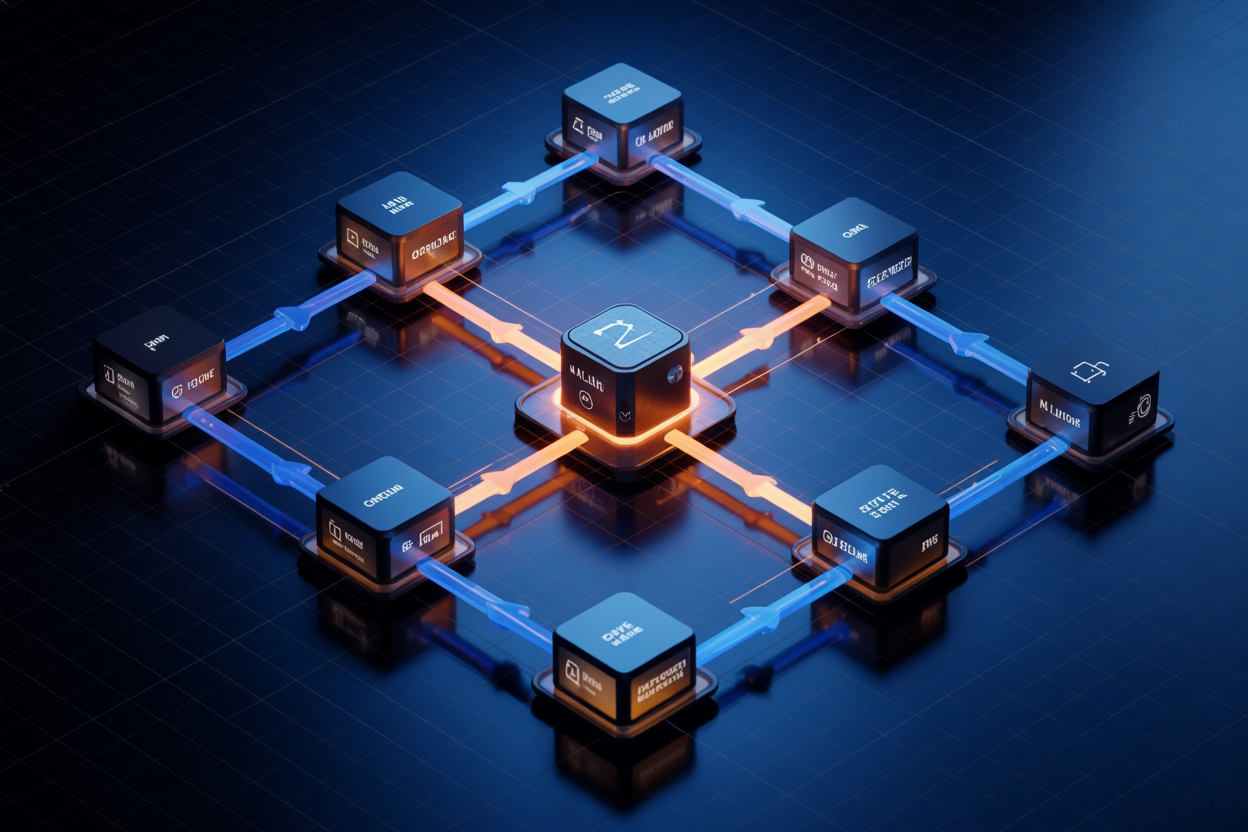
The MLflow tracking server acts as the single source of truth for all your machine learning experiments across every AWS account in your organization. Instead of letting teams run isolated, disconnected tracking setups, you host one server that logs runs, parameters, metrics, and artifacts from every team and every account — keeping everything searchable and comparable in one place.
B. Amazon S3 for Scalable Artifact Storage
S3 is the natural home for MLflow artifacts at scale. Model binaries, plots, datasets, and checkpoint files get stored in a dedicated S3 bucket living in the central account. Client accounts write artifacts directly to this bucket using cross-account IAM permissions, so storage scales automatically without any infrastructure management on your part.
C. Amazon RDS for Reliable Metadata Persistence
MLflow needs a relational database to store experiment metadata — run IDs, parameters, metrics, and tags. Amazon RDS (PostgreSQL or MySQL) gives you a managed, durable backend that handles concurrent writes from multiple accounts without breaking a sweat. Multi-AZ deployments keep the database available even during maintenance windows or unexpected failures.
D. AWS IAM Roles and Cross-Account Access Policies
Cross-account IAM roles are the backbone of this whole setup. Each client account creates a role that trusts the central account, and the central MLflow server assumes that role to authenticate incoming requests. You lock down permissions tightly — only allowing the actions each team genuinely needs, like s3:PutObject for artifact uploads or rds-db:connect for metadata writes.
Key IAM components include:
- Trust policies on client account roles pointing to the central account
- S3 bucket policies granting specific cross-account write access
- Least-privilege inline policies scoped to MLflow-specific actions only
E. VPC Networking and Private Connectivity Between Accounts
Keeping traffic off the public internet is non-negotiable in production. VPC peering or AWS Transit Gateway connects client account VPCs to the central account’s VPC, letting ML workloads reach the MLflow tracking server over private IP addresses. You can also use VPC endpoints for S3 and RDS to avoid any traffic leaving the AWS backbone entirely, which tightens security and cuts data transfer costs.
Designing the Cross-Account Access Strategy
Using IAM Assume Role for Secure Cross-Account Permissions
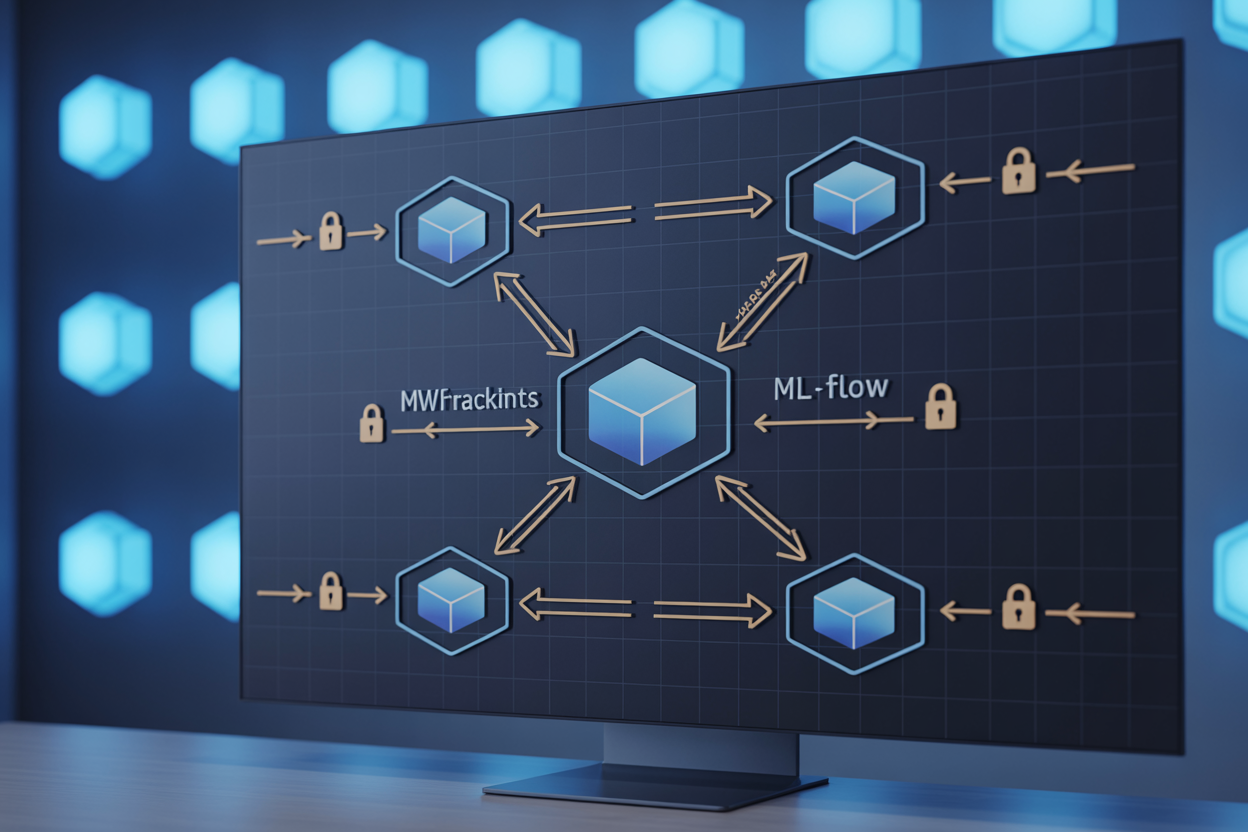
Getting multiple AWS accounts to talk to a single MLflow tracking server without handing out long-lived credentials is exactly where IAM Assume Role shines. Each client account gets a dedicated IAM role in the central account that it can temporarily assume, grabbing short-lived credentials scoped only to what MLflow needs.
Key setup steps:
- Create a cross-account IAM role in the central (MLflow host) account with a trust policy listing each client account’s ID
- Attach permissions covering S3 artifact writes, read access to experiment metadata, and any KMS key usage if encryption is enabled
- In each client account, create an IAM role or user with
sts:AssumeRolepermission pointing to the central role ARN - Configure the MLflow client to call
boto3.client('sts').assume_role()before starting a run, injecting the temporary credentials automatically
This pattern keeps your MLflow IAM cross-account access clean — no static keys floating around, and every session expires automatically.
Configuring S3 Bucket Policies to Allow Multi-Account Artifact Writes
The S3 bucket sitting in your central account needs an explicit bucket policy to accept writes from external accounts. By default, S3 blocks cross-account puts, so skipping this step means artifacts silently fail to upload.
A solid bucket policy looks like this:
{
  "Version": "2012-10-17",
  "Statement": [
    {
      "Effect": "Allow",
      "Principal": {
        "AWS": [
          "arn:aws:iam::CLIENT_ACCOUNT_A:role/MLflowClientRole",
          "arn:aws:iam::CLIENT_ACCOUNT_B:role/MLflowClientRole"
        ]
      },
      "Action": [
        "s3:PutObject",
        "s3:GetObject",
        "s3:ListBucket"
      ],
      "Resource": [
        "arn:aws:s3:::your-central-mlflow-artifacts",
        "arn:aws:s3:::your-central-mlflow-artifacts/*"
      ]
    }
  ]
}
A few things worth keeping tight here:
- Pin the
Principalto specific role ARNs, never* - Add a condition block using
aws:SourceAccountif you want an extra layer of validation - Use prefix-based paths like
s3://bucket/team-a/per client account to keep artifact namespaces separated and auditable
Enforcing Least Privilege to Protect Sensitive Experiment Data
In a multi-account MLflow setup, experiment data can carry sensitive info — hyperparameters, dataset paths, model performance metrics tied to proprietary data. Locking down who can see and write what is non-negotiable.
Here’s how to keep permissions tight without breaking workflows:
- Separate read and write roles: Client accounts get write-only artifact roles; only the MLflow server role gets broad read access
- Scope IAM policies to experiment prefixes: Use
s3:prefixconditions so Team A can’t browse Team B’s artifact folders - Enable S3 server-side encryption with per-team KMS keys, and grant
kms:GenerateDataKeyonly to the relevant cross-account roles - Audit with AWS CloudTrail: Log every
AssumeRolecall and S3 API action — this gives you a full trail of who logged what experiment and when - Rotate and review regularly: Set up AWS IAM Access Analyzer to flag any overly permissive policies before they become a problem
Keeping the scalable MLflow deployment secure long-term means treating these policies as living documents, not a one-time setup task.
Deploying the MLflow Tracking Server on AWS

Choosing the Right Compute Option for Your Workload
Picking the right compute option comes down to your team’s operational comfort and expected traffic. EC2 gives you full control but requires manual scaling and patching. Fargate removes the server management overhead entirely, making it a solid pick for teams that want to focus on ML work rather than infrastructure babysitting.
- EC2: Best when you need custom networking configurations or GPU access alongside the tracking server
- AWS Fargate: Ideal for most teams — serverless containers with auto-scaling and no EC2 instance management
- Lambda: Not recommended for MLflow since it requires persistent processes and long-running connections
Containerizing MLflow with Docker for Consistent Deployments
A Docker image locks in your MLflow version, dependencies, and configuration so every environment — dev, staging, production — behaves identically. Here’s a minimal Dockerfile to get started:
FROM python:3.10-slim

RUN pip install mlflow boto3 psycopg2-binary

ENV MLFLOW_BACKEND_STORE_URI=postgresql://user:pass@host:5432/mlflow
ENV MLFLOW_DEFAULT_ARTIFACT_ROOT=s3://your-central-bucket/artifacts

EXPOSE 5000

CMD ["mlflow", "server", \
     "--host", "0.0.0.0", \
     "--port", "5000", \
     "--backend-store-uri", "${MLFLOW_BACKEND_STORE_URI}", \
     "--default-artifact-root", "${MLFLOW_DEFAULT_ARTIFACT_ROOT}"]
Push this image to Amazon ECR so ECS or EKS can pull it consistently across deployments. Tag images by MLflow version to make rollbacks painless.
Running the Server on Amazon ECS or EKS for High Availability
For most teams, ECS with Fargate hits the sweet spot between simplicity and reliability. You define a task definition pointing to your ECR image, set desired task count to at least 2 across multiple Availability Zones, and let ECS handle restarts if a container crashes.
ECS Setup Checklist:
- Create a task definition with at least 1 vCPU and 2GB memory for moderate workloads
- Attach an IAM task role with S3 and cross-account assume-role permissions
- Set environment variables for backend store URI and artifact root via AWS Secrets Manager
- Enable ECS Service Auto Scaling based on CPU utilization targets (target 60-70%)
Teams already running Kubernetes should go with EKS — deploy MLflow as a Deployment with replicas: 2, back it with a ClusterIP service, and expose it through an Ingress controller. EKS gives you fine-grained pod-level IAM through IRSA (IAM Roles for Service Accounts), which pairs perfectly with a scalable MLflow deployment serving multiple AWS accounts.
Setting Up an Application Load Balancer for Secure Access
An Application Load Balancer (ALB) sits in front of your ECS or EKS service, handling TLS termination, health checks, and routing. This keeps the MLflow tracking server URL stable even as containers restart or scale out.
Key ALB Configuration Steps:
- Create a Target Group pointing to your ECS tasks or EKS pods on port 5000, with health check path set to
/health - Configure HTTPS Listener on port 443 using an ACM certificate for your domain (e.g.,
mlflow.internal.yourcompany.com) - Redirect HTTP to HTTPS with a listener rule on port 80 — no plain-text traffic
- Restrict Inbound Access using ALB security groups to allow only traffic from client account VPC CIDR ranges or through AWS PrivateLink endpoints
- Enable Access Logs to S3 for auditing who is hitting the MLflow tracking server on AWS
For internal-only access, set the ALB scheme to internal so it never gets a public IP. Client accounts reach it through VPC peering or Transit Gateway, keeping all experiment tracking traffic off the public internet entirely.
Connecting Client AWS Accounts to the Central Server

Configuring MLflow Clients to Point to the Central Tracking URI
Setting up your client accounts to talk to the central MLflow tracking server is straightforward once you know the right pieces. In each client environment, set the MLFLOW_TRACKING_URI environment variable to point to your central server’s endpoint:
export MLFLOW_TRACKING_URI=https://mlflow.your-central-domain.com
Or set it directly in your training code:
import mlflow
mlflow.set_tracking_uri("https://mlflow.your-central-domain.com")
mlflow.set_experiment("my-client-experiment")
You can also bake this into your ML pipeline configs or Docker container environment variables so every run automatically targets the right server without any code changes.
Passing Cross-Account Credentials Securely at Runtime
This is where things get interesting. Client accounts need to authenticate against both the central MLflow server and the S3 artifact bucket sitting in the central AWS account. The cleanest approach involves IAM role chaining:
- Each client AWS account has a local IAM role that its compute (EC2, ECS, SageMaker) assumes automatically
- That local role has permission to
sts:AssumeRoleinto a cross-account role in the central account - The cross-account role has scoped S3 access to the artifact bucket
At runtime, grab temporary credentials like this:
import boto3

sts = boto3.client("sts")
assumed = sts.assume_role(
    RoleArn="arn:aws:iam::CENTRAL_ACCOUNT_ID:role/MLflowCrossAccountRole",
    RoleSessionName="mlflow-client-session"
)

creds = assumed["Credentials"]
os.environ["AWS_ACCESS_KEY_ID"] = creds["AccessKeyId"]
os.environ["AWS_SECRET_ACCESS_KEY"] = creds["SecretAccessKey"]
os.environ["AWS_SESSION_TOKEN"] = creds["SessionToken"]
Never hardcode these credentials. Use AWS Secrets Manager or SSM Parameter Store to store role ARNs, and let the SDK handle the temporary credential refresh cycle.
Validating Experiment Logging and Artifact Storage from Client Accounts
Once the wiring is in place, run a quick smoke test from each client account to confirm everything lands correctly in the central MLflow tracking server:
import mlflow

mlflow.set_tracking_uri("https://mlflow.your-central-domain.com")
mlflow.set_experiment("cross-account-validation")

with mlflow.start_run():
    mlflow.log_param("account_id", "CLIENT_ACCOUNT_123")
    mlflow.log_metric("accuracy", 0.95)
    mlflow.log_artifact("model_summary.txt")

print("Run ID:", mlflow.active_run().info.run_id)
Check these things after the run:
- MLflow UI shows the experiment and logged metrics under the correct experiment name
- S3 bucket in the central account has the artifact file stored under the expected
mlflow/<experiment_id>/<run_id>/artifacts/path - CloudWatch Logs on the tracking server show the request came in and completed without auth errors
- IAM Access Analyzer findings (if enabled) confirm no unintended cross-account access patterns
If artifacts land in the wrong bucket or metrics don’t appear, the first places to dig are the IAM trust policy on the cross-account role and the MLFLOW_S3_ENDPOINT_URL environment variable — both are common trip wires in a multi-account MLflow setup.
Scaling and Securing the Tracking Server for Production Use

Enabling Authentication and Authorization with a Reverse Proxy
Running an MLflow tracking server in production without authentication is like leaving your front door wide open. A reverse proxy like NGINX or AWS Application Load Balancer (ALB) sits in front of your MLflow server and handles auth before any request gets through.
Here’s a practical setup using ALB with Cognito:
- AWS Cognito User Pool — Create user groups mapped to client teams. Each team gets scoped access without sharing credentials.
- ALB Listener Rules — Attach a Cognito authorizer directly to the ALB listener. Unauthenticated requests get a 401 before they ever touch MLflow.
- NGINX as a sidecar — If you prefer fine-grained control, run NGINX alongside your MLflow container in ECS. Use
auth_requestto validate JWT tokens against an internal auth service.
For role-based access, you can layer in a lightweight middleware that reads the JWT claims and restricts certain API paths — for example, only data scientists from Account A can delete experiments they own.
Scaling the Backend Store and Artifact Storage for Growing Teams
As more teams onboard to your centralized MLflow tracking server on AWS, two things will start buckling under pressure first: your database and your S3 costs. Planning for this early saves a painful migration later.
Backend Store (PostgreSQL on RDS):
- Start with
db.t3.mediumfor small teams, but set up Aurora Serverless v2 from day one if you expect spiky workloads — it scales read/write capacity automatically. - Enable RDS Proxy to manage connection pooling. MLflow can open a lot of connections fast when multiple training jobs log simultaneously, and without pooling, you’ll hit PostgreSQL’s connection limit quickly.
- Use read replicas to offload experiment query traffic from write-heavy logging operations.
Artifact Storage (S3):
- Organize artifacts by account and team using prefixed paths:
s3://central-mlflow-artifacts/{account_id}/{team_name}/{experiment_id}/ - Enable S3 Intelligent-Tiering on the bucket. Old experiment artifacts from months ago don’t need to sit in standard storage.
- Set lifecycle policies to move artifacts older than 90 days to Glacier Instant Retrieval.
Monitoring Server Health and Setting Up Alerts with CloudWatch
A production MLflow server production environment needs eyes on it at all times. CloudWatch is your go-to here, and setting it up properly takes less than an hour.
Key metrics to watch:
- ECS Task CPU and Memory — If CPU spikes above 80% consistently, it’s time to scale out your Fargate tasks.
- RDS DatabaseConnections — Breaching 80% of your max connection limit is a warning sign that you need RDS Proxy or a bigger instance.
- ALB TargetResponseTime — Track P99 latency. MLflow UI slowness is often the first complaint from data scientists.
- S3 4xxErrors and 5xxErrors — Cross-account access issues usually show up here first.
Alerts to configure:
- CPU > 80% for 5 minutes → SNS → Slack notification
- RDS connections > 80% of max → PagerDuty alert
- ALB HTTP 5xx rate > 1% → SNS → email to ops team
- ECS task count drops to 0 → immediate PagerDuty
You can also set up a CloudWatch Dashboard shared across your org that shows all of these metrics in one view — super helpful during incidents.
Implementing Cost Controls for Multi-Account Artifact Storage
Multi-account MLflow IAM cross-account access is powerful, but it means every team is writing artifacts to your central S3 bucket — and the bill lands on your account. Here’s how to keep that under control.
S3 Storage Lens:
- Enable S3 Storage Lens across your organization to get a breakdown of storage usage by prefix (which maps to account and team). This makes chargeback conversations much easier.
Per-Account Cost Allocation:
- Tag every artifact upload with the originating AWS account ID using S3 Object Tagging. You can do this in the cross-account IAM role session policy.
- Use AWS Cost Explorer with resource tags to split costs back to each client account.
Artifact Retention Policies:
- Set a hard limit on artifact size per experiment using a Lambda function triggered by S3
ObjectCreatedevents. If an upload exceeds a threshold, the Lambda sends a Slack alert to the team. - Run a weekly cleanup job (EventBridge + Lambda) that deletes artifacts from failed or deleted experiments automatically.
Budget Alerts:
- Create an AWS Budget specifically for the S3 bucket using cost allocation tags. Set alerts at 80% and 100% of your monthly target so surprises don’t happen at the end of the month.

Managing machine learning experiments across multiple AWS accounts doesn’t have to be chaotic. A centralized MLflow tracking server, built with the right cross-account access strategy and a solid AWS deployment, gives your teams a single source of truth for all their model runs, metrics, and artifacts. From setting up the core architecture to connecting client accounts and locking things down for production, each step builds toward a setup that actually scales with your needs.
If you’re ready to take the next step, start small — deploy the central server, connect one client account, and get a feel for the workflow before rolling it out broadly. The architecture covered here is designed to grow with you, so there’s no need to build everything at once. Get the foundation right, and scaling becomes a much smoother ride.