The Ultimate Flutter Best Practices Guide for Modern Developers
Building great Flutter apps means more than just writing code that works. This comprehensive Flutter development guide shows you how to write apps that scale, perform well, and are easy to maintain.
This guide is designed for Flutter developers who want to level up their skills – from junior developers looking to establish solid coding habits to experienced programmers transitioning from other frameworks. You’ll learn practical techniques that make your code cleaner and your apps faster.
We’ll cover everything from setting up an efficient Flutter development environment and organizing your Flutter project structure to advanced topics like Flutter performance optimization and Flutter testing strategies. You’ll also discover how to master Flutter state management, create stunning Flutter responsive design layouts, and implement Flutter code optimization techniques that keep your apps running smoothly.
Ready to transform your Flutter development workflow? Let’s dive into the best practices that separate good Flutter developers from great ones.
Set Up Your Flutter Development Environment for Maximum Efficiency

Configure IDE with Essential Extensions and Plugins
Setting up your Flutter development environment starts with choosing the right IDE and equipping it with powerful tools. Visual Studio Code and Android Studio remain the top choices for Flutter developers, each offering unique advantages that can supercharge your development workflow.
For Visual Studio Code users, the Flutter and Dart extensions are non-negotiable. These provide syntax highlighting, code completion, and debugging capabilities that make Flutter development seamless. Add the Awesome Flutter Snippets extension to speed up your coding with pre-built code templates for common Flutter widgets and patterns.
Android Studio users benefit from built-in Flutter support, but installing additional plugins like Flutter Inspector and Widget Inspector takes your development experience to the next level. These tools provide visual debugging capabilities that help you understand your widget tree structure and identify layout issues quickly.
Consider adding these game-changing extensions to your setup:
- Bracket Pair Colorizer – Makes nested widgets easier to track
- GitLens – Provides powerful Git integration within your editor
- Flutter Intl – Simplifies internationalization workflow
- Pubspec Assist – Automates dependency management
- Flutter Tree – Visualizes your widget hierarchy
Implement Proper Debugging Tools and Profilers
Debugging Flutter apps requires more than basic print statements. The Flutter Inspector is your primary debugging companion, offering real-time widget tree inspection and property modification. Access it through your IDE or run flutter inspector in your terminal to launch the web-based version.
The Dart DevTools suite provides comprehensive debugging capabilities that every Flutter developer should master. Launch it with flutter pub global activate devtools followed by flutter pub global run devtools. This powerful toolset includes:
| Tool | Purpose | Key Features |
|---|---|---|
| Widget Inspector | UI debugging | Widget tree visualization, property editing |
| Performance View | Performance analysis | Frame rendering metrics, rebuild tracking |
| Memory View | Memory profiling | Heap analysis, memory leak detection |
| Network View | API debugging | HTTP request monitoring, response analysis |
The Flutter Performance overlay (flutter run --profile) reveals frame rendering issues in real-time. Green bars indicate smooth 60fps performance, while red bars highlight jank and performance bottlenecks. Enable it programmatically with flutter run --debug --debug-port=12345 for persistent debugging sessions.
Hot reload and hot restart are debugging superpowers that distinguish Flutter from other frameworks. Hot reload preserves app state while updating code changes, perfect for UI tweaks and small logic modifications. Hot restart rebuilds the entire app, necessary for changes to main(), app initialization, or global variables.
Establish Version Control Workflows with Git
Effective Git workflows prevent code conflicts and ensure smooth collaboration in Flutter projects. The feature branch workflow works exceptionally well for Flutter development teams, allowing developers to work on isolated features before merging to main branches.
Create a comprehensive .gitignore file specifically tailored for Flutter projects:
# Flutter/Dart
.packages
.pub/
build/
ios/Flutter/Generated.xcconfig
ios/Flutter/flutter_export_environment.sh
android/app/src/main/java/io/flutter/plugins/

# IDE
.vscode/
.idea/
*.iml

# Platform-specific
ios/Pods/
android/.gradle/
Implement conventional commit messages to maintain clear project history. Use prefixes like feat: for new features, fix: for bug fixes, refactor: for code improvements, and docs: for documentation updates. This approach makes tracking changes easier and enables automated changelog generation.
Set up pre-commit hooks to enforce code quality standards. Install git-hooks and configure automatic formatting with dart format and static analysis with flutter analyze. This prevents poorly formatted or error-prone code from entering your repository.
Consider using GitFlow for complex projects with multiple release cycles. Create separate branches for development, staging, and production environments, ensuring stable releases while allowing continuous feature development.
Optimize Build Configurations for Faster Compilation
Build optimization dramatically improves development velocity and deployment efficiency. Flutter’s build system offers multiple configuration options that can reduce compilation times from minutes to seconds.
Enable incremental builds by keeping your development server running between coding sessions. Use flutter run --hot for development and maintain the same terminal session to leverage Dart’s incremental compiler. This approach reduces subsequent build times by up to 80%.
Configure build flavors for different environments (development, staging, production) in your android/app/build.gradle and ios/Runner.xcconfig files. This allows environment-specific configurations without code duplication:
flutter build apk --flavor dev
flutter build apk --flavor prod
Optimize your pubspec.yaml dependencies by removing unused packages and using specific version constraints instead of caret notation. Unnecessary dependencies increase build times and app size. Run flutter pub deps regularly to audit your dependency tree.
Enable ProGuard for Android release builds to reduce APK size and improve performance. Configure it in your android/app/build.gradle file with Flutter-specific keep rules to prevent essential Flutter code from being removed during optimization.
Use build caching when working in teams by configuring shared build cache directories. This allows team members to share compiled artifacts, reducing individual build times significantly. Docker containers can standardize build environments across different development machines, ensuring consistent compilation results.
Master Flutter Project Structure and Organization

Create scalable folder hierarchies for large applications
Building a well-organized Flutter project structure becomes critical as your application grows. A scalable folder hierarchy prevents technical debt and makes code navigation effortless for team members.
Start with a foundational structure that separates concerns clearly. Create top-level directories like core, features, shared, and config to establish clear boundaries. The core directory houses essential services, utilities, and base classes that power your entire application. Meanwhile, features contains domain-specific functionality, and shared holds reusable components across multiple features.
For large applications, implement a three-tier structure within each major directory:
lib/
├── core/
│   ├── constants/
│   ├── services/
│   ├── utils/
│   └── exceptions/
├── features/
│   ├── authentication/
│   ├── dashboard/
│   └── profile/
└── shared/
    ├── widgets/
    ├── themes/
    └── extensions/
Each feature directory should follow the same internal structure, making it predictable for developers to locate specific files. This consistency reduces cognitive load and speeds up development across large teams.
Implement feature-based modular architecture
Feature-based architecture transforms your Flutter project structure into independent, self-contained modules. This approach mirrors how users think about your app – in terms of features rather than technical layers.
Organize each feature as a complete module with its own data layer, business logic, and presentation components. A typical feature module structure includes:
- Data layer: API calls, repositories, and data models
- Domain layer: Business logic, use cases, and entities
- Presentation layer: UI components, state management, and view models
Here’s how a user authentication feature might look:
features/authentication/
├── data/
│   ├── datasources/
│   ├── models/
│   └── repositories/
├── domain/
│   ├── entities/
│   ├── repositories/
│   └── usecases/
└── presentation/
    ├── pages/
    ├── widgets/
    └── bloc/
This modular approach enables teams to work on different features simultaneously without stepping on each other’s toes. You can even extract features into separate packages if they become complex enough, promoting true modularity.
Separate business logic from UI components effectively
Clean separation between business logic and UI components makes your Flutter code maintainable and testable. Your widgets should focus solely on rendering UI and handling user interactions, while business logic lives in dedicated classes.
Use state management solutions like BLoC, Riverpod, or Provider to create this separation. These patterns ensure your UI components remain stateless and predictable, while business logic stays isolated in testable units.
Consider this comparison:
| Poor Separation | Clean Separation |
|---|---|
| Widget handles API calls directly | Widget listens to state changes |
| Business rules mixed with UI code | Business logic in dedicated classes |
| Difficult to test | Easy unit testing |
| Tight coupling | Loose coupling |
Implement dependency injection to further decouple your components. Use packages like get_it or injectable to manage dependencies and make your code more flexible. This approach allows you to easily swap implementations for testing or different environments.
Your widgets should only know about state and events, not about how data is fetched or processed. This creates a clear contract between your UI and business layers, making both easier to maintain and extend.
Organize assets and resources systematically
Strategic asset organization prevents your Flutter project from becoming a cluttered mess as it scales. Create a logical hierarchy that makes assets easy to find and maintain across development cycles.
Structure your assets directory with clear categories:
assets/
├── images/
│   ├── icons/
│   ├── illustrations/
│   └── backgrounds/
├── fonts/
├── data/
│   └── mock_responses/
└── animations/
Use consistent naming conventions throughout your asset organization. Prefix assets with their category or feature name, such as auth_login_background.png or dashboard_chart_icon.svg. This naming strategy makes assets searchable and prevents naming conflicts.
Implement different asset variants for various screen densities and themes. Flutter’s asset variant system automatically selects appropriate resources based on device characteristics:
assets/images/
├── 2.0x/
├── 3.0x/
├── dark/
└── light/
Create an asset management class that provides typed access to your resources. This approach catches asset reference errors at compile time and makes refactoring safer when you need to reorganize or rename assets.
Regular asset audits help identify unused resources that bloat your app size. Tools like flutter_launcher_icons and flutter_native_splash automate asset generation for platform-specific requirements, reducing manual maintenance overhead.
Write Clean and Maintainable Flutter Code

Follow consistent naming conventions throughout your project
Consistent naming conventions form the backbone of readable Flutter code. When working on Flutter development projects, stick to Dart’s official naming guidelines: use camelCase for variables, methods, and parameters, PascalCase for classes and types, and lowercase_with_underscores for file names and directories.
Your widget names should clearly describe their purpose. Instead of naming a widget MyWidget, choose descriptive names like UserProfileCard or ShoppingCartButton. Variables should tell their story too – replace generic names like data or info with specific ones like userAccountBalance or weatherForecast.
File organization plays a crucial role in maintainability. Group related files together and use consistent prefixes or suffixes. For example, all your authentication-related widgets could start with Auth like AuthLoginForm and AuthSignUpButton. This approach makes navigation through your codebase much smoother.
Constants deserve special attention in Flutter best practices. Use SCREAMING_SNAKE_CASE for compile-time constants and group them logically. Create separate files for different constant categories like app_colors.dart, api_endpoints.dart, and dimension_constants.dart.
Implement proper error handling and exception management
Robust error handling transforms fragile Flutter apps into reliable user experiences. Wrap risky operations in try-catch blocks, especially when dealing with API calls, file operations, or device-specific features. Don’t just catch exceptions – handle them meaningfully.
Create custom exception classes for different error scenarios in your Flutter development workflow. Instead of throwing generic exceptions, define specific ones like NetworkConnectionException or InvalidUserInputException. This makes debugging easier and allows for targeted error responses.
class NetworkException extends Exception {
  final String message;
  final int statusCode;

  NetworkException(this.message, this.statusCode);
}
Global error handling should be your safety net. Implement FlutterError.onError for framework errors and PlatformDispatcher.instance.onError for async errors. This catches issues that slip through your local error handling and prevents app crashes.
User-facing error messages need careful consideration. Technical error details confuse users – instead, show friendly messages that explain what went wrong and how to fix it. Keep error logs detailed for developers while maintaining simplicity for users.
Use meaningful comments and documentation practices
Smart commenting enhances Flutter code optimization without cluttering your files. Focus on explaining why your code does something rather than what it does. The code itself should be self-explanatory enough to show what’s happening.
Document complex business logic, especially in state management implementations. When you’re handling intricate data transformations or implementing specific algorithms, add comments that future developers (including yourself) will appreciate. Explain the reasoning behind architectural decisions and any workarounds for platform-specific issues.
Use Dart’s documentation comments (///) for public APIs. These comments generate automatic documentation and provide helpful hints in IDEs. Include parameter descriptions, return value explanations, and usage examples when appropriate.
/// Calculates the total price including tax and discount.
///
/// [basePrice] The original item price before modifications
/// [taxRate] Tax percentage as decimal (0.1 for 10%)
/// [discountAmount] Fixed discount amount to subtract
///
/// Returns the final price after applying tax and discount.
/// Throws [ArgumentError] if basePrice is negative.
double calculateFinalPrice(double basePrice, double taxRate, double discountAmount) {
  // Implementation here
}
Avoid obvious comments that restate what the code does. Comments like // Increment counter by 1 above counter++ add no value. Instead, focus on providing context about complex calculations, business rules, or integration requirements that aren’t immediately clear from reading the code.
Apply SOLID principles to Flutter development
SOLID principles guide modern Flutter development toward maintainable, scalable applications. The Single Responsibility Principle keeps your widgets focused on one job. Instead of creating massive widgets that handle multiple concerns, break them into smaller, specialized components.
Open/Closed Principle works beautifully with Flutter’s composition model. Design your widgets and classes to be open for extension but closed for modification. Use abstract classes and interfaces to define contracts that can be implemented in different ways without changing existing code.
Liskov Substitution Principle ensures your widget hierarchies work predictably. When creating custom widgets that extend existing ones, make sure they can replace their parent widgets without breaking functionality. This principle is especially important when building reusable component libraries.
Interface Segregation Principle prevents bloated contracts in your Flutter project structure. Instead of creating large interfaces with many methods, design smaller, focused interfaces that classes can implement selectively. This approach reduces coupling and makes testing easier.
Dependency Inversion Principle promotes loose coupling through dependency injection. Instead of creating dependencies directly within your classes, inject them through constructors or use dependency injection frameworks. This makes your code more testable and flexible, allowing you to swap implementations easily during testing or when requirements change.
Optimize State Management for Better Performance

Choose the right state management solution for your needs
Flutter state management can make or break your app’s performance. With so many options available—Provider, Riverpod, BlocPattern, GetX, and MobX—picking the right one depends on your project’s complexity and team experience.
For simple apps with basic state needs, Provider remains the go-to choice. It’s lightweight, officially recommended by the Flutter team, and perfect for small to medium projects. Your team will appreciate its straightforward learning curve and excellent documentation.
Riverpod steps up as Provider’s more powerful successor, offering better testing capabilities and compile-time safety. Choose Riverpod when you need more robust dependency injection or want to avoid common Provider pitfalls like forgetting to wrap widgets properly.
BlocPattern shines in larger, enterprise-level applications where predictable state management is crucial. The clear separation of business logic from UI components makes it ideal for teams working on complex features. The learning curve is steeper, but the payoff in maintainability is worth it.
GetX appeals to developers who want an all-in-one solution combining state management, routing, and dependency injection. While convenient, be cautious about vendor lock-in and the framework’s opinionated approach.
| Solution | Best For | Learning Curve | Performance |
|---|---|---|---|
| Provider | Small-medium apps | Easy | Good |
| Riverpod | Medium-large apps | Moderate | Excellent |
| BlocPattern | Enterprise apps | Steep | Excellent |
| GetX | Rapid prototyping | Easy | Good |
Minimize unnecessary widget rebuilds and rendering
Widget rebuilds are performance killers in Flutter apps. Every unnecessary rebuild wastes CPU cycles and drains battery life. Smart Flutter development focuses on surgical precision—rebuild only what needs updating.
const constructors are your first line of defense. Mark widgets as const whenever possible to prevent unnecessary rebuilds during parent widget updates. This simple practice can dramatically improve your app’s performance with zero effort.
// Bad - rebuilds on every parent update
Widget buildHeader() {
  return Text('My App Header');
}

// Good - stays constant
Widget buildHeader() {
  return const Text('My App Header');
}
Builder widgets help isolate rebuilds to specific areas. Instead of rebuilding entire widget trees, use Consumer, Selector, or similar widgets to update only affected portions:
// Rebuilds only the text widget when counter changes
Consumer<CounterModel>(
  builder: (context, counter, child) => Text('${counter.value}'),
)
Keys play a crucial role in widget identity. Use them strategically to help Flutter’s rendering engine understand which widgets to preserve versus rebuild. ValueKey, ObjectKey, and GlobalKey each serve different purposes in optimizing widget lifecycles.
Split large widgets into smaller, focused components. This granular approach means changes in one area won’t trigger rebuilds in unrelated sections. Your app stays responsive even as complexity grows.
Implement efficient data flow patterns
Data flow architecture determines how information moves through your Flutter app. Poor patterns create bottlenecks, while efficient ones keep your app running smoothly even under heavy load.
Unidirectional data flow should be your default approach. Data flows down through widgets via parameters, while events bubble up through callbacks or state management actions. This predictable pattern makes debugging easier and prevents circular dependencies that can crash your app.
Separation of concerns keeps business logic away from UI code. Create dedicated service classes, repositories, and data models instead of cramming everything into your widgets. This approach improves testability and makes your codebase more maintainable as it grows.
Immutable state objects prevent accidental mutations that cause hard-to-track bugs. Use packages like freezed or built_value to generate immutable classes automatically:
@freezed
class User with _$User {
  const factory User({
    required String name,
    required String email,
    required int age,
  }) = _User;
}
Stream-based architectures excel at handling real-time data updates. StreamBuilder widgets automatically rebuild when new data arrives, perfect for chat apps, live feeds, or any scenario requiring reactive updates.
Cache frequently accessed data to reduce redundant network calls and database queries. Implement smart caching strategies that balance memory usage with performance gains.
Handle asynchronous operations properly
Asynchronous operations are everywhere in modern Flutter apps—API calls, database queries, file operations, and user interactions. Poor async handling leads to frozen UIs, race conditions, and frustrated users.
FutureBuilder and StreamBuilder are essential widgets for handling async data in your UI. They automatically manage loading states, errors, and data updates without manual intervention:
FutureBuilder<User>(
  future: userService.fetchUser(userId),
  builder: (context, snapshot) {
    if (snapshot.hasError) return ErrorWidget(snapshot.error!);
    if (!snapshot.hasData) return LoadingWidget();
    return UserProfile(user: snapshot.data!);
  },
)
Error boundaries prevent single async failures from crashing your entire app. Wrap risky operations in try-catch blocks and provide meaningful fallback experiences. Users appreciate apps that gracefully handle network outages or server errors.
Debouncing and throttling optimize user input handling. Don’t trigger search requests on every keystroke—wait for typing to pause. This reduces server load and improves user experience:
Timer? _debounceTimer;

void onSearchChanged(String query) {
  _debounceTimer?.cancel();
  _debounceTimer = Timer(Duration(milliseconds: 300), () {
    performSearch(query);
  });
}
Cancellation tokens prevent memory leaks in long-running operations. Always dispose of subscriptions, timers, and HTTP requests when widgets are destroyed. The dio package provides excellent cancellation support for network requests.
Implement proper loading indicators and skeleton screens to keep users engaged during async operations. Never leave users staring at blank screens wondering if your app is still working.
Design Responsive and Accessible User Interfaces
Create adaptive layouts for multiple screen sizes
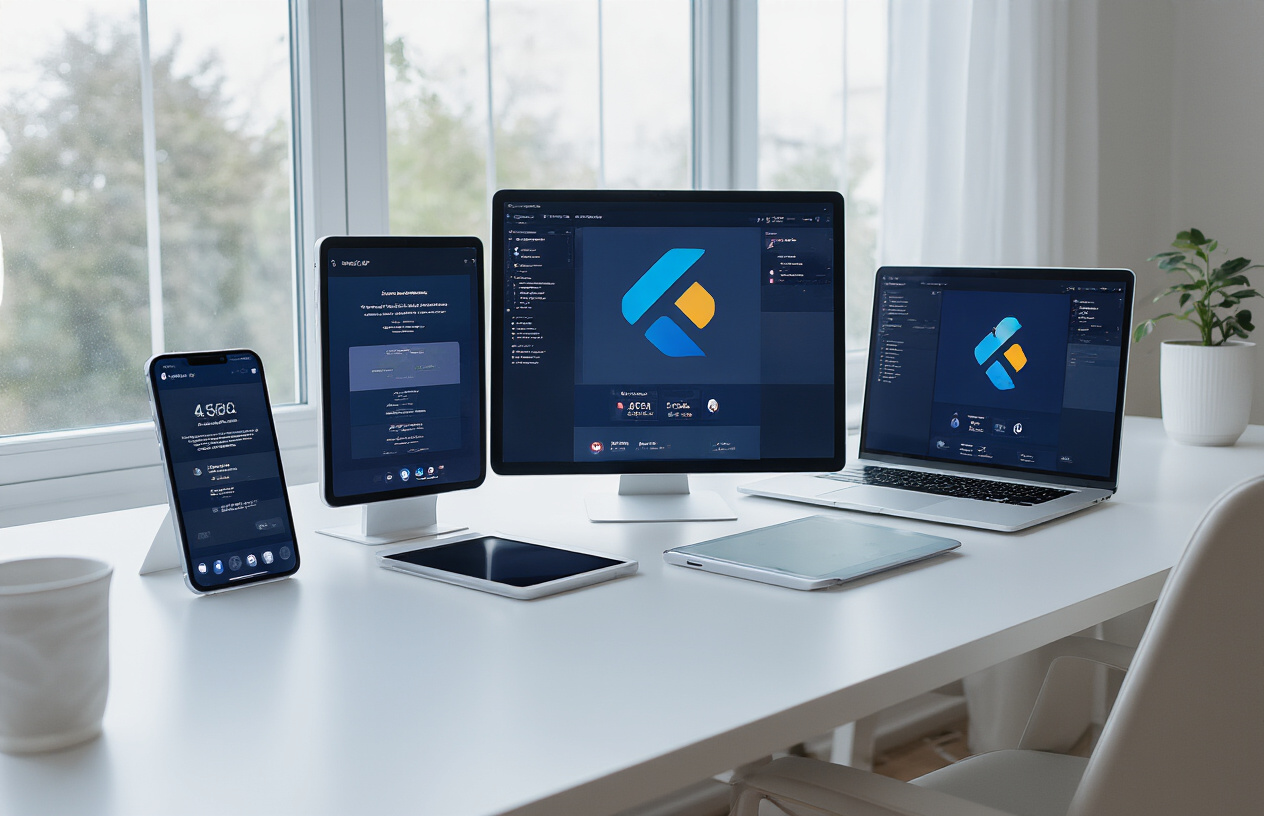
Building apps that look great on every device requires smart layout strategies. The MediaQuery class gives you screen dimensions and orientation data to make informed decisions about your UI. Use LayoutBuilder to access available space and adjust your components accordingly.
Widget build(BuildContext context) {
  return LayoutBuilder(
    builder: (context, constraints) {
      if (constraints.maxWidth > 600) {
        return TabletLayout();
      }
      return MobileLayout();
    },
  );
}
Breakpoint-based design works well with Flutter’s flexible widget system. Define clear breakpoints for mobile (< 600dp), tablet (600-1200dp), and desktop (> 1200dp) experiences. The Expanded and Flexible widgets help distribute space proportionally across different screen sizes.
Consider using SafeArea to respect device notches and system UI elements. The AspectRatio widget maintains consistent proportions across devices, while FittedBox scales content to fit available space without overflow.
Implement proper color schemes and typography
Material Design 3 provides a robust foundation for Flutter responsive design through dynamic color schemes. Use ColorScheme.fromSeed() to generate harmonious color palettes that adapt to user preferences and system themes.
ThemeData(
  colorScheme: ColorScheme.fromSeed(
    seedColor: Colors.blue,
    brightness: Brightness.light,
  ),
  textTheme: Typography.material2021().black,
)
Typography scales should respond to user accessibility settings. Flutter’s TextTheme provides predefined text styles that automatically adjust based on the device’s text scaling factor. Use semantic text styles like headlineLarge, bodyMedium, and labelSmall instead of hardcoded font sizes.
Dark mode support becomes effortless when you properly structure your color scheme. Test both light and dark variants to ensure sufficient contrast ratios meet accessibility guidelines. The MediaQuery.platformBrightnessOf() method helps detect system theme preferences.
Ensure accessibility compliance for all users
Screen reader support starts with proper widget semantics. Add Semantics widgets or semantic properties to describe UI elements for users with visual impairments. Every interactive element needs a meaningful label and hint.
Semantics(
  label: 'Add new item',
  hint: 'Tap to create a new todo item',
  child: FloatingActionButton(
    onPressed: addItem,
    child: Icon(Icons.add),
  ),
)
Color alone shouldn’t convey information. Provide additional visual cues like icons, patterns, or text labels alongside color-coded elements. This helps users with color vision deficiencies understand your app’s functionality.
Focus management plays a crucial role in keyboard navigation. Use FocusNode and Focus widgets to control tab order and ensure logical navigation flow. The autofocus property helps users start interacting immediately with the most important element.
Optimize touch targets and navigation patterns
Touch targets should meet the minimum 44dp recommendation for comfortable interaction. Use SizedBox or padding to expand small interactive elements. The Material widget with InkWell provides visual feedback that confirms user interactions.
Material(
  child: InkWell(
    onTap: onPressed,
    child: Container(
      constraints: BoxConstraints(minWidth: 44, minHeight: 44),
      child: Icon(Icons.favorite),
    ),
  ),
)
Navigation patterns should feel natural across platforms. Bottom navigation works well for mobile apps with 3-5 primary destinations. Drawer navigation suits apps with many sections, while rail navigation fits tablet and desktop layouts.
Gesture handling requires platform-appropriate responses. iOS users expect edge swipes for back navigation, while Android users rely on system back buttons. The WillPopScope widget helps manage back button behavior, and Dismissible enables swipe-to-delete patterns that users recognize.
Platform-specific adaptations enhance user experience without compromising your Flutter development workflow. Use Platform.isIOS checks sparingly, focusing on behavioral differences rather than visual ones. The adaptive constructors in widgets like Switch.adaptive() automatically choose platform-appropriate appearances.
Implement Robust Testing Strategies

Write Comprehensive Unit Tests for Business Logic
Unit testing forms the foundation of any solid Flutter testing strategies. Your business logic should be completely isolated from UI components and external dependencies when writing these tests. Focus on testing pure functions, data models, and service classes that handle your app’s core functionality.
Create test files in the test/ directory with the _test.dart suffix. Use the test() function to define individual test cases and group related tests with group(). Mock external dependencies using packages like mockito or mocktail to ensure your tests remain fast and reliable.
// Example unit test structure
group('User Authentication Service', () {
  test('should return user when login credentials are valid', () {
    // Arrange, Act, Assert pattern
  });

  test('should throw exception when credentials are invalid', () {
    // Test implementation
  });
});
Test edge cases, error conditions, and boundary values. Your unit tests should cover at least 80% of your business logic code to catch bugs early in development.
Create Widget Tests for UI Components
Widget testing validates that your UI components render correctly and respond to user interactions as expected. These tests run faster than integration tests while providing more comprehensive coverage than unit tests alone.
Use testWidgets() to create widget tests and WidgetTester to interact with your widgets. The pumpWidget() method renders your widget, while pump() and pumpAndSettle() trigger rebuilds and animations.
Key widget testing techniques include:
- Finding widgets: Use
find.byType(),find.byKey(),find.text(), andfind.byIcon() - Verifying presence: Use
expect(finder, findsOneWidget)orfindsNothing - Simulating interactions: Use
tester.tap(),tester.enterText(),tester.drag() - Testing state changes: Verify that widgets update correctly after user actions
Mock dependencies like HTTP clients and databases to keep widget tests focused on UI behavior. Create reusable test helpers for common setup tasks and widget configurations.
Develop Integration Tests for Complete User Flows
Integration tests verify that your entire app works correctly from the user’s perspective. These tests run on real devices or emulators and validate complete workflows like user registration, data synchronization, and navigation flows.
Set up integration tests in the integration_test/ directory using the integration_test package. These tests can interact with real backend services or use staging environments to simulate production conditions.
Structure your integration tests around user stories:
- Authentication flows: Login, logout, password reset
- Core features: Creating, reading, updating, deleting data
- Navigation: Moving between screens and handling deep links
- Offline scenarios: Testing app behavior without network connectivity
Use page object models to organize your integration test code. This pattern creates reusable classes that represent app screens and their interactions, making tests more maintainable.
class LoginPage {
  final WidgetTester tester;
  LoginPage(this.tester);

  Future<void> enterCredentials(String email, String password) async {
    await tester.enterText(find.byKey(Key('email_field')), email);
    await tester.enterText(find.byKey(Key('password_field')), password);
  }

  Future<void> tapLoginButton() async {
    await tester.tap(find.byKey(Key('login_button')));
    await tester.pumpAndSettle();
  }
}
Establish Continuous Integration Pipelines
Automated testing through CI/CD pipelines catches issues before they reach production and maintains code quality across your development team. Set up your pipeline to run all test types automatically on code commits and pull requests.
Popular CI platforms for Flutter projects include GitHub Actions, GitLab CI, and Bitrise. Configure your pipeline to:
- Install Flutter SDK: Use the latest stable version
- Run static analysis: Execute
flutter analyzeto catch code issues - Execute unit tests: Run
flutter testwith coverage reporting - Perform widget tests: Include UI component validation
- Run integration tests: Test on multiple device configurations
Create separate pipeline stages for different test types. Unit and widget tests should run quickly on every commit, while integration tests can run on pull requests or scheduled builds due to their longer execution time.
Configure test result reporting and coverage metrics to track your testing progress over time. Set minimum coverage thresholds and fail builds that don’t meet your quality standards.
Store test artifacts like screenshots from failed integration tests to help debug issues. Many CI platforms offer integration with testing services that provide real device testing across multiple Android and iOS versions.
Monitor your pipeline performance and optimize slow-running tests. Parallel test execution and selective testing based on changed files can significantly reduce build times while maintaining comprehensive coverage.
Optimize App Performance and Memory Usage

Profile and eliminate memory leaks effectively
Memory leaks can silently destroy your Flutter app’s performance, causing crashes and frustrating user experiences. Start by leveraging Flutter Inspector and Dart DevTools to monitor memory usage patterns during development. The Memory tab provides real-time insights into heap allocations, helping you identify objects that aren’t being garbage collected properly.
Common culprits include unclosed streams, lingering animation controllers, and retained widget references. Always dispose of controllers in your dispose() method:
@override
void dispose() {
  _animationController.dispose();
  _streamSubscription.cancel();
  super.dispose();
}
Watch for circular references between objects, which prevent proper garbage collection. Use weak references when necessary, and avoid storing widget instances in global variables. The flutter analyze command can catch some memory-related issues early in development.
Profile your app regularly using flutter run --profile to simulate production conditions. Look for memory growth patterns that don’t stabilize over time – these often indicate leaks. Pay special attention to image caching, which can consume significant memory if not managed properly.
Implement lazy loading and pagination techniques
Lazy loading transforms how your Flutter app handles large datasets, dramatically improving startup times and memory efficiency. Instead of loading everything upfront, fetch data only when users actually need it.
For lists, implement pagination using ListView.builder with scroll detection:
ListView.builder(
  controller: _scrollController,
  itemCount: items.length + (hasMore ? 1 : 0),
  itemBuilder: (context, index) {
    if (index == items.length) {
      // Load more indicator
      _loadMoreData();
      return CircularProgressIndicator();
    }
    return ListTile(title: Text(items[index].title));
  },
)
Create infinite scroll experiences by detecting when users reach the bottom 80% of your list. This gives enough time to fetch new data before they hit the end. Use packages like infinite_scroll_pagination for complex scenarios with error handling and retry logic.
For images, implement progressive loading where thumbnail versions appear first, followed by full-resolution images. This creates the perception of faster loading while managing bandwidth effectively.
Consider implementing virtual scrolling for extremely large lists where only visible items exist in memory. The flutter_staggered_grid_view package offers excellent virtualization capabilities for grid layouts.
Optimize image handling and caching strategies
Images often consume the largest portion of your app’s memory and bandwidth. Smart caching strategies can dramatically improve both performance and user experience while following Flutter performance optimization best practices.
Use cached_network_image package for automatic caching with customizable policies:
CachedNetworkImage(
  imageUrl: imageUrl,
  memCacheWidth: 400, // Resize in memory
  placeholder: (context, url) => CircularProgressIndicator(),
  errorWidget: (context, url, error) => Icon(Icons.error),
)
Implement multiple cache layers: memory cache for immediate access, disk cache for offline support, and network cache for bandwidth optimization. Set appropriate cache sizes based on device capabilities – mobile devices typically need smaller cache limits than tablets.
For local images, use different resolutions based on device pixel density. Flutter’s asset bundling supports multiple image variants, automatically selecting the best fit. Compress images using WebP format when possible, which offers 25-35% better compression than JPEG.
Consider lazy loading for image galleries where only visible images load initially. Pre-load adjacent images to ensure smooth scrolling experiences. Implement image placeholder strategies using blurred thumbnails or skeleton screens to maintain visual continuity during loading.
Reduce app size through code splitting
App size directly impacts download conversion rates and user retention. Code splitting allows you to break your Flutter app into smaller, manageable chunks that load on demand.
Start by analyzing your current app size using flutter build apk --analyze-size. This command reveals which packages and assets contribute most to your bundle size. Remove unused dependencies and assets that inflate your app unnecessarily.
Implement deferred loading for feature modules that users might not access immediately:
import 'package:premium_features/premium.dart' deferred as premium;

void loadPremiumFeatures() async {
  await premium.loadLibrary();
  premium.showPremiumScreen();
}
Use conditional imports to include platform-specific code only when needed. This prevents Android-specific code from appearing in iOS builds and vice versa.
Split large asset bundles by grouping related resources together. Load UI assets immediately but defer heavy resources like videos or complex animations until needed. Consider storing large media files remotely and caching them locally after first use.
Tree shaking automatically removes unused code during release builds, but you can help by avoiding dynamic imports and maintaining clear dependency graphs. The flutter build command with --split-debug-info flag can help identify optimization opportunities in your codebase.
Handle Data Persistence and API Integration

Choose Appropriate Local Storage Solutions
Different scenarios demand different storage approaches in Flutter development. SharedPreferences works perfectly for storing simple key-value pairs like user preferences, settings, or small configuration data. You can save strings, booleans, integers, and lists without hassle.
For more complex data structures, SQLite through the sqflite package offers robust relational database capabilities. Create tables, run complex queries, and maintain data relationships efficiently. This approach shines when dealing with structured data that requires filtering, sorting, or complex relationships.
Hive provides a lightweight, fast alternative to SQLite for object storage. It’s particularly effective for caching API responses, storing user-generated content, or managing app state between sessions. The NoSQL approach eliminates the need for complex schemas while maintaining excellent performance.
| Storage Solution | Best For | Performance | Complexity |
|---|---|---|---|
| SharedPreferences | Simple key-value data | Fast | Low |
| SQLite | Structured, relational data | Good | Medium |
| Hive | Object storage, caching | Very Fast | Low |
| Secure Storage | Sensitive information | Good | Medium |
Implement Efficient Network Request Patterns
The http package serves as Flutter’s foundation for API communication, but wrapping it in a service class creates better maintainability. Create dedicated API service classes that handle authentication, error management, and response parsing in one place.
class ApiService {
  static const String baseUrl = 'https://api.example.com';

  Future<User> fetchUser(int userId) async {
    final response = await http.get(
      Uri.parse('$baseUrl/users/$userId'),
      headers: {'Authorization': 'Bearer ${await getToken()}'},
    );

    if (response.statusCode == 200) {
      return User.fromJson(json.decode(response.body));
    }
    throw ApiException('Failed to load user');
  }
}
Dio offers advanced features like interceptors, automatic JSON serialization, and built-in retry mechanisms. Use interceptors to handle authentication tokens automatically, log requests for debugging, and manage common error responses across your entire application.
Implement proper timeout configurations to prevent hanging requests. Set both connection and read timeouts based on your API’s expected response times. Cache frequently accessed data locally to reduce unnecessary network calls and improve user experience.
Handle Offline Functionality and Data Synchronization
Build offline-first applications by caching critical data locally and synchronizing when connectivity returns. The connectivity_plus package helps detect network status changes, allowing your app to adapt behavior accordingly.
Create a sync manager that queues operations performed offline and executes them when connectivity resumes. Store pending actions in local storage and process them in the background to maintain data consistency.
class SyncManager {
  final Queue<SyncOperation> _pendingOperations = Queue();

  Future<void> addOperation(SyncOperation operation) async {
    if (await isOnline()) {
      await executeOperation(operation);
    } else {
      _pendingOperations.add(operation);
      await savePendingOperations();
    }
  }

  Future<void> processPendingOperations() async {
    while (_pendingOperations.isNotEmpty) {
      final operation = _pendingOperations.removeFirst();
      try {
        await executeOperation(operation);
      } catch (e) {
        _pendingOperations.addFirst(operation);
        break;
      }
    }
  }
}
Implement conflict resolution strategies for data that might be modified both offline and on the server. Consider timestamp-based resolution, user-choice prompts, or field-level merging depending on your application’s requirements.
Secure Sensitive Data with Proper Encryption
Never store sensitive information like passwords, API keys, or personal data in plain text. The flutter_secure_storage package encrypts data before storing it, using platform-specific secure storage mechanisms like iOS Keychain and Android Keystore.
class SecureStorageService {
  static const _storage = FlutterSecureStorage();

  Future<void> storeToken(String token) async {
    await _storage.write(key: 'auth_token', value: token);
  }

  Future<String?> getToken() async {
    return await _storage.read(key: 'auth_token');
  }

  Future<void> clearAll() async {
    await _storage.deleteAll();
  }
}
Encrypt sensitive data at rest using AES encryption before storing it in regular databases. Generate unique encryption keys per user or per device to maintain security even if the database is compromised.
Implement certificate pinning for critical API endpoints to prevent man-in-the-middle attacks. This ensures your app only communicates with legitimate servers, protecting user data during transmission.
Use obfuscation techniques during release builds to make reverse engineering more difficult. Remove debug information and consider additional security measures like root/jailbreak detection for highly sensitive applications.

Following these Flutter best practices will transform your development workflow and help you build apps that users actually love. From setting up an efficient environment to mastering clean code principles, each practice builds on the others to create a solid foundation for your projects. The key is starting with proper project structure and gradually incorporating performance optimization, testing, and accessibility as your skills grow.
Remember that great Flutter apps don’t happen by accident – they’re the result of deliberate choices and consistent habits. Focus on implementing one or two practices at a time rather than trying to master everything at once. Your future self will thank you when you’re maintaining code that’s easy to understand, debug, and extend. Start with the fundamentals today, and watch your Flutter development skills reach new heights.


