


DevOps engineers and AWS cloud architects looking to improve their container deployment processes will benefit from implementing blue/green deployments with Amazon ECS. This guide walks through setting up reliable, zero-downtime deployments using AWS CodePipeline and CodeDeploy for your containerized applications. We’ll cover how to configure your ECS environment properly, create automated deployment pipelines, and implement blue/green deployment strategies that minimize risk during updates.
Understanding ECS Deployment Strategies

What is Amazon ECS and why it matters
Amazon Elastic Container Service (ECS) isn’t just another tool in AWS’s massive catalog—it’s the backbone of modern containerized applications. At its core, ECS is a fully managed container orchestration service that handles all the complex tasks of running, stopping, and managing Docker containers.
Think of ECS as the conductor of an orchestra where each container is an instrument. Without proper coordination, you’d just have noise. ECS ensures everything plays in harmony.
Why should you care? Because ECS eliminates the operational headaches of managing container infrastructure. You focus on building great applications while AWS handles the scaling, patching, and monitoring. That’s the dream, right?
Plus, ECS integrates seamlessly with other AWS services like IAM for security, CloudWatch for monitoring, and the services we’ll talk about later—CodePipeline and CodeDeploy.
Blue/Green deployment explained
Blue/Green deployment isn’t rocket science, but it’s pretty close to genius. Here’s the concept:
You have two identical environments: Blue (current production) and Green (new version). Users are hitting the Blue environment while you’re testing the Green one.
Once you’re confident the Green environment works perfectly, you switch traffic over. Boom! Instant deployment with virtually zero downtime.
The magic happens in that traffic switch. With ECS, it’s just updating the target group of a load balancer to point to your new Green task set instead of the Blue one.
If something goes wrong? Just flip back to Blue. No panic, no emergency fixes at 3 AM, no angry customers.
Benefits of Blue/Green over traditional deployments
Traditional deployments are like replacing parts of an airplane while it’s flying. Blue/Green is more like having a second airplane ready to go.
The benefits are massive:
- Zero downtime: Users don’t even notice you’ve deployed
- Instant rollback: Found a bug? Flip back to Blue in seconds
- Complete testing: Test the entire environment, not just the code
- Reduced risk: Validate in production-identical environments
With standard deployments, you’re always taking a risk. Will that new code crash your service? Will users experience errors during the transition?
Blue/Green eliminates these concerns. Your users keep using the Blue environment until Green is 100% ready and verified.
Common challenges in containerized deployments
Container deployments aren’t all sunshine and rainbows. Even with ECS, you’ll face some hurdles:
Database migrations can be tricky. Your Blue and Green environments might need to share the same database, so backward compatibility becomes crucial.
Stateful applications present another challenge. If your containers store state, you need strategies to persist or transfer that state during deployment.
Resource costs double temporarily during deployment since you’re running two environments. This isn’t trivial for large-scale applications.
Configuration drift between environments can cause the dreaded “but it worked in staging” problem.
Session handling requires careful planning. User sessions shouldn’t be dropped during the transition.
The good news? These challenges are all solvable with proper planning and architecture. And that’s exactly what we’ll cover in the upcoming sections.
Setting Up Your ECS Environment

A. Configuring task definitions for seamless deployments
Task definitions are the backbone of your ECS deployments. They’re basically blueprints that tell AWS how to run your containers. For smooth blue/green deployments, you need to structure them right.
First, separate your configuration from your code. Use environment variables for anything that might change between environments. This makes your containers portable across your blue/green setup.
"environment": [
  {"name": "DATABASE_URL", "value": "${database_url}"},
  {"name": "LOG_LEVEL", "value": "info"}
]
Always specify explicit container versions in your task definitions. Using “latest” is a recipe for disaster – you’ll never know which version is actually running in which environment.
Make your task definitions stateless. Any persistent data should live in external services like RDS or S3. When your new (green) environment spins up, it needs to seamlessly access the same data.
B. Container image considerations
Your container images can make or break your blue/green strategy. Build them once, deploy them everywhere.
Multi-stage Docker builds keep your images lean:
FROM node:14 AS builder
WORKDIR /app
COPY . .
RUN npm ci && npm run build

FROM node:14-alpine
COPY --from=builder /app/dist /app
CMD ["node", "app/index.js"]
Smaller images mean faster deployments. A 2GB image might take minutes to pull, while a 200MB one takes seconds.
Cache your images in ECR and use immutable tags (not just “latest”). Each build should generate a unique tag – commit hashes work great.
Pre-warm your containers when possible. Add health checks that verify your app is truly ready, not just that the process started.
C. Optimizing resource allocation
Resource allocation isn’t just about performance – it directly impacts how smoothly your blue/green deployments work.
Right-size your containers. Too much headroom wastes money, too little creates instability during transitions. Monitor your actual usage and adjust:
| Resource | Recommendation |
|---|---|
| CPU | Set soft limits 20% above observed peak |
| Memory | Hard limits 30% above observed peak |
| Disk | Ephemeral only; use external storage for persistence |
Configure proper autoscaling. Your green environment needs capacity to take full load before blue traffic shifts over. Set up target tracking scaling policies based on CPU/memory utilization.
Reserve capacity in your cluster for deployments. Without it, your green environment might not have room to launch.
D. Networking best practices for ECS clusters
Your network setup determines how smoothly traffic shifts between blue and green environments.
Use Application Load Balancers with target groups for each environment. This allows gradual traffic shifting:
Blue Environment (100%) → ALB → Green Environment (0%)
Keep all services in the same VPC but use separate security groups for isolation. Open only the ports you absolutely need.
Configure DNS TTLs appropriately – too long and clients might cache old endpoints, too short and you’ll hammer your DNS servers.
For internal service communication, use service discovery rather than hardcoded endpoints. AWS Cloud Map integrates perfectly with ECS for this.
E. Security configurations for production workloads
Security can’t be an afterthought in containerized environments. Lock things down from day one.
Grant least-privilege permissions using IAM roles for tasks. Each service should have its own role with only the permissions it needs:
{
  "Version": "2012-10-17",
  "Statement": [
    {
      "Effect": "Allow",
      "Action": ["s3:GetObject"],
      "Resource": "arn:aws:s3:::my-bucket/my-app/*"
    }
  ]
}
Encrypt all your data. Use AWS KMS for secrets, enable encryption for EBS volumes, and enforce HTTPS for all traffic.
Implement network security controls with security groups and NACLs. Your tasks should only communicate with necessary services.
Scan your container images for vulnerabilities before deployment. AWS ECR provides built-in scanning or integrate with tools like Clair or Trivy.
Rotate credentials regularly and use AWS Secrets Manager to inject secrets as environment variables rather than baking them into your images.
Leveraging AWS CodePipeline
Building an efficient CI/CD pipeline for containers
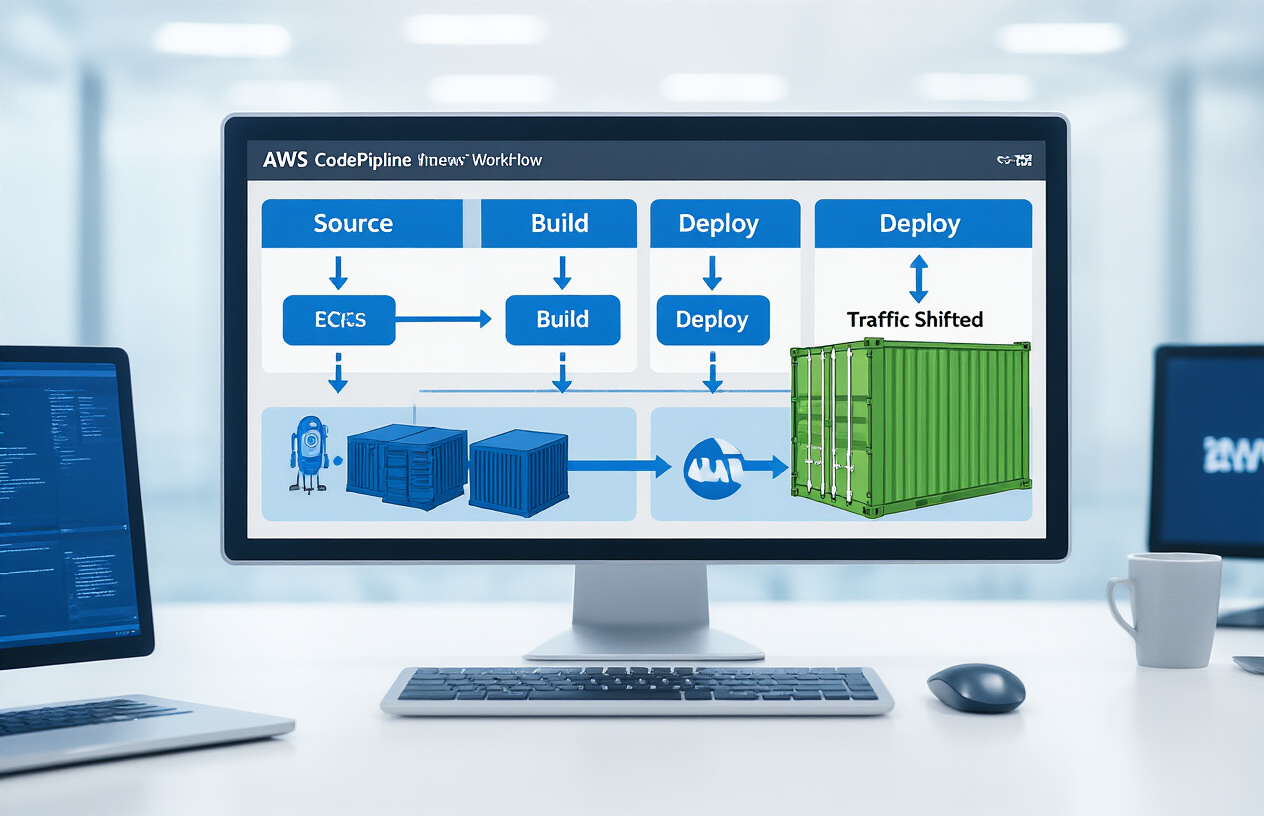
Building a CI/CD pipeline for your ECS deployments isn’t rocket science, but it does require some planning. CodePipeline makes this surprisingly straightforward. The magic happens when you connect your source repository, build processes, and deployment stages into one automated workflow.
Here’s what a solid ECS pipeline typically includes:
- Source stage pulling from GitHub, CodeCommit, or BitBucket
- Build stage using CodeBuild to create container images
- Test stage running automated tests against your images
- Deployment stage handling blue/green deployments via CodeDeploy
The key is automation. Every code push should trigger your pipeline, building new container images, running tests, and deploying to your ECS cluster without manual intervention.
Source control integration options
You’ve got options when connecting your code to CodePipeline:
| Source Provider | Best For | Key Features |
|---|---|---|
| AWS CodeCommit | Teams already in AWS ecosystem | Private, scalable, fully managed |
| GitHub/GitHub Enterprise | Most development teams | Familiar interface, robust community |
| BitBucket | Atlassian-centric teams | Integration with Jira and other Atlassian tools |
| Amazon S3 | Simple artifact storage | Versioning and lifecycle policies |
Each webhook or polling mechanism keeps your pipeline synced with code changes. Using branch-based strategies? CodePipeline handles that too. You can set up different pipelines for dev, staging, and production environments, each tied to specific branches.
Automated testing strategies
Testing containers isn’t an afterthought – it’s essential for reliable deployments. Your pipeline should include:
- Unit tests during the build phase
- Integration tests against your container images
- Security scans for vulnerabilities
- Performance testing for critical workloads
CodeBuild test reports give you visibility into test results right in the pipeline. Better yet, failed tests can automatically stop deployments before they reach production.
Smart teams implement progressive testing – starting with fast, focused tests and expanding to broader integration tests only when the basics pass. This saves compute time and gets feedback to developers faster.
Pipeline monitoring and notifications
Nobody wants to be the last to know when a deployment fails. Set up monitoring and alerts:
- CloudWatch alarms for pipeline failures
- SNS notifications for key stakeholders
- Slack/Teams integrations for team visibility
- Deployment metrics dashboards
What gets measured gets managed. Track metrics like deployment frequency, lead time for changes, and failure rate. These DevOps measurements help you spot bottlenecks.
CodePipeline’s EventBridge integration takes this further – you can trigger Lambda functions on specific pipeline events for custom notifications or remediation actions.
Implementing CodeDeploy for ECS
CodeDeploy Configuration Essentials
Setting up CodeDeploy for ECS isn’t rocket science, but you need to nail a few key components. First, create an AppSpec file – this YAML or JSON file is your deployment’s blueprint. For ECS, your AppSpec needs:
version: 0.0
Resources:
  - TargetService:
      Type: AWS::ECS::Service
      Properties:
        TaskDefinition: <TASK_DEFINITION>
        LoadBalancerInfo:
          ContainerName: "<CONTAINER_NAME>"
          ContainerPort: <PORT>
Don’t forget your IAM roles. CodeDeploy needs permissions to modify your ECS service, talk to your load balancer, and update task definitions. The service role needs these managed policies at minimum:
- AmazonECS-FullAccess
- AWSCodeDeployRoleForECS
Defining Deployment Groups
Deployment groups in CodeDeploy are where the magic happens. They define:
- Your target ECS service
- Load balancer configuration
- Deployment settings and traffic shifting patterns
Here’s what makes a solid deployment group:
- Service selection: Link to your specific ECS service
- Load balancer: Connect both production and test listeners
- Traffic routing: Choose between ALB, NLB, or CloudFront
- Alarms: Integrate CloudWatch alarms to monitor deployments
Traffic Routing Options and Considerations
Traffic routing is where blue/green really shines. CodeDeploy gives you three options:
- All at once: Immediately shift 100% traffic to new tasks (risky but quick)
- Linear: Gradually shift traffic in equal increments (e.g., 10% every 5 minutes)
- Canary: Shift a small percentage first, then the rest after evaluation
Your choice depends on risk tolerance. Running a critical service? Go with canary. Need quick deployments for non-critical apps? All-at-once might work.
The key consideration: balance between deployment speed and risk mitigation.
Rollback Strategies When Deployments Fail
Nobody likes failing deployments, but they happen. CodeDeploy offers automatic rollbacks when:
- CloudWatch alarms trigger
- Deployment timeouts occur
- Custom Lambda validation tests fail
Configure rollbacks in your deployment group settings. The best part? CodeDeploy handles the heavy lifting – routing traffic back to the original task set and terminating the failed deployment.
Smart teams also implement custom health checks through Lambda functions that can trigger rollbacks based on business-specific metrics.
Validation Tests During Deployment
Validation tests are your safety net. CodeDeploy supports hooks at various deployment phases:
- BeforeInstall: Verify prerequisites before deployment starts
- AfterInstall: Run tests after tasks are deployed but before traffic shifts
- AfterAllowTraffic: Verify everything works after traffic shifts
Implement validation through Lambda functions that can:
- Check endpoint health
- Verify business transactions
- Validate database connections
- Compare performance metrics
A solid validation strategy means catching issues before they impact users, not after your support line lights up.
Blue/Green Deployment Implementation
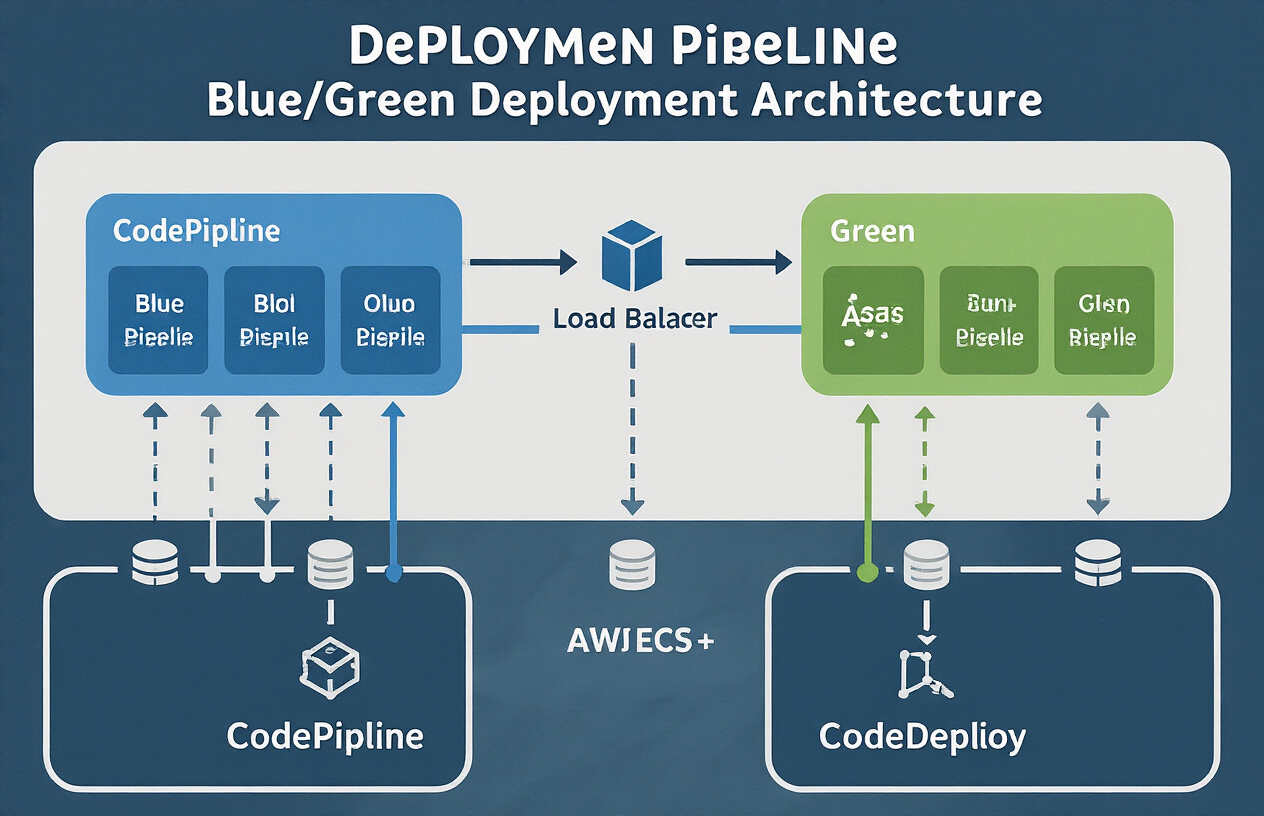
A. Step-by-step deployment workflow
Setting up Blue/Green deployments in ECS with CodePipeline and CodeDeploy isn’t rocket science, but you do need to get the steps right:
- Create two ECS target groups – one for your blue environment (current production) and one for green (new version)
- Configure CodeDeploy application:
aws deploy create-application --application-name ecs-bluegreen-app --compute-platform ECS - Set up deployment group:
aws deploy create-deployment-group \ --application-name ecs-bluegreen-app \ --deployment-group-name ecs-bluegreen-dg \ --deployment-config-name CodeDeployDefault.ECSAllAtOnce \ --service-role-arn arn:aws:iam::123456789012:role/CodeDeployServiceRole \ --load-balancer-info targetGroupPairInfoList=[{targetGroups=[{name=blue-tg},{name=green-tg}]}] - Create appspec.yml in your repository:
version: 0.0 Resources: - TargetService: Type: AWS::ECS::Service Properties: TaskDefinition: <TASK_DEFINITION> LoadBalancerInfo: ContainerName: "web" ContainerPort: 80 - Add CodeDeploy to your pipeline as a deployment stage after your build stage
B. Traffic shifting patterns and best practices
The whole point of Blue/Green is to control how traffic moves to your new version. Choose the pattern that matches your risk tolerance:
Canary: Start with a small percentage of traffic (like 10%) to the green environment, then gradually increase if all looks good. Perfect for catching issues before they affect everyone.
Linear: Shift traffic in equal increments (like 25% every 5 minutes). This gives you a more predictable rollout schedule.
All-at-once: The YOLO approach. Moves 100% of traffic immediately. Only use this for low-risk deployments or when you’ve tested thoroughly.
Best practices that’ll save you headaches:
- Keep deployment configurations in code (Infrastructure as Code)
- Monitor both environments during the shift
- Have clear rollback criteria established before deployment
- Test the entire deployment process in a staging environment
C. Health check configurations
Health checks can make or break your Blue/Green deployment. Get them right:
Path selection: Choose an endpoint that tests critical dependencies:
{
  "healthCheckPath": "/health",
  "healthCheckIntervalSeconds": 30,
  "healthyThresholdCount": 2,
  "unhealthyThresholdCount": 3,
  "healthCheckTimeoutSeconds": 5
}
Don’t just ping / – create a dedicated /health endpoint that checks:
- Database connectivity
- Cache access
- External API dependencies
- Correct configuration loading
Timeout settings: Balance between:
- Too short: Might fail healthy services during temporary network blips
- Too long: Keeps unhealthy instances in rotation
For containerized apps, a good starting point is:
- 5-second timeout
- 30-second interval
- 2 successful checks to mark healthy
- 3 failed checks to mark unhealthy
D. Managing database connections during deployments
Database connections are tricky during Blue/Green – both environments need access but you don’t want to overload your database.
Connection pooling strategies:
- Implement proper connection pooling in both environments
- Set reasonable max connection limits per environment
- Consider using RDS Proxy for automatic connection management
Schema changes:
- Make additive-only changes before deployment (add columns, tables)
- Deploy new code that can work with both old and new schema
- After deployment success, clean up old schema elements
Data consistency techniques:
- Use transactions for critical operations
- Implement eventual consistency where appropriate
- Consider implementing a circuit breaker pattern for database operations
If your application is write-heavy, use a write-behind pattern where writes are queued and processed asynchronously to prevent overwhelming the database during deployment transitions.
Monitoring and Optimizing Your Deployments

Key metrics to track during and after deployments
Deployments can go sideways fast if you’re not watching the right numbers. Here’s what you need to keep an eye on:
- Deployment time: How long does your deployment take? Shorter is better.
- Error rates: Sudden spike in 5xx errors? That’s a red flag.
- CPU and memory utilization: Watch for unusual patterns that might indicate memory leaks.
- Request latency: Users notice when things get slow.
- Task start-up time: How quickly are your containers becoming available?
- Rollback frequency: Too many rollbacks? Your testing process might need work.
- Traffic distribution: During blue/green, check if traffic is routing correctly.
Monitor these and you’ll catch issues before your customers do.
Setting up CloudWatch alarms
CloudWatch alarms are your early warning system. Set these up and thank me later:
aws cloudwatch put-metric-alarm \
  --alarm-name ECS-Deployment-High-Error-Rate \
  --metric-name HTTPCode_Target_5XX_Count \
  --namespace AWS/ApplicationELB \
  --statistic Sum \
  --period 60 \
  --threshold 5 \
  --comparison-operator GreaterThanThreshold \
  --evaluation-periods 3 \
  --alarm-actions arn:aws:sns:region:account-id:my-topic
Don’t just set alarms for failures. Track positive metrics too:
- Successful deployment completion
- Normal latency ranges
- Healthy host count meeting expectations
Make these alarms actionable – they should tell you exactly what’s wrong and ideally how to fix it.
Post-deployment validation techniques
Deployment finished without errors? Great start, but you’re not done yet.
Smoke testing is your best friend here. Create a suite of lightweight tests that hit critical paths in your application. Run them automatically after every deployment.
Canary testing takes this further. Route a small percentage of traffic to your new deployment and analyze:
- Are error rates comparable to production?
- Is latency within acceptable ranges?
- Are all key business transactions completing?
Don’t forget to verify database migrations completed correctly. Nothing ruins your day faster than discovering missing columns or tables hours after deployment.
Synthetic transactions help too – simulate user workflows end-to-end to catch issues real users would experience.
Cost optimization strategies
Blue/green deployments are powerful but can get expensive if you’re not careful. Double infrastructure isn’t cheap!
Try these tactics to keep costs in check:
- Time-box your deployments – Don’t let the “blue” environment run indefinitely after a successful cutover
- Right-size your tasks – Use AWS Compute Optimizer to identify over-provisioned containers
- Schedule non-production deployments – Test environments don’t need to run 24/7
- Use Fargate Spot for the blue environment – If you can handle potential interruptions
- Clean up old task definitions and images – They add up fast!
The biggest cost saving? Automate termination of the old environment once deployment validation passes. I’ve seen teams forget this step and pay double for weeks.
Advanced Deployment Patterns

A. Canary deployments with ECS
Canary deployments aren’t just fancy jargon – they’re your safety net when rolling out updates. With ECS, you can deploy a small percentage of your traffic to the new version, test it in the wild, and then gradually increase the traffic if everything looks good.
Here’s how to set it up:
{
  "deploymentConfiguration": {
    "deploymentCircuitBreaker": {
      "enable": true,
      "rollback": true
    },
    "maximumPercent": 200,
    "minimumHealthyPercent": 100
  }
}
The real magic happens when you combine this with CodeDeploy. You can create traffic shifting rules like:
- 10% for 15 minutes
- 50% for 15 minutes
- 100% if all health checks pass
If something breaks? The system automatically rolls back. No late-night emergency calls needed.
B. Integration with service discovery
Service discovery with ECS is a game-changer. Instead of hardcoding IP addresses or load balancer endpoints, your services can find each other automatically.
AWS Cloud Map integrates seamlessly with ECS:
aws servicediscovery create-service \
  --name api-service \
  --namespace-id ns-abc123 \
  --dns-config "NamespaceId=ns-abc123,RoutingPolicy=WEIGHTED,DnsRecords=[{Type=A,TTL=60}]" \
  --health-check-custom-config "FailureThreshold=1"
Then in your task definition:
"serviceRegistries": [
  {
    "registryArn": "arn:aws:servicediscovery:region:account-id:service/srv-abc123",
    "port": 8080
  }
]
Now your microservices can communicate using friendly DNS names like api-service.local – much cleaner than juggling environment variables with IP addresses.
C. Multi-region deployment considerations
Deploying across multiple regions isn’t just for the big players anymore. It’s essential for disaster recovery and reducing latency.
The key challenges with multi-region ECS deployments:
| Challenge | Solution |
|---|---|
| Image distribution | Use ECR replication or multi-region image builds |
| Configuration management | Parameter Store with replication or region-specific parameters |
| Database synchronization | Aurora Global Database or DynamoDB global tables |
| Traffic routing | Route 53 with health checks and latency-based routing |
Remember to keep your IAM roles and task execution roles consistent across regions. Nothing’s worse than a perfectly good container failing because it can’t access the resources it needs.
D. Containerized microservices deployment strategies
The microservices game requires special deployment tactics. With ECS, you’ve got options:
- Service-by-service rollout: Update services independently based on their dependency chain.
- Parallel deployments: Update independent services simultaneously to reduce overall deployment time.
- Contract testing: Ensure service interfaces don’t break before deployment.
For complex microservice architectures, consider an ECS task for each microservice with its own deployment pipeline. This gives you:
- Independent scaling
- Isolated failure domains
- Service-specific rollback capabilities
Your task definitions should be treated as immutable artifacts – version them in your repository alongside your application code.
E. Automating infrastructure with CloudFormation or Terraform
Manual clicking in the console is so 2010. Modern ECS deployments demand infrastructure as code.
With CloudFormation:
ECSCluster:
  Type: AWS::ECS::Cluster
  Properties:
    ClusterName: !Sub ${AWS::StackName}-cluster
    CapacityProviders:
      - FARGATE
      - FARGATE_SPOT
Terraform fans get even more flexibility:
resource "aws_ecs_cluster" "main" {
  name = "app-cluster"

  setting {
    name  = "containerInsights"
    value = "enabled"
  }
}
The real power move? Create modules for common patterns. A single “microservice” module can wrap up:
- ECS service definition
- Task definition
- Auto-scaling rules
- CloudWatch alarms
- Service discovery entries
This approach means deploying a new microservice takes minutes, not days. And when you need to patch all services for a security update? One change to the module, one PR to review.
Mastering AWS ECS deployments with Blue/Green strategies ensures your applications remain resilient and available during updates. By configuring your ECS environment properly, integrating with CodePipeline for continuous delivery, and leveraging CodeDeploy’s powerful deployment capabilities, you create a robust pipeline that minimizes risk and downtime. Monitoring these deployments provides critical insights that help optimize performance and catch issues before they impact users.
Take your deployment practices to the next level by exploring advanced patterns and continuously refining your approach. Start implementing these best practices today to achieve smoother, more reliable deployments that support your application’s growth. Your development team and users will both appreciate the stability and confidence that comes with well-architected ECS deployment strategies.


