Looking to host your Next.js application on AWS? This guide walks you through the entire deployment process, perfect for web developers and DevOps engineers who want reliable, scalable hosting for their React applications.
We’ll cover everything from preparing your Next.js app for production to choosing between AWS Amplify, Lambda, or container-based solutions. You’ll learn how to set up your development environment correctly and implement AWS security best practices to keep your application safe.
By the end of this guide, you’ll have the knowledge to deploy, optimize, and scale your Next.js application on Amazon’s cloud platform with confidence.
Understanding Next.js and AWS Fundamentals
A. Why Next.js is ideal for modern web applications
Next.js has skyrocketed in popularity among developers for good reason. It simply makes building fast, SEO-friendly React apps a breeze.
The framework shines with its hybrid rendering approach. You get the best of both worlds – static site generation for blazing-fast loading and server-side rendering when you need dynamic content. This flexibility is a game-changer.
Code splitting happens automatically in Next.js. Your users only download the code they actually need for the current page, making your app feel lightning-quick even on slower connections.
Image optimization is built right in. The next/image component handles all the hard work of serving properly sized images for different devices and browsers.
And the developer experience? It’s ridiculously good. Hot reloading, intuitive file-based routing, and API routes that let you build your backend within the same project make development smooth and enjoyable.
B. Key AWS services for hosting Next.js applications
When deploying Next.js on AWS, several services stand out as perfect companions:
AWS Amplify is often the quickest path to production. It handles continuous deployment from your Git repository and automatically configures the right build settings for Next.js apps.
Amazon S3 + CloudFront works brilliantly for hosting static assets and exported Next.js sites, delivering your content with minimal latency worldwide.
AWS Lambda powers serverless functions for your API routes and server-side rendered pages, scaling automatically with your traffic demands.
Container services like ECS or EKS shine for more complex Next.js applications, especially those requiring custom server configurations.
┌────────────────────┬──────────────────────────────────────┐
│ AWS Service        │ Best For                             │
├────────────────────┼──────────────────────────────────────┤
│ Amplify            │ Quick setup, CI/CD pipelines         │
│ S3 + CloudFront    │ Static sites, global distribution    │
│ Lambda + API GW    │ Serverless API routes, SSR           │
│ ECS/EKS            │ Custom server.js, complex configs    │
└────────────────────┴──────────────────────────────────────┘
C. Benefits of deploying Next.js on AWS infrastructure
AWS and Next.js together create a powerhouse combination that’s hard to beat.
The global infrastructure of AWS means your Next.js app loads quickly for users anywhere in the world. With edge locations across continents, your content delivery becomes significantly faster.
Scalability happens automatically. Your application can handle sudden traffic spikes without breaking a sweat, with resources scaling up and down based on demand.
Security is rock-solid with AWS’s compliance certifications and built-in protections. Your Next.js application benefits from enterprise-grade security measures that would be difficult to implement yourself.
The monitoring tools are comprehensive too. CloudWatch gives you insights into performance issues before they affect users, while AWS X-Ray helps trace requests through your application.
Integration with the broader AWS ecosystem means your Next.js app can easily connect to managed databases, authentication services, AI capabilities, and hundreds of other services without leaving the AWS environment.
D. Cost considerations and optimization strategies
The cloud bill can creep up on you if you’re not careful, but there are smart ways to keep costs predictable while deploying Next.js on AWS.
Start with a pay-as-you-go approach. The serverless model works perfectly for most Next.js applications – you only pay for actual compute time and data transfer, not for idle servers.
Optimize your image delivery. AWS CloudFront combined with Next.js’s built-in image optimization dramatically reduces bandwidth costs while improving load times.
Take advantage of the AWS Free Tier when starting out. It provides generous allowances for many services that can host Next.js applications.
Set up billing alerts early. AWS Budget Alerts notify you before costs exceed your expected threshold, preventing surprise bills at the end of the month.
Cache aggressively. Proper caching strategies at both the CloudFront and application levels reduce compute costs and improve performance simultaneously.
Use Spot Instances for non-critical workloads. If you’re running containers for your Next.js app, Spot Instances can reduce costs by up to 90% compared to on-demand pricing.
Setting Up Your Development Environment

A. Required tools and dependencies
Before diving into AWS deployment for your Next.js app, you need to set up your development environment properly. Trust me, this step saves hours of troubleshooting later.
First, install these essential tools:
- Node.js (v14 or later) – The foundation for running Next.js
- npm or Yarn – Package managers to handle dependencies
- Git – For version control and deployment workflows
- AWS CLI – Command-line tool for interacting with AWS services
- Text editor/IDE – VS Code works great with helpful extensions
For AWS-specific deployment, you’ll also need:
- AWS CDK – Install it globally with
npm install -g aws-cdk - Serverless Framework (optional) – Great for Lambda deployments
- Docker – Essential for container-based deployments
Your package.json should include these key dependencies:
{
  "dependencies": {
    "next": "^12.0.0",
    "react": "^17.0.2",
    "react-dom": "^17.0.2",
    "aws-sdk": "^2.1001.0"
  },
  "devDependencies": {
    "aws-cdk-lib": "^2.0.0",
    "eslint": "^8.0.0",
    "typescript": "^4.4.4"
  }
}
B. Configuring AWS CLI and credentials
Got your tools? Now let’s set up your AWS access.
First, create an IAM user in the AWS console with programmatic access and appropriate permissions. At minimum, you’ll need:
- AmazonS3FullAccess
- CloudFrontFullAccess
- AmazonRoute53FullAccess
- AmazonCloudWatchFullAccess
After creating the user, download the access key ID and secret.
Now run:
aws configure
You’ll be prompted to enter:
- AWS Access Key ID
- AWS Secret Access Key
- Default region (e.g., us-east-1)
- Default output format (json recommended)
This creates config files in your ~/.aws/ directory. To verify everything’s working:
aws sts get-caller-identity
If you see your account details, you’re good to go!
For CI/CD pipelines, consider using environment variables or AWS Secrets Manager instead of hardcoded credentials.
C. Creating a Next.js project optimized for AWS deployment
Time to create a Next.js project that’ll play nicely with AWS.
Start with:
npx create-next-app my-aws-app
cd my-aws-app
Now, let’s optimize it for AWS:
- Configure environment variables – Create
.env.localfor development and.env.productionfor AWS-specific variables. - Update next.config.js:
module.exports = {
  reactStrictMode: true,
  images: {
    domains: ['your-s3-bucket.s3.amazonaws.com'],
    loader: 'default'
  },
  experimental: {
    outputStandalone: true,
  }
}
- Create a custom server.js file for Lambda or container deployments:
const { createServer } = require('http')
const { parse } = require('url')
const next = require('next')

const dev = process.env.NODE_ENV !== 'production'
const app = next({ dev })
const handle = app.getRequestHandler()

app.prepare().then(() => {
  createServer((req, res) => {
    const parsedUrl = parse(req.url, true)
    handle(req, res, parsedUrl)
  }).listen(3000, (err) => {
    if (err) throw err
    console.log('> Ready on http://localhost:3000')
  })
})
- Add AWS deployment scripts to package.json:
"scripts": {
  "build": "next build",
  "export": "next build && next export",
  "deploy:s3": "aws s3 sync out/ s3://your-bucket-name",
  "deploy:cloudfront": "aws cloudfront create-invalidation --distribution-id YOUR_DIST_ID --paths '/*'"
}
Preparing Your Next.js Application for Production

Optimizing build configurations
Getting your Next.js app ready for AWS means tweaking your build settings for maximum performance. Start by customizing your next.config.js file:
module.exports = {
  reactStrictMode: true,
  compress: true,
  poweredByHeader: false,
  productionBrowserSourceMaps: false,
  images: {
    domains: ['your-aws-s3-bucket.amazonaws.com'],
  }
}
This config disables unnecessary source maps, removes the “powered by” header (better security!), and enables compression.
Implementing environment variables for different deployment stages
Environment variables are your best friend when deploying to different environments. Create separate .env files for each stage:
.env.development.env.staging.env.production
Example of a production env file:
NEXT_PUBLIC_API_URL=https://api.yourdomain.com/v1
AWS_REGION=us-east-1
CACHE_TTL=3600
Remember that only variables prefixed with NEXT_PUBLIC_ will be available client-side. Keep sensitive info server-side only!
Setting up server-side rendering considerations
SSR works differently on AWS than on your local machine. You’ll need to adjust your data fetching strategy based on your AWS setup.
When using Lambda:
- Keep functions small and focused
- Minimize cold starts by optimizing imports
- Use connection pooling for databases
For container deployments:
- Configure proper memory allocation
- Implement health checks
- Set appropriate scaling policies
Handling static assets efficiently
Static assets slow down your site if not handled correctly. Use these strategies:
- Enable the Next.js automatic image optimization
- Store larger media files in S3 with CloudFront CDN
- Configure proper cache headers:
// Custom _middleware.js for asset caching
export function middleware(req) {
  const response = NextResponse.next()

  if (req.url.includes('/images/')) {
    response.headers.set('Cache-Control', 'public, max-age=31536000, immutable')
  }

  return response
}
Testing your application before deployment
Don’t skip testing! Before pushing to AWS:
- Run a production build locally:
next build && next start - Check for build warnings and eliminate them
- Verify all API endpoints work with production variables
- Test on slow connections by throttling your network
- Run Lighthouse audits for performance bottlenecks
- Test your error boundaries by forcing failures
Fix issues locally first—it’s cheaper and faster than debugging in AWS.
Choosing the Right AWS Deployment Strategy

A. Serverless deployment with AWS Lambda and API Gateway
Going serverless with Next.js? Smart move. AWS Lambda paired with API Gateway gives you a truly scalable setup without the infrastructure headaches.
Here’s the deal: Lambda functions handle your Next.js API routes and server-side rendering while API Gateway routes HTTP requests to the right Lambda function. The beauty is you only pay for what you use – no traffic means near-zero costs.
Setup isn’t complex:
- Bundle your Next.js app with AWS Lambda adapters
- Create Lambda functions for your app’s rendering
- Configure API Gateway as your HTTP endpoint
- Set up proper routing rules
But watch out for cold starts. That first request might be sluggish if your Lambda hasn’t been called recently.
B. Container-based deployment with ECS or EKS
Got a complex Next.js app? Containers might be your best bet. AWS offers two solid options:
ECS (Elastic Container Service) is simpler to set up and manage. Perfect if you’re not looking to dive deep into Kubernetes complexities.
EKS (Elastic Kubernetes Service) gives you more control and portability. Great if you’re already comfortable with Kubernetes or need its advanced orchestration.
With containers, you get:
- Consistent environments across development and production
- Better resource utilization than EC2 instances
- Easier scaling based on traffic patterns
- Simplified deployment pipelines
The container approach really shines for larger Next.js applications with multiple services or microservices architecture.
C. Traditional EC2 instance deployment
Sometimes the classic approach works best. EC2 instances give you complete control over your Next.js deployment environment.
You’ll handle:
- Server provisioning
- Runtime environment setup
- Scaling configuration
- Load balancing
- Deployment pipelines
This approach makes sense when you need specific OS-level customizations or when you’re migrating existing infrastructure.
Pro tip: Use an Auto Scaling Group with a Load Balancer to handle traffic spikes. And consider setting up a CI/CD pipeline with AWS CodeDeploy for smoother deployments.
D. Amplify hosting for simplified workflows
Want the easiest route possible? AWS Amplify is built specifically for web applications like those built with Next.js.
With Amplify, you get:
- Git-based workflow (connect your GitHub/GitLab repo)
- Automatic builds and deployments
- Preview environments for pull requests
- Built-in CDN and HTTPS
- Simple domain management
Amplify abstracts away most of the AWS complexity while still giving you the benefits of serverless architecture. It’s particularly great for teams focused on fast iteration and frontend development.
Step-by-Step AWS Amplify Deployment
A. Connecting your Git repository to AWS Amplify
Connecting your Next.js app to AWS Amplify is surprisingly easy. First, log into your AWS console and head to the Amplify service. Click “New app” and select “Host web app.”
You’ll need to choose your Git provider – GitHub, GitLab, BitBucket, or AWS CodeCommit all work great. Grant AWS access to your repositories when prompted.
Pick the repo containing your Next.js app from the list. If you don’t see it, check your permissions or try refreshing.
Select the branch you want to deploy (usually main or master for production). Amplify will automatically detect that you’re using Next.js and suggest appropriate build settings.
What’s cool about this approach? Your code stays in your familiar Git workflow, and Amplify handles the heavy lifting of deployments.
B. Configuring build settings and environment variables
Amplify will pre-populate build settings for Next.js apps, but you might need to tweak them.
The default build spec typically looks like:
version: 1
frontend:
  phases:
    preBuild:
      commands:
        - npm ci
    build:
      commands:
        - npm run build
  artifacts:
    baseDirectory: .next
    files:
      - '**/*'
  cache:
    paths:
      - node_modules/**/*
Need environment variables? Add them in the “Environment variables” section. Common ones include:
- API keys
- Backend service URLs
- Feature flags
- Stage indicators (dev/staging/prod)
These variables are encrypted at rest and injected during build time. For sensitive values like API keys, use Amplify’s “hidden” option to keep them secure.
C. Setting up custom domains and HTTPS
Nobody wants to use those clunky default Amplify URLs in production. Here’s how to get your custom domain working:
- In your Amplify app dashboard, navigate to “Domain Management”
- Click “Add domain” and enter your domain name
- Verify ownership – you can do this through your DNS provider by adding the records Amplify provides
- Select your subdomains (www, dev, etc.)
Amplify automatically provisions an SSL certificate through AWS Certificate Manager – no more messing with certificate renewals!
The DNS verification might take a few minutes to a few hours to propagate. Once verified, your app becomes available at your custom domain with HTTPS enabled.
Pro tip: If you’re using Route 53 for DNS, the verification process is practically automatic.
D. Implementing CI/CD pipelines for automatic deployments
This is where Amplify really shines. Once connected to your Git repo, every push to your specified branch triggers an automatic build and deployment.
Want to get fancy? You can set up:
- Preview deployments for pull requests
- Branch-specific environments (dev, staging, prod)
- Password protection for specific branches
To customize your CI/CD workflow, edit the build settings to include test runs:
preBuild:
  commands:
    - npm ci
    - npm run test
You can also set up notifications via email or Slack to alert your team when deployments succeed or fail.
Bonus tip: Use branch patterns like feature/* to automatically deploy all feature branches to separate URLs for easier testing and QA.
Serverless Deployment with AWS Lambda
Architecting your Next.js app for serverless
Serverless and Next.js make a powerful combo, but you need to structure your app properly to reap the benefits. The first thing to understand is that serverless functions are stateless—each request gets a fresh instance without memory of previous requests.
Break down your Next.js app into smaller, function-sized chunks. Your API routes are perfect candidates for Lambda functions. Each API endpoint can become its own function, handling specific tasks without carrying unnecessary baggage.
For page routing, you’ll need to decide what renders where:
- Static pages should be pushed to CDN
- Dynamic pages will need Lambda backing
File structure matters too. Keep your Lambda-bound code lightweight by separating concerns:
/pages
  /api         # Each file becomes a Lambda function
  /components  # Shared UI elements
  /lib         # Shared utilities
Watch your dependencies! Lambda has size limits (50MB compressed), so audit your node_modules regularly. Use techniques like tree-shaking and dynamic imports to slim things down.
Creating and configuring Lambda functions
Setting up Lambdas for Next.js doesn’t have to be painful. The AWS Serverless Application Model (SAM) or AWS CDK can automate much of this process.
First, install the necessary tools:
npm install -g aws-sam-cli
# or for CDK
npm install -g aws-cdk
Your Lambda configuration should include:
Resources:
  NextJsFunction:
    Type: AWS::Serverless::Function
    Properties:
      Handler: index.handler
      Runtime: nodejs14.x
      MemorySize: 1024
      Timeout: 10
Memory matters for Next.js performance—don’t skimp here. Start with at least 1024MB and monitor from there.
Set environment variables directly in your Lambda config:
Environment:
  Variables:
    DATABASE_URL: your-db-connection
    API_SECRET: ${ssm:/api/secret}
The beauty of this approach? You can deploy different pages to different Lambda functions, scaling parts of your app independently.
Setting up API Gateway endpoints
API Gateway acts as the traffic cop for your serverless Next.js app. It routes incoming requests to the right Lambda function.
Create a new REST API in API Gateway and set up your routes to match your Next.js paths. You’ll need to map:
GET  /{proxy+} -> NextJsFunction
POST /{proxy+} -> NextJsFunction
That {proxy+} notation is crucial—it catches all paths and passes them to your Lambda for Next.js to handle internally.
For custom domains, configure the API Gateway domain name settings:
aws apigateway create-domain-name \
  --domain-name api.yourdomain.com \
  --certificate-arn arn:aws:acm:region:id:certificate/id
Then create a base path mapping to connect your API with your domain.
Don’t forget CORS if your frontend and backend are separate:
{
  "AllowOrigins": ["https://yourdomain.com"],
  "AllowMethods": ["GET", "POST", "OPTIONS"],
  "AllowHeaders": ["Content-Type", "Authorization"]
}
Deploying and testing your serverless application
Deployment time! Package everything up with SAM:
sam package \
  --template-file template.yaml \
  --output-template-file packaged.yaml \
  --s3-bucket your-deployment-bucket
Then deploy:
sam deploy \
  --template-file packaged.yaml \
  --stack-name next-js-serverless \
  --capabilities CAPABILITY_IAM
After deployment, test all your routes. Start with the happy paths:
- Does the home page load?
- Do API calls work?
- What about dynamic routes?
Then check the error cases—404s, bad inputs, etc.
Monitor your Lambda performance in CloudWatch. Look for:
- Cold start times (often a problem with Next.js)
- Memory usage (bump it if you’re close to the limit)
- Error rates (especially timeouts)
A common gotcha: Lambda cold starts can make the first load slow. Consider provisioned concurrency for frequently accessed routes:
ProvisionedConcurrencyConfig:
  ProvisionedConcurrentExecutions: 5
This keeps functions warm and ready to respond instantly, giving your users that snappy experience they expect from Next.js apps.
Container-Based Deployment Options
A. Containerizing your Next.js application with Docker
Docker makes your Next.js app deployable anywhere with consistent behavior. Here’s how to containerize your app:
First, create a Dockerfile in your project root:
FROM node:18-alpine AS builder
WORKDIR /app
COPY package*.json ./
RUN npm install
COPY . .
RUN npm run build

FROM node:18-alpine AS runner
WORKDIR /app
COPY --from=builder /app/next.config.js ./
COPY --from=builder /app/public ./public
COPY --from=builder /app/.next ./.next
COPY --from=builder /app/node_modules ./node_modules
COPY --from=builder /app/package.json ./package.json

EXPOSE 3000
CMD ["npm", "start"]
This two-stage build keeps your image slim. Now build and test locally:
docker build -t nextjs-app .
docker run -p 3000:3000 nextjs-app
B. Deploying to Amazon ECS for orchestrated containers
ECS is perfect for Next.js apps when you need more control than serverless but less complexity than Kubernetes.
Steps to deploy on ECS:
- Push your Docker image to Amazon ECR:
aws ecr create-repository --repository-name nextjs-app aws ecr get-login-password | docker login --username AWS --password-stdin <your-account-id>.dkr.ecr.<region>.amazonaws.com docker tag nextjs-app:latest <your-account-id>.dkr.ecr.<region>.amazonaws.com/nextjs-app:latest docker push <your-account-id>.dkr.ecr.<region>.amazonaws.com/nextjs-app:latest - Create an ECS cluster using Fargate (serverless compute for containers)
- Define a task definition specifying CPU/memory requirements
- Create an ECS service to maintain desired instance count
C. Using Amazon EKS for Kubernetes-based deployments
Kubernetes is overkill for many Next.js apps, but perfect for complex microservice architectures.
To deploy on EKS:
- Create an EKS cluster:
eksctl create cluster --name nextjs-cluster --region us-east-1 --nodegroup-name standard-workers --node-type t3.medium --nodes 3 --nodes-min 1 --nodes-max 4 - Create deployment manifests:
# deployment.yaml apiVersion: apps/v1 kind: Deployment metadata: name: nextjs-app spec: replicas: 3 selector: matchLabels: app: nextjs-app template: metadata: labels: app: nextjs-app spec: containers: - name: nextjs-app image: <your-account-id>.dkr.ecr.<region>.amazonaws.com/nextjs-app:latest ports: - containerPort: 3000 - Apply the manifests:
kubectl apply -f deployment.yaml
kubectl apply -f service.yaml
D. Setting up load balancing and auto-scaling
Container deployments shine with proper load balancing and auto-scaling.
For ECS:
- Create an Application Load Balancer
- Configure target groups to route traffic to your containers
- Set up auto-scaling based on CPU utilization:
aws application-autoscaling register-scalable-target \
  --service-namespace ecs \
  --scalable-dimension ecs:service:DesiredCount \
  --resource-id service/<cluster-name>/<service-name> \
  --min-capacity 2 \
  --max-capacity 10
For EKS:
- Use Kubernetes Horizontal Pod Autoscaler:
apiVersion: autoscaling/v2
kind: HorizontalPodAutoscaler
metadata:
  name: nextjs-app-hpa
spec:
  scaleTargetRef:
    apiVersion: apps/v1
    kind: Deployment
    name: nextjs-app
  minReplicas: 2
  maxReplicas: 10
  metrics:
  - type: Resource
    resource:
      name: cpu
      target:
        type: Utilization
        averageUtilization: 70
In both cases, you’ll get dynamic scaling to handle traffic spikes while keeping costs down during quiet periods.
Advanced AWS Configuration for Production
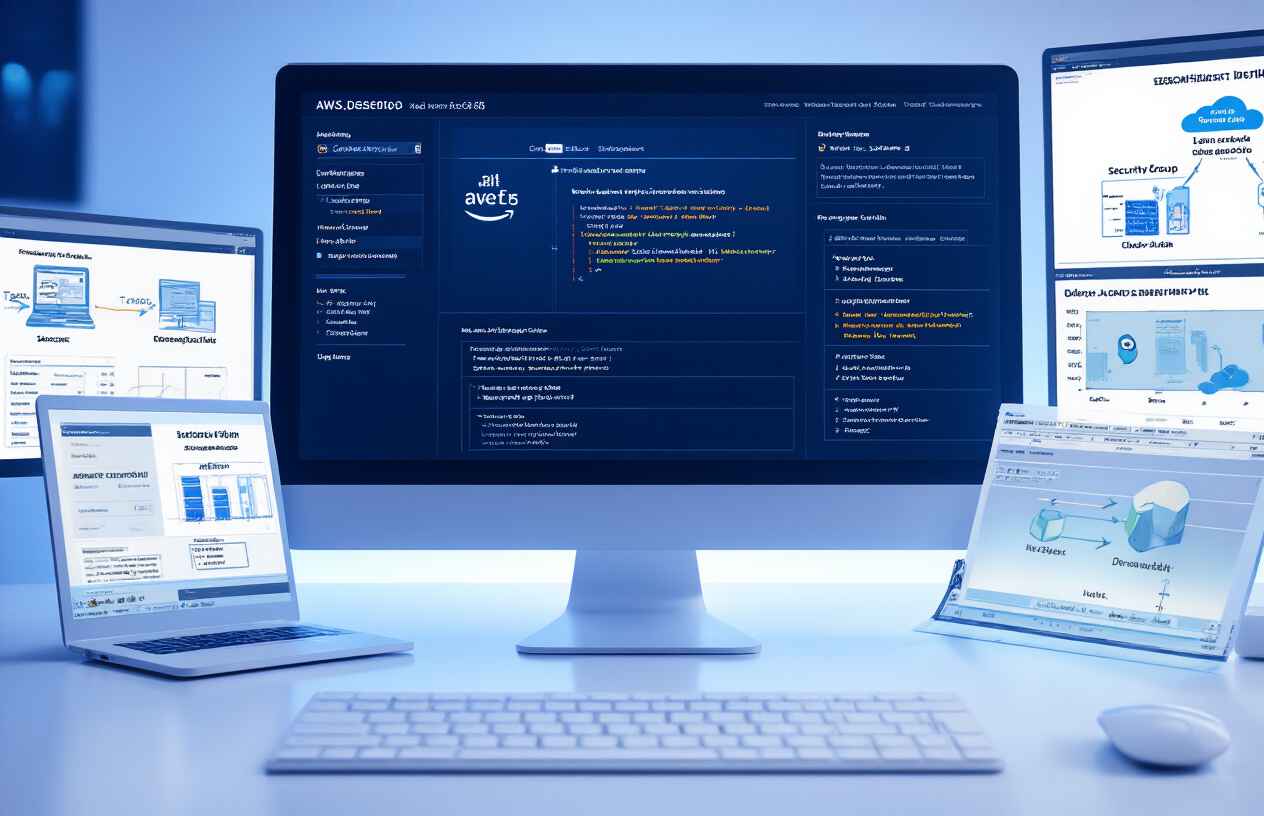
Implementing CDN with CloudFront for better performance
Running a Next.js app in production without a CDN is like driving a sports car on a dirt road. You’re not getting the most out of it.
CloudFront supercharges your Next.js application by caching content at edge locations worldwide. This means your users get lightning-fast responses no matter where they’re located.
Setting up CloudFront is straightforward:
- Navigate to the CloudFront console
- Create a distribution
- Point it to your origin (Amplify, EC2, or ECS)
- Configure cache behaviors:
- Cache static assets with long TTLs
- Set proper cache policies for API routes
For Next.js specifically, add these settings:
{
  "CacheBehaviors": {
    "PathPattern": "/_next/static/*",
    "MinTTL": 31536000
  }
}
Setting up database connections (RDS, DynamoDB)
Your database choice can make or break your Next.js app on AWS. Let’s get this right.
For relational data, Amazon RDS is your friend. For NoSQL, DynamoDB shines.
Here’s how to connect your Next.js app to RDS:
// utils/db.js
import mysql from 'mysql2/promise';

export async function connectToDatabase() {
  return await mysql.createConnection({
    host: process.env.DB_HOST,
    user: process.env.DB_USER,
    password: process.env.DB_PASSWORD,
    database: process.env.DB_NAME,
    ssl: {
      rejectUnauthorized: true
    }
  });
}
For DynamoDB, you’ll want:
import { DynamoDBClient } from "@aws-sdk/client-dynamodb";
import { DynamoDBDocumentClient } from "@aws-sdk/lib-dynamodb";

const client = new DynamoDBClient({ region: "us-east-1" });
const docClient = DynamoDBDocumentClient.from(client);
Store these credentials securely using AWS Secrets Manager or Parameter Store, not in your code!
Configuring S3 for static asset storage
S3 is perfect for storing those hefty images, videos, and other static assets your Next.js app might use.
First, create a bucket:
aws s3 mb s3://my-nextjs-assets --region us-east-1
Then configure CORS to allow your domain:
[
  {
    "AllowedHeaders": ["*"],
    "AllowedMethods": ["GET"],
    "AllowedOrigins": ["https://yourdomain.com"],
    "ExposeHeaders": []
  }
]
For uploading directly from your Next.js app:
import { S3Client, PutObjectCommand } from "@aws-sdk/client-s3";

const s3Client = new S3Client({ region: "us-east-1" });

async function uploadToS3(file, key) {
  const command = new PutObjectCommand({
    Bucket: "my-nextjs-assets",
    Key: key,
    Body: file,
    ContentType: file.type
  });

  return s3Client.send(command);
}
Implementing monitoring and logging with CloudWatch
Flying blind in production is asking for trouble. CloudWatch gives you eyes and ears for your Next.js app.
Set up a custom dashboard with these metrics:
- API Gateway request counts and latencies
- Lambda execution times and error rates
- CloudFront cache hit ratios
- RDS database connections and query performance
For detailed application logging, use the AWS SDK:
import { CloudWatchLogsClient, PutLogEventsCommand } from "@aws-sdk/client-cloudwatch-logs";

const client = new CloudWatchLogsClient({ region: "us-east-1" });

export async function logError(error) {
  const command = new PutLogEventsCommand({
    logGroupName: "/aws/lambda/nextjs-production",
    logStreamName: "errors",
    logEvents: [
      {
        timestamp: Date.now(),
        message: JSON.stringify(error)
      },
    ],
  });

  await client.send(command);
}
Create CloudWatch Alarms to notify you when things go sideways. Set thresholds for error rates, response times, and resource utilization to catch issues before users notice.
Performance Optimization and Scaling

Implementing caching strategies
Ever tried loading your Next.js app on a slow connection? Painful, right? AWS offers several caching solutions that’ll make your app lightning fast.
CloudFront is your best friend here. This CDN caches your static assets and API responses at edge locations worldwide. Setup takes maybe 15 minutes but saves you hours of optimization headaches later.
// next.config.js example with caching headers
module.exports = {
  async headers() {
    return [
      {
        source: '/static/:path*',
        headers: [
          {
            key: 'Cache-Control',
            value: 'public, max-age=31536000, immutable',
          },
        ],
      },
    ]
  },
}
Don’t forget about ElastiCache if you’re dealing with dynamic data. Redis works beautifully with Next.js for storing session data, API responses, or anything you fetch repeatedly.
Auto-scaling configurations for handling traffic spikes
Traffic spikes happen. Your viral marketing campaign works too well, and suddenly your servers melt down. Not cool.
AWS Auto Scaling Groups are your safety net. They automatically adjust your EC2 instance count based on traffic patterns. Here’s what a solid setup looks like:
- Minimum instances: 2 (for high availability)
- Maximum instances: 10 (or whatever your budget allows)
- Scale-out policy: Add instance when CPU > 70% for 2 minutes
- Scale-in policy: Remove instance when CPU < 30% for 10 minutes
For serverless Next.js deployments, Lambda and API Gateway handle auto-scaling automatically. You just pay for what you use.
AWS Fargate with ECS is another great option. It scales your containers without the infrastructure headaches:
aws ecs update-service --service nextjs-service --desired-count 5
Performance monitoring and benchmarking
Flying blind with performance is asking for trouble. AWS CloudWatch gives you the visibility you need.
Set up custom dashboards for key metrics:
- Response time (p95, p99)
- Error rates
- CPU/memory usage
- Lambda cold starts
But raw numbers aren’t enough. Use X-Ray to trace requests through your application and spot bottlenecks.
For real user monitoring, hook up CloudWatch RUM. It shows you how actual visitors experience your site, not just server metrics.
// Example CloudWatch alarm for high latency
aws cloudwatch put-metric-alarm \
  --alarm-name "HighLatency" \
  --metric-name "Latency" \
  --namespace "AWS/ApiGateway" \
  --statistic "Average" \
  --period 300 \
  --threshold 1000 \
  --comparison-operator "GreaterThanThreshold" \
  --evaluation-periods 1 \
  --alarm-actions "arn:aws:sns:us-east-1:123456789012:AlarmNotification"
Cost optimization techniques for AWS resources
AWS bills can spiral out of control faster than you’d expect. A few smart moves can save you hundreds or thousands monthly.
First, use Savings Plans for predictable workloads. They’re like Reserved Instances but more flexible, with savings up to 72%.
For Next.js static assets, S3 + CloudFront is dirt cheap compared to serving from EC2. A typical setup costs pennies per month for thousands of visitors.
Lambda costs add up with high traffic. Keep functions warm with scheduled pings and optimize cold start times:
// Reduce Lambda size with webpack
const nodeExternals = require('webpack-node-externals');

module.exports = {
  target: 'node',
  externals: [nodeExternals()],
  // more config...
}
Finally, set up AWS Budgets with alerts. Getting a text when you’re approaching your budget beats the shock of an unexpected bill.
Security Best Practices for Next.js on AWS

Implementing AWS IAM roles and permissions
Security isn’t optional when deploying Next.js apps on AWS—it’s non-negotiable. Start with proper IAM configuration. Create role-specific permissions following the principle of least privilege.
For your Next.js deployment, you’ll want:
# Example IAM policy for Next.js deployment
{
  "Version": "2012-10-17",
  "Statement": [
    {
      "Effect": "Allow",
      "Action": [
        "s3:PutObject",
        "s3:GetObject",
        "cloudfront:CreateInvalidation"
      ],
      "Resource": [
        "arn:aws:s3:::your-nextjs-bucket/*",
        "arn:aws:cloudfront::distribution/YOUR_DISTRIBUTION_ID"
      ]
    }
  ]
}
Don’t use the root account for deployments. Create separate deployment users with scoped permissions for CI/CD pipelines.
Securing API endpoints and sensitive data
Your Next.js API routes need protection. A few must-follow rules:
- Store secrets in AWS Secrets Manager or Parameter Store—never in your codebase or environment files that get committed.
- Implement proper CORS headers:
// pages/api/example.js
export default function handler(req, res) {
  res.setHeader('Access-Control-Allow-Origin', 'https://yourdomain.com');
  res.setHeader('Access-Control-Allow-Methods', 'GET,POST');
  // Rest of your API logic
}
- Use middleware for authentication. JWT tokens work great with Next.js API routes when paired with Cognito or Auth0.
- Encrypt data in transit using HTTPS—AWS Certificate Manager makes this straightforward.
Setting up WAF and Shield for protection
The web is a dangerous place. AWS WAF acts as your bouncer.
Set up AWS WAF with these basic rules:
- Block common SQL injection patterns
- Rate limiting to prevent brute force attacks
- Geo-restrictions if your app is region-specific
- Block known bad IP addresses
For high-traffic Next.js apps, AWS Shield Standard comes free and defends against common DDoS attacks. For mission-critical applications, Shield Advanced provides specialized protection.
Implementing regular security audits and updates
Security isn’t set-it-and-forget-it. Schedule these critical activities:
- Weekly npm audit fixes for your Next.js dependencies
- Monthly AWS Config rule reviews
- Quarterly penetration testing
- Enable GuardDuty for continuous threat detection
Set up CloudWatch alerts for suspicious activities like unexpected API Gateway traffic spikes or Lambda execution errors.
Finally, automate your security updates using AWS Systems Manager Patch Manager for your EC2 instances or automated container rebuilds for ECS/EKS deployments.

Deploying Next.js applications on AWS offers developers multiple pathways to create scalable, high-performance web applications. Whether you choose the simplicity of AWS Amplify for seamless continuous deployment, the serverless approach with Lambda for cost efficiency, or container-based solutions for greater flexibility, AWS provides comprehensive tools to support your Next.js projects. The key is selecting the deployment strategy that best aligns with your specific application requirements and team capabilities.
As you implement your Next.js application on AWS, remember to prioritize security best practices and performance optimization from the start. Regularly monitor your application metrics, implement proper IAM policies, and leverage AWS’s scaling capabilities to ensure your application remains responsive and secure as user demand grows. With the right configuration and attention to these critical areas, your Next.js application will thrive in AWS’s robust cloud environment.


