Setting up a web server manually through the AWS console gets old fast. Every time you need to spin up a new environment, you’re clicking through dozens of screens, hoping you don’t miss a security group rule or forget to attach that storage volume.
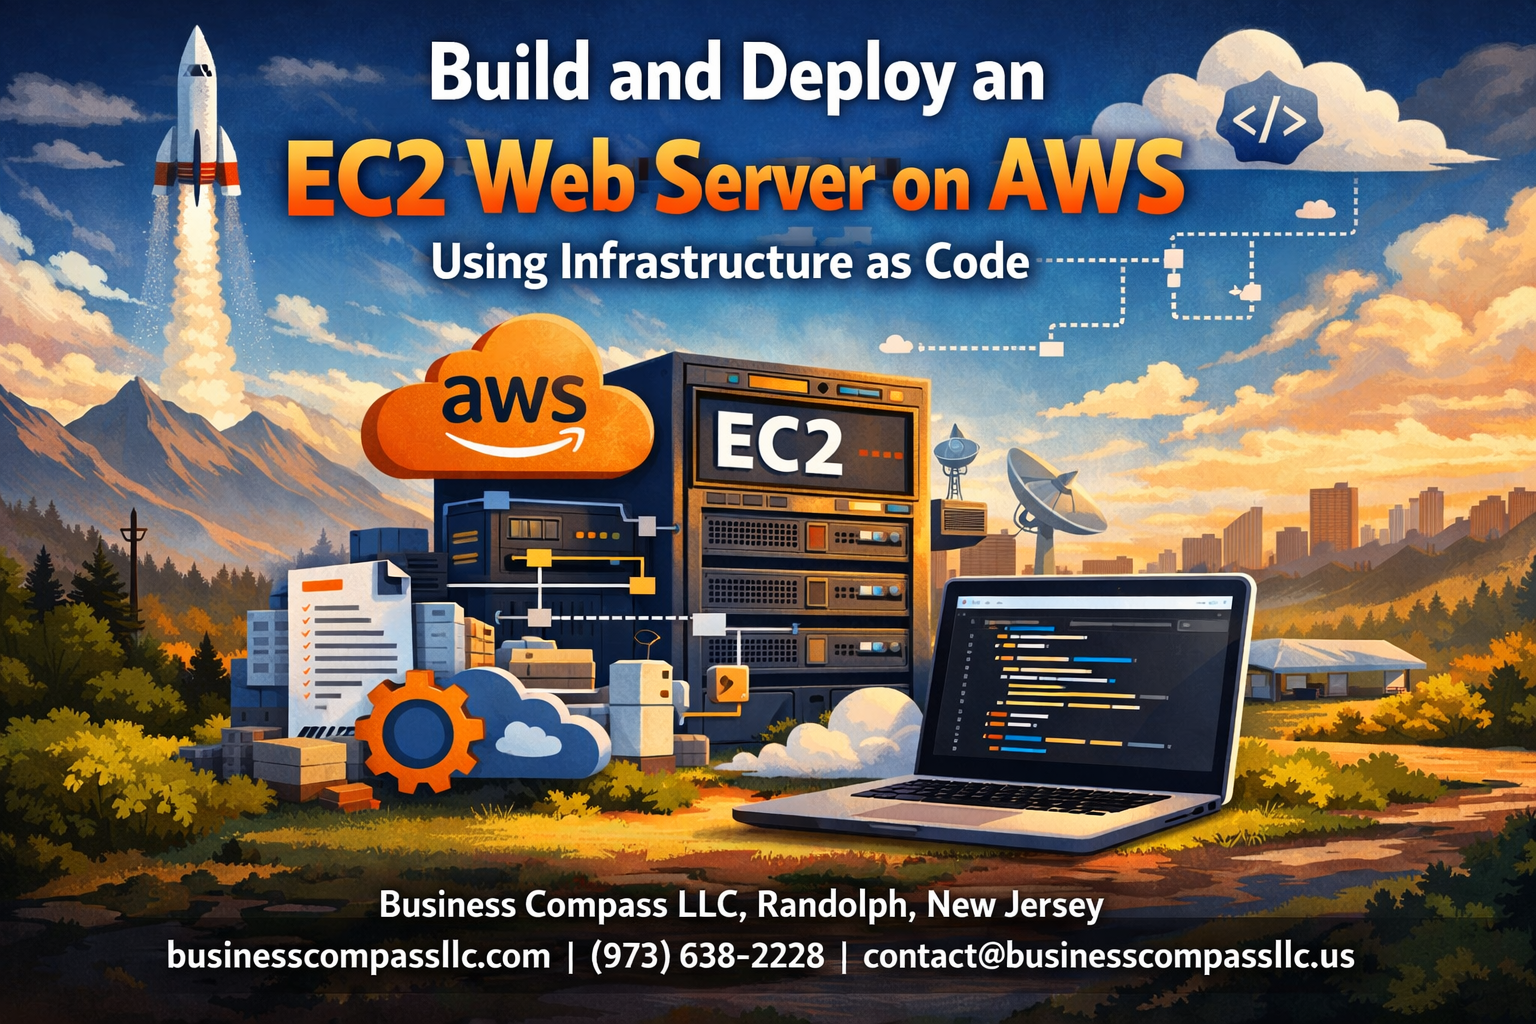
This guide walks you through EC2 web server deployment using Infrastructure as Code AWS principles, specifically with Terraform. Perfect for developers, DevOps engineers, and system administrators who want to automate their AWS deployments and stop treating servers like pets.
You’ll learn how to write Terraform EC2 tutorial code that creates reproducible, scalable infrastructure every time. We’ll cover EC2 instance configuration from scratch, including VPC setup, security groups, and automated software installation. Plus, you’ll discover EC2 security optimization techniques and AWS cloud infrastructure management best practices that’ll keep your deployments running smoothly.
By the end, you’ll have a solid Terraform AWS deployment workflow that turns infrastructure provisioning from a manual chore into a simple terraform apply command.
Understanding Infrastructure as Code Fundamentals for AWS

Define Infrastructure as Code and its key advantages
Infrastructure as Code (IaC) represents a fundamental shift in how we manage and deploy cloud resources like EC2 web servers. Instead of manually clicking through AWS consoles or running individual commands, IaC lets you define your entire infrastructure using code files that can be version-controlled, shared, and automatically executed.
Think of IaC as writing a recipe for your infrastructure. Just like a chef can recreate the same dish perfectly every time by following a recipe, IaC ensures your AWS resources are deployed consistently across different environments. This approach brings several game-changing advantages to your Infrastructure as Code AWS workflow.
Key advantages of Infrastructure as Code:
- Consistency and repeatability: Your EC2 instance configuration remains identical whether you’re deploying to development, staging, or production environments
- Version control: Track changes to your infrastructure just like application code, with complete rollback capabilities
- Collaboration: Teams can review, approve, and contribute to infrastructure changes through standard code review processes
- Documentation: Your infrastructure code serves as living documentation of your system architecture
- Speed and efficiency: Deploy complex web server setups in minutes rather than hours
- Cost optimization: Easily spin up resources when needed and tear them down when not in use
Compare traditional server provisioning vs automated deployment
Traditional server provisioning feels like building a house by hand every single time. System administrators would log into AWS consoles, manually create security groups, launch EC2 instances, configure network settings, and install software packages one by one. This manual approach creates several pain points that slow down development and increase the risk of errors.
Traditional provisioning challenges:
- Time-intensive: Setting up a single web server environment could take hours or days
- Human error: Manual steps lead to configuration drift and inconsistencies between environments
- Knowledge silos: Only specific team members knew the exact steps to recreate environments
- Poor scalability: Spinning up multiple environments required repeating all manual steps
- Limited documentation: Processes lived in scattered documents or team members’ heads
Automated deployment advantages:
Terraform EC2 tutorial workflows and other automation tools transform this process completely. Instead of manual clicking, you write declarative configuration files that describe your desired infrastructure state. The automation tool handles all the heavy lifting – creating resources, configuring settings, and managing dependencies.
Benefits of automation:
- Speed: Deploy complete web server infrastructure in under 10 minutes
- Reliability: Eliminate human error through consistent, repeatable processes
- Scalability: Create multiple environments with a single command
- Disaster recovery: Rebuild entire infrastructures quickly from code
- Team empowerment: Any team member can deploy environments using the same code
Overview of AWS services essential for web server deployment
AWS provides a comprehensive suite of services that work together seamlessly for EC2 web server deployment. Understanding these core services and their relationships helps you architect robust, scalable web applications.
Core Compute Services:
- EC2 (Elastic Compute Cloud): The heart of your web server infrastructure, providing scalable virtual machines with various instance types optimized for different workloads
- Auto Scaling Groups: Automatically adjust the number of EC2 instances based on traffic demands, ensuring your web server can handle varying loads
- Elastic Load Balancer: Distributes incoming traffic across multiple EC2 instances, improving availability and fault tolerance
Networking Components:
- VPC (Virtual Private Cloud): Creates your isolated network environment where EC2 instances and other resources operate securely
- Subnets: Segment your VPC into public and private network zones for optimal security architecture
- Security Groups: Act as virtual firewalls controlling inbound and outbound traffic to your EC2 instances
- Internet Gateway: Provides internet connectivity for resources in public subnets
Storage and Database Services:
- EBS (Elastic Block Store): Provides persistent, high-performance storage volumes for your EC2 instances
- S3 (Simple Storage Service): Stores static assets, backups, and application artifacts with virtually unlimited capacity
- RDS (Relational Database Service): Managed database solutions that integrate seamlessly with your web server applications
Monitoring and Management:
- CloudWatch: Monitors your EC2 instances and applications, providing metrics, logs, and alerting capabilities
- Systems Manager: Helps manage and patch your EC2 instances at scale
- IAM (Identity and Access Management): Controls access permissions for AWS resources and services
These AWS cloud infrastructure management services work together through Infrastructure as Code best practices, allowing you to define complex architectures as code and deploy them consistently across environments.
Setting Up Your AWS Environment and Prerequisites

Configure AWS CLI and authentication credentials
Installing the AWS CLI is your first step toward managing AWS resources from the command line. Download the latest version from Amazon’s official website and install it on your local machine. Once installed, you’ll need to configure your authentication credentials using the aws configure command.
Your AWS access keys consist of an Access Key ID and Secret Access Key, which you can generate from the AWS IAM console. Create a new IAM user specifically for Infrastructure as Code AWS operations, and attach the necessary permissions policies. Store these credentials securely and never commit them to version control systems.
Run aws configure and enter your access key details along with your preferred AWS region. The CLI will store these credentials in ~/.aws/credentials on Linux/Mac or %USERPROFILE%\.aws\credentials on Windows. Test your configuration by running aws sts get-caller-identity to verify your connection.
Install and configure Terraform for infrastructure management
Terraform serves as your primary tool for EC2 web server deployment through infrastructure as code. Download the appropriate binary for your operating system from HashiCorp’s website and add it to your system’s PATH environment variable.
Create a dedicated directory for your Terraform EC2 tutorial files. Inside this directory, you’ll organize your configuration files with a clear structure:
main.tf– Primary resource definitionsvariables.tf– Input variables and parametersoutputs.tf– Output values after deploymentterraform.tfvars– Variable value assignments
Initialize your Terraform workspace using terraform init to download the AWS provider. Configure the provider block in your main configuration file to specify the AWS region and authentication method. Terraform will automatically use your AWS CLI credentials unless you specify otherwise.
Establish proper IAM roles and security policies
Security forms the backbone of any AWS cloud infrastructure management strategy. Create specific IAM roles that follow the principle of least privilege, granting only the permissions necessary for your EC2 instances and Terraform operations.
Start by creating an IAM policy document that includes permissions for EC2 management, VPC operations, and security group modifications. Your Terraform automation scripting will require additional permissions for creating and managing AWS resources programmatically.
Design separate roles for different purposes:
- EC2 Instance Role: Attach policies for application-specific AWS service access
- Terraform Execution Role: Include permissions for resource creation and management
- Monitoring Role: Grant access to CloudWatch and logging services
Attach these roles to your resources during the infrastructure deployment process. Use IAM policy conditions to restrict access based on source IP addresses, time windows, or specific resource tags for enhanced security.
Create SSH key pairs for secure server access
SSH key pairs provide secure, password-less access to your EC2 instances. Generate a new key pair using ssh-keygen -t rsa -b 4096 -f ~/.ssh/aws-ec2-key on your local machine. This creates both private and public key files.
Import your public key to AWS using either the EC2 console or AWS CLI. Store the private key securely on your local machine with restricted permissions (chmod 600 ~/.ssh/aws-ec2-key). Never share or commit your private key to version control systems.
Configure your SSH client by creating a config file at ~/.ssh/config with connection details for your EC2 instances. This simplifies the connection process and allows you to use shorter commands like ssh my-web-server instead of typing the full connection string each time.
Plan your key management strategy for team environments. Consider using AWS Systems Manager Session Manager as an alternative access method that doesn’t require direct SSH access, especially for production environments where you need audit trails and centralized access control.
Designing Your EC2 Web Server Architecture

Select optimal EC2 instance types for web hosting needs
Choosing the right EC2 instance type makes the difference between a snappy website and one that leaves visitors waiting. For most small to medium web applications, t3.micro or t3.small instances work great as starting points. These burstable performance instances give you baseline CPU performance with the ability to burst when traffic spikes hit your server.
If you’re running a content-heavy site or expecting consistent traffic, t3.medium provides more reliable performance. The beauty of these t3 instances is their cost-effectiveness – perfect for development environments and low-traffic production sites.
When your application demands more power, m5.large or c5.large instances step up to handle heavier workloads. M5 instances offer balanced compute, memory, and networking, while C5 instances excel when your web server needs serious CPU muscle for processing-intensive tasks.
Memory-intensive applications like those running large databases or caching layers should consider r5.large instances. These give you more RAM per dollar, keeping your application data readily available without constant disk access.
Plan VPC networking and subnet configuration
Your VPC acts as your private cloud network where EC2 web server deployment happens securely. Start by creating a VPC with a CIDR block like 10.0.0.0/16, giving you plenty of IP addresses to work with as your infrastructure grows.
Design at least two subnets across different Availability Zones for high availability. Your public subnet (10.0.1.0/24) hosts resources that need internet access, like your web servers behind a load balancer. The private subnet (10.0.2.0/24) houses your application servers and databases, keeping them protected from direct internet exposure.
Set up an Internet Gateway for public subnet connectivity and configure a NAT Gateway in your public subnet. This setup lets private subnet resources access the internet for updates and patches while maintaining security.
Route tables tie everything together – your public subnet routes through the Internet Gateway, while private subnets route internet traffic through the NAT Gateway.
Design security groups for web traffic and SSH access
Security groups work like virtual firewalls, controlling traffic flow to your EC2 instances. Create separate security groups for different functions rather than cramming everything into one overly permissive group.
Your web server security group should allow:
- HTTP traffic (port 80) from anywhere (0.0.0.0/0)
- HTTPS traffic (port 443) from anywhere (0.0.0.0/0)
- SSH access (port 22) only from your IP address or a bastion host
For enhanced security, create a database security group that only accepts connections from your web server security group on the required database port (3306 for MySQL, 5432 for PostgreSQL).
Never open SSH access to the entire internet. Instead, use your office IP address or set up a bastion host in your public subnet. This approach follows AWS security optimization best practices by implementing the principle of least privilege.
Consider creating an admin security group for maintenance tasks, keeping it separate from your production traffic rules. This separation makes security audits easier and reduces the risk of accidentally exposing sensitive services.
Choose appropriate storage options and backup strategies
Your storage choices directly impact both performance and data durability. Start with gp3 EBS volumes for your root volumes – they offer excellent performance at a reasonable price point. For most web servers, 20-30 GB provides adequate space for the operating system and application files.
If your web application handles file uploads or generates logs, attach additional EBS volumes rather than expanding the root volume. This approach makes backup management cleaner and gives you flexibility to optimize storage types per use case.
EBS snapshots form the backbone of your backup strategy. Schedule daily snapshots of critical volumes and retain them based on your recovery requirements. Weekly snapshots with longer retention work well for development environments, while production systems benefit from daily snapshots with point-in-time recovery capabilities.
For static content like images, CSS, and JavaScript files, consider storing them in S3 rather than on EC2 storage. This setup reduces server storage costs and improves content delivery speed when combined with CloudFront.
Implement lifecycle policies for your snapshots to automatically delete older backups, keeping storage costs under control. A typical strategy might retain daily snapshots for 7 days, weekly snapshots for a month, and monthly snapshots for a year.
Writing Terraform Code for EC2 Infrastructure
Create Provider Configuration and Variable Definitions
Start your Terraform EC2 tutorial by setting up the foundation with a provider configuration that connects to your AWS account. Create a main.tf file and define the AWS provider with your preferred region:
terraform {
  required_providers {
    aws = {
      source  = "hashicorp/aws"
      version = "~> 5.0"
    }
  }
}

provider "aws" {
  region = var.aws_region
}
Variable definitions make your Infrastructure as Code AWS deployment flexible and reusable. Create a variables.tf file to centralize all configurable parameters:
variable "aws_region" {
  description = "AWS region for resources"
  type        = string
  default     = "us-west-2"
}

variable "instance_type" {
  description = "EC2 instance type"
  type        = string
  default     = "t2.micro"
}

variable "key_pair_name" {
  description = "AWS key pair name"
  type        = string
}
Add a terraform.tfvars file to set actual values for your variables, keeping sensitive information secure and separate from your code.
Build VPC, Subnets, and Internet Gateway Resources
Your EC2 web server deployment needs a solid networking foundation. Create a dedicated VPC to isolate your infrastructure and provide complete control over network configuration:
resource "aws_vpc" "main" {
  cidr_block           = "10.0.0.0/16"
  enable_dns_hostnames = true
  enable_dns_support   = true

  tags = {
    Name = "web-server-vpc"
  }
}

resource "aws_subnet" "public" {
  vpc_id                  = aws_vpc.main.id
  cidr_block              = "10.0.1.0/24"
  availability_zone       = "${var.aws_region}a"
  map_public_ip_on_launch = true

  tags = {
    Name = "public-subnet"
  }
}

resource "aws_internet_gateway" "main" {
  vpc_id = aws_vpc.main.id

  tags = {
    Name = "main-igw"
  }
}
Configure the route table to direct traffic properly through your internet gateway, enabling your web server to communicate with the outside world:
resource "aws_route_table" "public" {
  vpc_id = aws_vpc.main.id

  route {
    cidr_block = "0.0.0.0/0"
    gateway_id = aws_internet_gateway.main.id
  }

  tags = {
    Name = "public-route-table"
  }
}

resource "aws_route_table_association" "public" {
  subnet_id      = aws_subnet.public.id
  route_table_id = aws_route_table.public.id
}
Define Security Groups with Proper Ingress and Egress Rules
Security groups act as virtual firewalls for your EC2 instance configuration. Create focused security groups that follow the principle of least privilege while allowing necessary web traffic:
resource "aws_security_group" "web_server" {
  name_description = "Security group for web server"
  vpc_id          = aws_vpc.main.id

  ingress {
    from_port   = 80
    to_port     = 80
    protocol    = "tcp"
    cidr_blocks = ["0.0.0.0/0"]
  }

  ingress {
    from_port   = 443
    to_port     = 443
    protocol    = "tcp"
    cidr_blocks = ["0.0.0.0/0"]
  }

  ingress {
    from_port   = 22
    to_port     = 22
    protocol    = "tcp"
    cidr_blocks = ["your.ip.address/32"]
  }

  egress {
    from_port   = 0
    to_port     = 0
    protocol    = "-1"
    cidr_blocks = ["0.0.0.0/0"]
  }

  tags = {
    Name = "web-server-sg"
  }
}
Replace “your.ip.address/32” with your actual IP address to restrict SSH access to your location only. This AWS automation scripting approach ensures EC2 security optimization by limiting administrative access.
Configure EC2 Instance with User Data for Web Server Setup
Complete your Terraform AWS deployment by defining the EC2 instance resource with user data that automatically installs and configures your web server:
data "aws_ami" "amazon_linux" {
  most_recent = true
  owners      = ["amazon"]

  filter {
    name   = "name"
    values = ["amzn2-ami-hvm-*-x86_64-gp2"]
  }
}

resource "aws_instance" "web_server" {
  ami                    = data.aws_ami.amazon_linux.id
  instance_type          = var.instance_type
  key_name               = var.key_pair_name
  vpc_security_group_ids = [aws_security_group.web_server.id]
  subnet_id              = aws_subnet.public.id

  user_data = <<-EOF
    #!/bin/bash
    yum update -y
    yum install -y httpd
    systemctl start httpd
    systemctl enable httpd
    echo "<h1>Welcome to your AWS Web Server!</h1>" > /var/www/html/index.html
  EOF

  tags = {
    Name = "terraform-web-server"
  }
}
Add an output block to display the public IP address of your newly created instance:
output "web_server_public_ip" {
  description = "Public IP address of the web server"
  value       = aws_instance.web_server.public_ip
}
This user data script automatically installs Apache HTTP server during instance launch, making your AWS web server setup completely hands-off. The Infrastructure as Code best practices demonstrated here create a reproducible, version-controlled deployment that you can modify and redeploy as needed.
Automating Web Server Installation and Configuration

Write user data scripts for Apache or Nginx installation
User data scripts are powerful automation tools that run automatically when your EC2 instance boots up for the first time. These scripts eliminate manual installation steps and ensure consistent EC2 web server deployment across all your instances.
For Apache installation, your user data script should update the system, install the Apache web server, and configure it to start automatically:
#!/bin/bash
yum update -y
yum install -y httpd
systemctl start httpd
systemctl enable httpd
echo "<h1>Web Server Running on $(hostname -f)</h1>" > /var/www/html/index.html
For Nginx deployment, the script follows a similar pattern but with Nginx-specific commands:
#!/bin/bash
yum update -y
amazon-linux-extras install nginx1 -y
systemctl start nginx
systemctl enable nginx
echo "<h1>Nginx Server on $(hostname -f)</h1>" > /usr/share/nginx/html/index.html
When working with Terraform EC2 tutorial implementations, embed these scripts directly in your EC2 instance configuration using the user_data parameter. This approach streamlines your AWS automation scripting workflow and reduces deployment time significantly.
Configure automatic package updates and security patches
Security patch management becomes critical when running web servers in production environments. Automated updates protect your EC2 instance configuration from vulnerabilities while minimizing manual intervention.
Configure automatic security updates by adding these commands to your user data script:
# Enable automatic security updates
yum install -y yum-cron
sed -i 's/apply_updates = no/apply_updates = yes/' /etc/yum/yum-cron.conf
sed -i 's/update_level = default/update_level = security/' /etc/yum/yum-cron.conf
systemctl enable yum-cron
systemctl start yum-cron
For Ubuntu-based instances, use unattended-upgrades:
apt-get update
apt-get install -y unattended-upgrades
echo 'Unattended-Upgrade::Automatic-Reboot "true";' >> /etc/apt/apt.conf.d/50unattended-upgrades
Set up CloudWatch logs to monitor update activities and track security patch installations. This monitoring approach aligns with Infrastructure as Code best practices by providing visibility into your automated maintenance processes.
Set up web application deployment from source control
Modern web applications require seamless deployment pipelines that pull code directly from version control systems. This automation reduces human error and speeds up your deployment cycles.
Create a deployment script that clones your repository and configures the web application:
# Install Git and clone your repository
yum install -y git
cd /var/www/html
git clone https://github.com/your-username/your-web-app.git .
chown -R apache:apache /var/www/html
chmod -R 755 /var/www/html
For more sophisticated deployments, integrate AWS CodeDeploy into your Infrastructure as Code AWS setup. This service provides blue/green deployments and rollback capabilities:
# Install CodeDeploy agent
yum install -y ruby wget
wget https://aws-codedeploy-us-east-1.s3.us-east-1.amazonaws.com/latest/install
chmod +x ./install
./install auto
service codedeploy-agent start
Configure your Terraform code to create the necessary IAM roles and policies for CodeDeploy access. This setup enables automated deployments triggered by code commits or manual releases.
Implement health checks and monitoring capabilities
Health checks and monitoring form the backbone of reliable AWS web server setup operations. These capabilities help you detect issues before they impact users and maintain high availability.
Install CloudWatch agent to collect custom metrics and logs:
# Install CloudWatch agent
wget https://s3.amazonaws.com/amazoncloudwatch-agent/amazon_linux/amd64/latest/amazon-cloudwatch-agent.rpm
rpm -U ./amazon-cloudwatch-agent.rpm

# Configure basic monitoring
cat > /opt/aws/amazon-cloudwatch-agent/etc/amazon-cloudwatch-agent.json << 'EOF'
{
  "metrics": {
    "metrics_collected": {
      "cpu": {
        "measurement": ["cpu_usage_idle", "cpu_usage_iowait"]
      },
      "disk": {
        "measurement": ["used_percent"],
        "metrics_collection_interval": 60
      },
      "mem": {
        "measurement": ["mem_used_percent"]
      }
    }
  },
  "logs": {
    "logs_collected": {
      "files": {
        "collect_list": [
          {
            "file_path": "/var/log/httpd/access_log",
            "log_group_name": "ec2-web-server-access",
            "log_stream_name": "{instance_id}"
          }
        ]
      }
    }
  }
}
EOF

/opt/aws/amazon-cloudwatch-agent/bin/amazon-cloudwatch-agent-ctl -m ec2 -c file:/opt/aws/amazon-cloudwatch-agent/etc/amazon-cloudwatch-agent.json -a fetch-config
Set up application-level health checks by creating a simple endpoint that your load balancer can monitor:
echo '<?php echo "OK"; ?>' > /var/www/html/health.php
This endpoint provides a quick way to verify that your web server responds to requests. Combine this with ALB health checks in your Terraform AWS deployment configuration to ensure traffic only routes to healthy instances.
Deploying and Managing Your Infrastructure

Execute Terraform plan to preview infrastructure changes
Running terraform plan is like getting a sneak peek at what’s about to happen in your AWS environment before committing to any changes. This command analyzes your Terraform configuration files against your current infrastructure state and shows exactly what resources will be created, modified, or destroyed.
When you execute terraform plan for your EC2 web server deployment, you’ll see a detailed output showing the security groups, EC2 instances, VPCs, and any other AWS resources that Terraform will provision. Pay close attention to the resource count summary at the bottom – it tells you how many resources will be added, changed, or removed.
The plan output uses color coding to help you understand the changes: green plus signs indicate new resources, yellow tildes show modifications, and red minus signs represent deletions. Review each resource carefully, especially security group rules and instance configurations, to catch any potential issues before deployment.
Save your plan output to a file using terraform plan -out=tfplan for documentation purposes. This creates a binary plan file that you can reference later and ensures the exact same changes are applied when you run terraform apply.
Apply configuration to provision AWS resources
After reviewing your Terraform plan, execute terraform apply to begin the actual Infrastructure as Code AWS deployment process. You can apply the saved plan file directly with terraform apply tfplan or run the command without arguments to generate a fresh plan for approval.
Terraform will display the same plan output and prompt for confirmation before proceeding. Type “yes” to start provisioning your AWS resources. The apply process typically takes 2-5 minutes for a basic EC2 web server setup, depending on the complexity of your configuration.
Watch the apply output for any error messages or warnings. Common issues during EC2 web server deployment include insufficient IAM permissions, resource limits, or availability zone constraints. If errors occur, Terraform will attempt to roll back any partially created resources automatically.
The apply command creates a terraform.tfstate file that tracks your infrastructure’s current state. This state file is critical for future updates and should be stored securely, preferably in an S3 backend with versioning enabled for team environments.
Verify web server accessibility and functionality
Once Terraform completes the provisioning process, test your web server accessibility by navigating to the public IP address or domain name in your browser. Your basic web server should respond with the default page you configured during the setup process.
Run connection tests from multiple locations to ensure your security group rules are properly configured. Use tools like curl or wget to test HTTP/HTTPS connectivity from the command line:
curl -I http://your-ec2-public-ip
curl -I https://your-ec2-public-ip
Check the EC2 instance status in the AWS console to confirm it’s running and passing both system and instance status checks. SSH into your server using the key pair you specified in your Terraform configuration to verify system-level functionality:
ssh -i your-key.pem ec2-user@your-ec2-public-ip
Test any application-specific functionality you’ve deployed, such as database connections, API endpoints, or file uploads. Monitor CloudWatch metrics for CPU utilization, network traffic, and disk I/O to establish baseline performance metrics.
Implement backup and disaster recovery procedures
Set up automated EBS snapshots for your EC2 instance’s root volume and any additional storage volumes. Create a backup Lambda function or use AWS Backup service to schedule regular snapshots based on your recovery point objectives (RPO).
Configure AWS CloudFormation or Terraform automation scripting to enable rapid infrastructure recreation in case of catastrophic failure. Store your Terraform configuration files in version control systems like Git, and maintain separate configurations for different environments (development, staging, production).
Document your disaster recovery procedures, including:
- Steps to restore from EBS snapshots
- Database backup and restore processes
- DNS failover configurations
- Application deployment procedures
Test your backup and recovery procedures regularly by spinning up resources in a separate AWS region or account. This ensures your Infrastructure as Code best practices work correctly when you need them most.
Consider implementing cross-region replication for critical data and maintaining AMI copies in multiple availability zones. Set up CloudWatch alarms and SNS notifications to alert you immediately when system issues occur, enabling faster response times during outages.
Optimizing Performance and Security Best Practices

Configure Auto-Scaling Groups for Traffic Management
Auto-scaling groups transform your static EC2 web server deployment into a dynamic, traffic-responsive infrastructure. When building an EC2 web server deployment with Terraform, implementing auto-scaling ensures your application handles traffic spikes without breaking the bank during quiet periods.
Start by creating an Application Load Balancer (ALB) in your Terraform configuration. This serves as the entry point for all incoming traffic and distributes requests across multiple EC2 instances. Define your launch template with the AMI, instance type, security groups, and user data script that configures your web server.
resource "aws_autoscaling_group" "web_server_asg" {
  name                = "web-server-asg"
  vpc_zone_identifier = var.private_subnet_ids
  target_group_arns   = [aws_lb_target_group.web_server_tg.arn]
  health_check_type   = "ELB"
  min_size            = 2
  max_size            = 10
  desired_capacity    = 3
}
Configure scaling policies based on CloudWatch metrics like CPU utilization or request count. Set up scale-out policies when average CPU exceeds 70% for two consecutive periods, and scale-in policies when CPU drops below 30%. This Infrastructure as Code AWS approach ensures consistent scaling behavior across environments.
Target tracking scaling policies work exceptionally well for web servers. They automatically adjust capacity to maintain a specific metric value, like keeping average CPU utilization around 50%. This provides optimal performance while controlling costs.
Implement SSL Certificates and HTTPS Encryption
HTTPS encryption is non-negotiable for modern web applications. EC2 security optimization starts with proper SSL certificate management through AWS Certificate Manager (ACM). Request certificates for your domain and any subdomains you plan to use.
AWS Certificate Manager handles certificate provisioning, renewal, and deployment automatically. Add the certificate ARN to your load balancer configuration:
resource "aws_lb_listener" "web_server_https" {
  load_balancer_arn = aws_lb.web_server_alb.arn
  port              = "443"
  protocol          = "HTTPS"
  ssl_policy        = "ELBSecurityPolicy-TLS-1-2-2017-01"
  certificate_arn   = aws_acm_certificate.web_server_cert.arn
}
Redirect all HTTP traffic to HTTPS by creating a listener that returns a 301 permanent redirect. This forces secure connections and improves your SEO rankings since search engines favor HTTPS sites.
Update your security groups to allow inbound traffic on ports 80 and 443 from the internet, while restricting direct access to your EC2 instances. Only the load balancer should communicate directly with your web servers on port 80 or 8080.
Consider implementing HTTP Strict Transport Security (HSTS) headers in your web server configuration. This tells browsers to only connect via HTTPS for future requests, preventing protocol downgrade attacks.
Set Up CloudWatch Monitoring and Alerting Systems
Comprehensive monitoring transforms reactive troubleshooting into proactive AWS cloud infrastructure management. CloudWatch provides detailed metrics for EC2 instances, load balancers, and auto-scaling groups out of the box.
Enable detailed monitoring on your EC2 instances to collect metrics every minute instead of the default five-minute intervals. This gives you faster detection of performance issues:
resource "aws_launch_template" "web_server_lt" {
  name_prefix   = "web-server-"
  image_id      = var.ami_id
  instance_type = var.instance_type

  monitoring {
    enabled = true
  }
}
Create custom CloudWatch alarms for critical metrics like high CPU utilization, low memory availability, and elevated error rates. Set up SNS topics to send notifications to your operations team when thresholds are breached.
Application-level monitoring requires custom metrics. Use the CloudWatch agent to collect system-level metrics like memory usage and disk space. Log aggregation through CloudWatch Logs helps track application errors and user behavior patterns.
Dashboard creation provides visual oversight of your entire Terraform AWS deployment. Build dashboards showing key performance indicators like response times, error rates, concurrent users, and infrastructure costs. Share these dashboards with stakeholders for transparency into system health and performance trends.
Set up composite alarms that trigger only when multiple conditions occur simultaneously. This reduces false positives and focuses attention on genuine issues requiring immediate intervention.

Building your own EC2 web server through Infrastructure as Code transforms what used to be a complex manual process into something manageable and repeatable. You’ve learned how to set up your AWS environment, design a solid architecture, write clean Terraform code, and automate everything from server deployment to configuration. The beauty of this approach lies in its consistency – your infrastructure becomes predictable, scalable, and easy to maintain.
Now it’s time to put these skills into action. Start small with a basic web server setup, then gradually add more sophisticated features like load balancing and auto-scaling as you get comfortable with the process. Remember that the real power comes from treating your infrastructure like code – version it, test it, and refine it over time. Your future self will thank you for the documentation and automation you build today.