


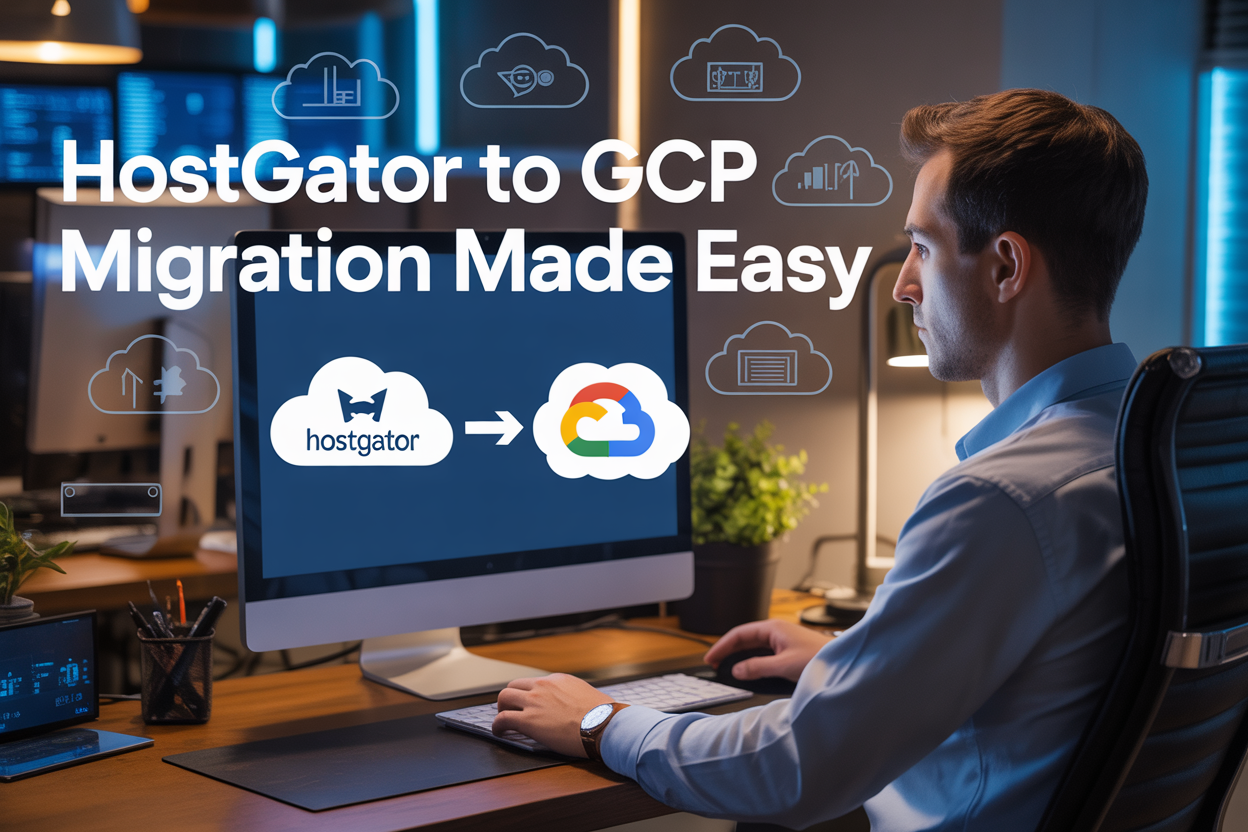
Making the jump from HostGator to Google Cloud Platform isn’t just a hosting change—it’s a complete upgrade to how your website performs, scales, and stays protected online.
This guide is designed for website owners, developers, and businesses currently using HostGator who want to unlock the superior performance and flexibility that comes with Google Cloud Platform migration. Whether you’re running a small business website or managing multiple client projects, you’ll discover why this HostGator to GCP migration could be the best decision for your online presence.
We’ll walk you through the essential pre-migration planning steps that prevent costly mistakes and downtime during your transition. You’ll also get a detailed breakdown of optimizing your new GCP environment to squeeze every bit of performance from Google’s infrastructure. Finally, we’ll cover advanced security configurations that go far beyond what traditional hosting providers offer, keeping your sites and data safe from modern threats.
Ready to leave shared hosting limitations behind and embrace true cloud hosting migration? Let’s dive into why thousands of HostGator users are making this switch—and how you can join them successfully.
Why HostGator Users Are Making the Switch to Google Cloud Platform

Performance limitations holding back your website growth
Your HostGator shared hosting environment is probably the biggest bottleneck between you and your business goals. When your website takes more than 3 seconds to load, you’re losing potential customers before they even see your content. HostGator’s shared servers mean you’re competing with hundreds of other websites for the same CPU, memory, and bandwidth resources.
The performance issues become glaring when traffic spikes hit. Your site slows to a crawl during peak hours, especially if you’re sharing server space with resource-heavy websites. This creates a frustrating user experience that directly impacts your conversion rates and search engine rankings.
Google Cloud Platform offers dedicated resources and global edge locations that deliver your content from the server closest to your users. With GCP’s auto-scaling capabilities, your website automatically adjusts to handle traffic surges without breaking a sweat. The performance difference isn’t just noticeable – it’s transformational for user engagement and revenue generation.
Security vulnerabilities exposing your business to risks
Shared hosting environments create inherent security weaknesses that put your business data at risk. When you’re on HostGator’s shared servers, a security breach affecting any website on your server can potentially compromise your site too. The “neighborhood effect” means you’re only as secure as the weakest website sharing your hosting space.
HostGator’s basic security features often fall short of enterprise-grade protection. Limited SSL options, basic firewall protection, and minimal DDoS mitigation leave gaps that cybercriminals actively exploit. Regular malware infections and unauthorized access attempts are common issues that shared hosting users face daily.
GCP provides enterprise-level security that includes advanced threat detection, automatic security patches, and Google’s robust infrastructure protection. With features like Cloud Armor for DDoS protection and Identity and Access Management (IAM) for granular access control, your migration to GCP significantly reduces your attack surface and protects your business reputation.
Scalability constraints preventing business expansion
HostGator’s rigid hosting plans create artificial ceilings for growing businesses. When your traffic increases or you need more storage space, you’re forced into expensive plan upgrades that often include features you don’t need. The upgrade process typically involves downtime and complex migration procedures that disrupt your business operations.
Resource limitations become painfully obvious during seasonal traffic spikes or viral content moments. Your website crashes or becomes unresponsive exactly when you need it to perform best. These missed opportunities translate directly into lost revenue and damaged customer relationships.
Google Cloud Platform eliminates these scalability barriers with on-demand resource allocation. Your infrastructure grows automatically as your business needs change, without service interruptions or manual interventions. You pay only for the resources you actually use, making it possible to handle massive traffic spikes without the financial burden of over-provisioning.
Cost inefficiencies draining your budget
HostGator’s pricing structure often includes hidden costs that accumulate over time. SSL certificates, backup services, additional databases, and premium support features come with separate charges that weren’t obvious in the initial hosting plan. These add-ons quickly inflate your monthly hosting costs without providing proportional value.
The fixed pricing model means you’re paying for peak capacity even during low-traffic periods. This creates significant waste for businesses with seasonal fluctuations or varying usage patterns. Additionally, the cost of downtime from performance issues and security incidents often exceeds the savings from cheaper hosting.
HostGator to GCP migration delivers immediate cost optimization through Google Cloud’s pay-as-you-use model. You eliminate unnecessary expenses while gaining access to enterprise-grade infrastructure. The GCP hosting benefits include transparent pricing, automatic cost optimization recommendations, and detailed usage analytics that help you make informed decisions about your hosting budget.
Understanding the Key Advantages of GCP Over Traditional Hosting

Lightning-fast global network infrastructure
Google Cloud Platform operates one of the world’s most advanced network infrastructures, spanning across 200+ countries and territories with 35+ regions worldwide. When you migrate from HostGator to GCP, you’re tapping into Google’s private fiber network that connects data centers with subsea cables and terrestrial networks.
This translates to significantly faster loading times for your website visitors, regardless of their location. While traditional hosting providers like HostGator typically offer limited server locations, GCP’s global edge locations ensure your content is delivered from the nearest point to your users. The result? Page load speeds that can improve by 40-60% compared to traditional shared hosting environments.
Google’s network automatically routes traffic through the fastest available paths, using advanced algorithms that consider real-time network conditions. This means your HostGator to GCP migration instantly benefits from enterprise-level content delivery without requiring complex CDN configurations.
Enterprise-grade security with automatic threat protection
GCP hosting benefits include security measures that go far beyond what traditional hosting providers can offer. Google invests billions of dollars annually in cybersecurity research and infrastructure, protecting your migrated website with the same systems that secure Google’s own services.
Key security advantages include:
- Automatic DDoS protection at no additional cost
- Identity and Access Management (IAM) with granular permission controls
- Data encryption both at rest and in transit by default
- 24/7 security monitoring with AI-powered threat detection
- Regular security updates applied automatically to infrastructure
Unlike HostGator’s basic security features, GCP provides advanced threat intelligence that analyzes billions of signals daily to identify and block emerging threats before they reach your applications.
Pay-only-for-what-you-use pricing model
Traditional hosting plans force you to pay fixed monthly fees regardless of actual resource consumption. GCP’s revolutionary pricing model charges you only for the computing resources, storage, and bandwidth you actually use.
This approach offers several advantages:
- Cost savings during low-traffic periods – perfect for seasonal businesses
- Automatic scaling without overpaying for unused capacity
- Transparent billing with detailed usage breakdowns
- No surprise overages with predictable cost controls
Many businesses discover their Google Cloud migration results in 20-40% cost savings compared to traditional hosting, especially when traffic fluctuates throughout the year.
Seamless integration with Google services and APIs
Your Google Cloud migration unlocks powerful integrations that simply aren’t available with traditional hosting providers. GCP natively connects with Google Workspace, Analytics, Ads, and hundreds of other services through APIs.
Popular integrations include:
- Google Analytics 4 for advanced website tracking
- Google Ads for improved conversion tracking
- Firebase for real-time databases and authentication
- Google Maps API for location-based features
- Machine learning APIs for image recognition, language processing, and more
These integrations work seamlessly without complex third-party configurations, giving your migrated website access to Google’s entire ecosystem of business tools and services.
Pre-Migration Planning for a Smooth Transition

Auditing your current HostGator setup and requirements
Before diving into your HostGator to GCP migration, you need to take a close look at what you’re currently working with. Start by documenting your existing websites, databases, email accounts, and any custom configurations you’ve set up over the years. This includes checking your current resource usage – how much bandwidth you’re consuming, storage requirements, and peak traffic patterns.
Pay special attention to your software stack. Note which version of PHP you’re running, any specific Apache modules you depend on, and third-party services integrated with your current setup. Don’t forget about SSL certificates, domain configurations, and any automated backup systems you have in place.
Create a comprehensive inventory of your HostGator account features you actually use versus what you pay for. Many shared hosting plans come bundled with services you might not need in the cloud environment. This audit will help you avoid over-provisioning resources on GCP while ensuring you don’t miss critical components during the migration.
Document any performance bottlenecks you’re currently experiencing. Maybe your site slows down during traffic spikes, or database queries take too long. These pain points will guide your GCP architecture decisions and help you build a more robust solution from the start.
Selecting the optimal GCP services for your needs
Google Cloud Platform offers a vast array of services, but you don’t need them all for a successful migration. Start with the core computing options: Compute Engine for virtual machines if you want something similar to traditional hosting, or App Engine if you prefer a more managed, serverless approach.
For most HostGator migrations, Compute Engine provides the smoothest transition since you can replicate your current server environment. Choose between different machine types based on your audit results. If you’re running a WordPress site with moderate traffic, an e2-medium instance often provides excellent performance at a reasonable cost.
Storage decisions matter significantly for your Google Cloud migration. Cloud SQL works perfectly for MySQL databases, offering automated backups and easy scaling. For file storage, Cloud Storage buckets handle media files efficiently and can integrate with CDN services for faster global delivery.
Consider Cloud Load Balancing if you expect traffic growth or want better reliability. This service distributes traffic across multiple instances and automatically handles SSL termination. For DNS management, Cloud DNS provides reliable, fast resolution and integrates seamlessly with other GCP services.
Don’t overlook security services like Cloud Armor for DDoS protection and Identity and Access Management (IAM) for controlling who can access your resources. These tools help you build a more secure infrastructure than typical shared hosting environments provide.
Creating a detailed migration timeline and checklist
Your migration timeline should account for both technical tasks and business considerations. Plan for a two-week window minimum, even for simple sites. This gives you time to test thoroughly without rushing critical steps that could cause downtime.
Week one focuses on preparation and setup. Create your GCP project, set up billing alerts, and provision your initial resources. Configure your development environment and begin transferring files and databases to test instances. This phase lets you work out any compatibility issues before touching your live site.
Build your checklist around these critical milestones: DNS preparation, SSL certificate setup, database migration testing, file transfer verification, and application configuration validation. Each item should include specific verification steps to confirm completion.
Schedule your final cutover during low-traffic periods for your site. Update DNS records with lower TTL values 24-48 hours before migration to speed up propagation. Have rollback procedures ready in case something goes wrong – keep your HostGator account active until you’re completely satisfied with the GCP performance.
Post-migration monitoring is crucial for the first 72 hours. Set up Cloud Monitoring alerts for key metrics like CPU usage, memory consumption, and response times. This proactive approach helps you catch and resolve issues before they impact your users.
Step-by-Step Migration Process from HostGator to GCP
Setting up your Google Cloud Platform account and project
Creating your Google Cloud Platform account marks the beginning of your HostGator to GCP migration journey. Visit the Google Cloud Console and sign up using your existing Google account or create a new one specifically for your business needs. Google offers a generous $300 credit for new users, giving you plenty of room to experiment and migrate without immediate cost concerns.
Once logged in, create a new project that will house all your migrated resources. Choose a meaningful project name that reflects your website or business, as this helps with organization when managing multiple projects later. Enable billing for your project and set up budget alerts to monitor your spending during the migration process.
Navigate to the APIs & Services section and enable essential services like Compute Engine, Cloud Storage, and Cloud SQL. These core services form the foundation of your Google Cloud Platform migration. Take time to explore the console interface and familiarize yourself with the navigation structure, as this knowledge will prove invaluable throughout the migration process.
Set up Identity and Access Management (IAM) permissions if you’re working with a team. Create service accounts for automated processes and assign appropriate roles to team members who’ll be involved in the migration.
Configuring Compute Engine instances for your applications
Compute Engine serves as the backbone of your new cloud infrastructure, replacing your shared HostGator hosting environment. Start by analyzing your current resource usage on HostGator to determine the appropriate instance size and specifications for your applications.
Create your first virtual machine instance by selecting the appropriate machine type based on your website’s traffic and performance requirements. For most WordPress sites migrating from HostGator, an e2-medium instance provides sufficient resources while keeping costs manageable. Choose a Linux distribution that matches your current setup – Ubuntu 20.04 LTS offers excellent compatibility and long-term support.
Configure your instance with adequate storage by adding persistent disks. Unlike HostGator’s limited disk space, GCP allows you to scale storage independently of your compute resources. Set up both boot disks and additional data disks as needed for your specific application requirements.
Install your web server stack (Apache, Nginx, or your preferred solution) and configure it to match your current HostGator environment. Pay special attention to PHP versions, installed modules, and configuration settings to ensure compatibility with your existing applications. Document these configurations as you’ll need them for troubleshooting and future scaling decisions.
Enable automatic backups for your instances using snapshots, providing better data protection than traditional shared hosting backup solutions.
Migrating databases and ensuring data integrity
Database migration requires careful planning and execution to prevent data loss during your cloud hosting migration. Start by creating a complete backup of your HostGator databases using phpMyAdmin or command-line tools like mysqldump. Download these backups to your local machine as a safety measure before beginning the transfer process.
Set up Cloud SQL instances in GCP to replace your HostGator database hosting. Choose the appropriate database engine version that matches your current setup, paying attention to MySQL or PostgreSQL versions to avoid compatibility issues. Configure your Cloud SQL instance with adequate storage and memory based on your current database size and expected growth.
Import your database backups into the new Cloud SQL instances using the Cloud Console import feature or command-line tools. For large databases, consider using Cloud Storage as an intermediary step, uploading your SQL files there before importing them into Cloud SQL.
Test database connectivity from your Compute Engine instances before proceeding with application configuration. Update your application configuration files with the new database connection strings, including the Cloud SQL instance IP address, username, and password. Use Cloud SQL Proxy for secure connections between your applications and databases.
Run comprehensive data integrity checks by comparing record counts, running application-specific tests, and verifying that all database functions work correctly. This validation step prevents issues that might not surface until your site goes live.
Transferring files and setting up Cloud Storage
Moving your website files from HostGator to GCP requires a systematic approach to ensure nothing gets lost in the transfer. Begin by downloading a complete copy of your website files from your HostGator account using FTP, SFTP, or your hosting control panel’s file manager.
Create Cloud Storage buckets to serve different purposes in your new infrastructure. Set up separate buckets for static assets like images and downloads, backup storage, and potentially as a content delivery mechanism. Choose appropriate storage classes based on access frequency – Standard storage for frequently accessed files and Nearline or Coldline for backup and archival data.
Upload your website files to your Compute Engine instances using secure copy (SCP), SFTP, or Google Cloud’s transfer tools. For large file transfers, consider using Cloud Storage Transfer Service, which can handle bulk transfers more efficiently than manual uploads.
Configure your web server to serve static content directly from Cloud Storage when appropriate, reducing load on your Compute Engine instances and improving performance. This approach works particularly well for WordPress media libraries and other static assets.
Set up lifecycle policies for your Cloud Storage buckets to automatically manage costs by moving older files to cheaper storage classes or deleting temporary files after specified periods.
Updating DNS settings for seamless domain transition
The final step in your GCP migration guide involves updating DNS records to point your domain to your new Google Cloud infrastructure. This process requires careful timing and preparation to minimize downtime during the transition.
Before making any DNS changes, reduce your domain’s Time To Live (TTL) values to 300 seconds (5 minutes) at least 24 hours before migration. This change ensures faster propagation when you update your DNS records to point to GCP.
Reserve static external IP addresses in GCP for your Compute Engine instances. These static IPs remain constant even if you restart or modify your instances, providing stability for your DNS configuration.
Update your A records to point to your new GCP static IP addresses, and modify any CNAME records that reference HostGator-specific hostnames. If you’re using a content delivery network or email services, verify that these configurations remain intact during the DNS transition.
Configure health checks and load balancers if you’re running multiple instances, ensuring traffic routes correctly to healthy servers. Monitor your website closely during the first few hours after DNS changes take effect, watching for any connectivity issues or broken functionality that might indicate DNS or configuration problems.
Test your website from multiple locations and devices to confirm that DNS propagation is working correctly worldwide. Keep your HostGator hosting active for at least 48-72 hours after the DNS switch to handle any lingering traffic from slower DNS propagation.
Optimizing Your New GCP Environment for Maximum Performance

Implementing auto-scaling for traffic spikes
Auto-scaling transforms how your application handles unexpected traffic surges, automatically adjusting resources based on real-time demand. After completing your HostGator to GCP migration, configuring auto-scaling becomes essential for maintaining consistent performance while controlling costs.
Start by setting up Google Cloud’s Compute Engine autoscaler, which monitors CPU usage, memory consumption, and custom metrics. Create an instance template that defines your application’s configuration, including machine type, disk specifications, and startup scripts. The autoscaler uses this template to launch new instances when demand increases.
Configure scaling policies that match your traffic patterns. Set minimum and maximum instance counts to prevent over-provisioning while ensuring adequate capacity. For web applications migrated from HostGator, consider scaling based on HTTP load balancer utilization rather than just CPU metrics. This approach provides more accurate scaling decisions for web workloads.
Google Cloud’s auto-scaling responds faster than traditional hosting solutions, typically launching new instances within 60-90 seconds. This rapid response prevents the performance degradation users often experience with shared hosting during traffic spikes. Monitor scaling events through Cloud Monitoring to fine-tune your policies and identify optimal thresholds for your specific application needs.
Setting up load balancing for improved reliability
Load balancing distributes incoming traffic across multiple instances, eliminating single points of failure that plague traditional hosting environments. Google Cloud Platform offers several load balancing options, each designed for specific use cases and traffic patterns.
HTTP(S) Load Balancing works best for web applications migrated from HostGator, providing global load distribution with automatic failover capabilities. Configure health checks that monitor your application’s availability every few seconds. When an instance fails health checks, the load balancer immediately routes traffic away from the problematic instance, maintaining service availability.
Set up backend services that group your instances into logical pools based on function or geographic location. This organization allows sophisticated traffic routing based on user location, reducing latency for global audiences. Unlike HostGator’s shared hosting model, GCP’s load balancing scales seamlessly without manual intervention or service disruptions.
Regional load balancing offers another option for applications serving specific geographic areas. This approach reduces costs while providing excellent performance for regionally-focused websites. Combine regional and global load balancing strategies based on your user distribution and performance requirements.
Configure SSL termination at the load balancer level to reduce computational overhead on your application instances. This setup improves overall performance while simplifying certificate management across multiple instances.
Configuring Cloud CDN for faster global content delivery
Cloud CDN accelerates content delivery by caching static assets at Google’s global edge locations, dramatically reducing load times for users worldwide. This represents a significant upgrade from HostGator’s limited geographic presence and basic caching capabilities.
Enable Cloud CDN by configuring it with your HTTP(S) load balancer. The setup process involves defining cache rules that determine which content gets cached and for how long. Static assets like images, CSS files, and JavaScript benefit most from CDN caching, while dynamic content requires careful configuration to avoid serving stale data.
Customize cache headers to optimize performance for your specific content types. Set longer cache durations for rarely-changing assets like logos and shorter periods for frequently-updated content. Cloud CDN respects standard HTTP cache headers, making migration from HostGator straightforward without requiring application code changes.
Monitor CDN performance through Cloud Monitoring dashboards that show cache hit rates, origin requests, and bandwidth savings. High cache hit rates indicate effective CDN utilization, while frequent origin requests suggest opportunities for cache optimization. Google Cloud’s CDN typically achieves 90%+ cache hit rates for properly configured static content.
Implement cache invalidation strategies for content updates. Cloud CDN supports both URL-based and tag-based invalidation, allowing precise control over cached content. This flexibility ensures users receive updated content promptly while maintaining optimal cache performance for unchanged assets.
Securing Your GCP Infrastructure Beyond Basic Protection

Implementing Identity and Access Management best practices
Moving from HostGator to GCP opens up powerful identity management capabilities that traditional hosting simply can’t match. The key lies in establishing a solid foundation with Google’s Identity and Access Management (IAM) system.
Start by creating specific service accounts for different functions rather than using your personal Google account for everything. Each application, service, or team member should have their own identity with precisely the permissions they need. This principle of least privilege prevents accidental data exposure and limits potential damage from compromised accounts.
Set up multi-factor authentication for all admin accounts without exception. Google’s authenticator app works seamlessly, but you can also integrate hardware security keys for maximum protection. Create custom IAM roles that match your specific workflow needs instead of relying on broad, pre-defined roles that grant excessive permissions.
Organize your resources using Google Cloud resource hierarchy with folders and projects. This structure allows you to apply consistent security policies across similar resources while maintaining granular control where needed. Enable audit logging to track who accessed what and when – this visibility becomes invaluable during security reviews or incident response.
Consider implementing Cloud Identity for centralized user management if you’re growing a team. This service integrates smoothly with existing corporate directories and provides single sign-on capabilities across your entire GCP infrastructure.
Setting up Cloud Security Command Center monitoring
Cloud Security Command Center acts as your central nervous system for security across your GCP migration from HostGator. This unified dashboard gives you real-time visibility into potential threats and vulnerabilities that would remain hidden in traditional hosting environments.
Begin by enabling Security Command Center’s standard tier, which provides essential security findings and recommendations at no additional cost. The system automatically scans your resources for common misconfigurations, outdated software versions, and potential security gaps that could expose your migrated applications.
Configure custom notifications through Cloud Pub/Sub or email alerts for critical security findings. Set up different alert levels based on severity – immediate notifications for critical issues like exposed databases or compromised instances, and weekly summaries for lower-priority recommendations.
The Asset Discovery feature continuously maps your entire GCP infrastructure, providing complete visibility into resources that might have been deployed outside your normal processes. This automated inventory prevents security blind spots that commonly occur during complex migrations from platforms like HostGator.
Integrate Security Command Center with your existing monitoring tools through APIs or export findings to Google Cloud Storage for long-term analysis. Regular security posture reviews using the dashboard help identify trends and guide security improvements over time.
Configuring firewall rules and network security
GCP’s Virtual Private Cloud offers network security capabilities that far exceed what’s possible with traditional HostGator hosting. The default-deny approach means you explicitly control every connection, creating a much more secure environment for your migrated applications.
Create separate VPC networks for different environments – development, staging, and production should never share the same network space. This isolation prevents accidental cross-environment access and contains potential security breaches.
Design firewall rules with specific source and destination parameters rather than broad “allow all” configurations. Tag your compute instances with descriptive labels that make firewall rule management straightforward. For example, tag web servers as “web-tier” and database servers as “db-tier” to create clear traffic flow patterns.
Implement Cloud NAT for instances that need outbound internet access without public IP addresses. This approach keeps your backend services completely hidden from direct internet contact while still allowing necessary external communications like API calls or software updates.
Enable VPC Flow Logs to monitor network traffic patterns and identify unusual connection attempts. These logs integrate with Cloud Security Command Center and can trigger automated responses to suspicious activity.
Consider setting up Cloud Armor for web application firewall protection, especially for public-facing services migrated from HostGator. The service provides DDoS protection and can block common web attacks before they reach your applications.
Use Private Google Access to allow instances without external IPs to reach Google Cloud APIs and services securely. This configuration maintains the security benefits of private networking while ensuring your applications can access necessary cloud services during and after your HostGator to GCP migration.
Post-Migration Optimization and Cost Management

Monitoring Performance Metrics and Identifying Bottlenecks
Your HostGator to GCP migration isn’t complete until you’ve established proper monitoring systems. Google Cloud Platform offers comprehensive monitoring tools that go far beyond what traditional hosting providers typically provide. Start by setting up Cloud Monitoring to track key performance indicators like CPU utilization, memory usage, network throughput, and database response times.
Create custom dashboards that display metrics relevant to your specific application. For web applications, monitor page load times, server response rates, and error frequencies. Database-heavy applications should track query execution times and connection pool usage. Set up alerting policies that notify you when metrics exceed predetermined thresholds – this proactive approach prevents minor issues from becoming major outages.
Use Cloud Trace to identify performance bottlenecks in your application code. This tool provides detailed insights into request latency and helps pinpoint exactly where delays occur in your system. For applications migrated from HostGator’s shared hosting environment, you’ll often discover performance improvements simply by having dedicated resources, but monitoring helps you optimize even further.
Right-Sizing Resources to Eliminate Waste
One major advantage of your Google Cloud migration is the ability to precisely match resources to actual needs. Unlike HostGator’s fixed hosting plans, GCP allows granular control over compute resources. Start by analyzing your actual usage patterns over the first few weeks post-migration.
Check CPU and memory utilization across different times and days. Many applications migrated from shared hosting initially over-provision resources due to uncertainty about requirements. If your instances consistently run below 50% utilization, consider downsizing to smaller machine types.
Google’s Compute Engine offers custom machine types, allowing you to create instances with exactly the CPU and memory ratios your application needs. This prevents paying for unused CPU cores when you need more RAM, or vice versa. Use sustained use discounts and committed use contracts for predictable workloads to reduce costs by up to 57%.
Implement auto-scaling for variable workloads. Configure your system to automatically add instances during traffic spikes and remove them during quiet periods. This dynamic scaling ensures you only pay for resources when you actually need them.
Setting Up Billing Alerts and Budget Controls
Cloud costs can spiral quickly without proper monitoring, especially for users transitioning from HostGator’s predictable monthly pricing. Google Cloud’s billing alerts and budget controls help prevent unexpected charges and maintain cost discipline.
Create budget alerts at different spending thresholds – typically at 50%, 80%, and 100% of your planned monthly spend. Configure these alerts to notify multiple team members via email and integrate with Slack or other communication tools for immediate visibility.
Set up billing exports to BigQuery for detailed cost analysis. This allows you to identify which services, projects, or resources consume the most budget. Create custom reports that break down spending by application component, making it easier to optimize costs.
Use Google Cloud’s cost optimization recommendations, which analyze your usage patterns and suggest specific ways to reduce spending. These recommendations often identify idle resources, suggest better machine types, or recommend switching to preemptible instances for suitable workloads.
Consider implementing spending limits through programmatic budget controls that can automatically shut down non-critical resources when spending exceeds predefined thresholds.
Implementing Automated Backup and Disaster Recovery
Your GCP migration provides opportunities for more robust backup and disaster recovery strategies than were possible with HostGator’s basic backup options. Implement automated, multi-region backup systems that ensure business continuity even during major outages.
Set up automated snapshots for all persistent disks using Cloud Scheduler. Create daily snapshots with a retention policy that balances recovery needs with storage costs. For critical data, implement cross-region replication to protect against regional disasters.
Design a disaster recovery strategy that defines Recovery Time Objectives (RTO) and Recovery Point Objectives (RPO) for different system components. Critical databases might require near-instantaneous failover, while static content might tolerate longer recovery times.
Use Cloud SQL’s automated backups and point-in-time recovery features for database protection. Configure read replicas in different regions for both performance and disaster recovery benefits. Test your recovery procedures regularly – automated backups are worthless if you can’t actually restore from them when needed.
Implement infrastructure as code using Terraform or Google Cloud Deployment Manager. This ensures you can quickly rebuild your entire environment in a different region if necessary, making disaster recovery faster and more reliable than manual reconstruction processes.

Moving your website from HostGator to Google Cloud Platform isn’t just a hosting change—it’s a smart business decision that sets you up for future growth. You’ve learned how to plan your migration carefully, execute the transfer step by step, and optimize your new cloud environment for peak performance. The enhanced security features, unlimited scalability, and cost-effective solutions make GCP a powerful alternative to traditional hosting limitations.
Take action on this migration sooner rather than later. The longer you wait, the more you’re missing out on improved site performance, better security, and the flexibility to handle traffic spikes without breaking a sweat. Start with the pre-migration planning phase we covered, back up your data, and begin your journey to modern cloud hosting. Your website—and your peace of mind—will thank you for making this upgrade.


