Deploy a Docker Container to AWS: Complete Integration Guide
Setting up a production-ready Docker container AWS deployment across multiple AWS services can feel overwhelming, but breaking it down into clear steps makes the process manageable. This guide walks developers and DevOps engineers through deploying containerized applications using AWS ECR Docker push workflows, ECS container deployment, and essential service integrations.
Who this guide is for: Software developers, DevOps engineers, and cloud architects who need to deploy Docker applications to AWS with enterprise-grade features like load balancing, database connectivity, and encryption.
We’ll cover three main areas to get your application running smoothly:
Container Deployment Pipeline: You’ll learn to build optimized Docker images, push them to Amazon ECR, and deploy to ECS with auto-scaling capabilities and AWS ALB configuration for traffic distribution.
Service Integration: We’ll connect your containers to RDS database connection setups, implement S3 integration Docker workflows for file storage, and add KMS encryption AWS security layers.
Production Readiness: Finally, we’ll set up Docker ECS auto scaling policies and monitoring tools to ensure your AWS container orchestration runs reliably at scale.
By the end of this ECR ECS deployment tutorial, you’ll have a fully functional, scalable container deployment that follows AWS best practices for security and performance.
Set Up Your Development Environment for AWS Deployment
Install and Configure Docker Desktop on Your Local Machine
Docker Desktop serves as your primary containerization platform for building and testing applications before deploying them to AWS. Download Docker Desktop from the official Docker website and install it based on your operating system – Windows, macOS, or Linux.
After installation, verify Docker is working correctly by running docker --version in your terminal. You should see the Docker version information displayed. Test the installation by running docker run hello-world, which downloads and runs a simple test container.
Configure Docker Desktop settings to optimize performance for AWS deployment workflows. Increase the allocated memory to at least 4GB and CPU cores to 2 or more, depending on your system capabilities. Enable Kubernetes if you plan to test container orchestration locally before moving to ECS.
Set up Docker Hub authentication if you need to pull private images during development. This step becomes crucial when working with proprietary base images or when your Docker container AWS deployment requires authenticated registry access.
Set Up AWS CLI with Proper Credentials and Permissions
AWS CLI installation enables seamless interaction with AWS services from your local development environment. Download the AWS CLI v2 from the AWS official documentation and follow the installation steps for your operating system.
Configure AWS credentials using aws configure command. You’ll need your AWS Access Key ID, Secret Access Key, default region, and preferred output format. These credentials should have appropriate permissions for ECR, ECS, RDS, S3, and KMS services.
Create a dedicated IAM user for your deployment activities rather than using root credentials. Attach policies like AmazonEC2ContainerRegistryFullAccess, AmazonECS_FullAccess, AmazonS3FullAccess, and AWSKeyManagementServicePowerUser to ensure your ECR ECS deployment tutorial runs smoothly.
Test your AWS CLI configuration by running aws sts get-caller-identity. This command returns your user information and confirms successful authentication. Also verify region settings with aws configure get region to ensure you’re deploying to the correct AWS region.
Consider setting up AWS CLI profiles for different environments (development, staging, production) using aws configure --profile profile-name. This approach prevents accidental deployments to wrong environments during your AWS container orchestration setup.
Create and Configure Your Project Directory Structure
Establish a well-organized project structure that supports efficient Docker container AWS deployment workflows. Create a main project directory and organize subdirectories for different components of your application stack.
your-project/
├── src/                    # Application source code
├── docker/                 # Docker-related files
│   ├── Dockerfile
│   ├── docker-compose.yml
│   └── .dockerignore
├── aws/                    # AWS infrastructure files
│   ├── ecs-task-definition.json
│   ├── alb-config.json
│   └── cloudformation/
├── scripts/                # Deployment and utility scripts
├── docs/                   # Documentation
└── .env.example           # Environment variables template
Create a comprehensive .dockerignore file to exclude unnecessary files from your container build context. Include common exclusions like node_modules/, .git/, *.log, and local configuration files. This optimization reduces build time and container size for your AWS ECR Docker push operations.
Set up environment configuration files for different deployment stages. Create .env.development, .env.staging, and .env.production files to manage environment-specific variables like database connections, S3 bucket names, and KMS key ARNs.
Initialize a Git repository in your project root to track changes and enable collaborative development. Add appropriate .gitignore entries to exclude sensitive files like actual environment configuration files containing credentials, but include the .env.example template for reference.
Build and Optimize Your Docker Container

Create a production-ready Dockerfile with best practices
Building a solid Dockerfile forms the foundation of your Docker container AWS deployment strategy. Start with a minimal base image like Alpine Linux or a distroless image to reduce attack surface and image size. Choose the specific version tags instead of “latest” to ensure consistent builds across environments.
FROM node:18-alpine AS builder
WORKDIR /app
COPY package*.json ./
RUN npm ci --only=production && npm cache clean --force

FROM node:18-alpine AS production
RUN addgroup -g 1001 -S nodejs && adduser -S nodeuser -u 1001
WORKDIR /app
COPY --from=builder --chown=nodeuser:nodejs /app/node_modules ./node_modules
COPY --chown=nodeuser:nodejs . .
USER nodeuser
EXPOSE 3000
CMD ["node", "server.js"]
Multi-stage builds separate your build dependencies from your runtime environment, dramatically reducing final image size. The example above shows how to create a builder stage for installing dependencies and a production stage with only runtime requirements.
Always run your container as a non-root user to follow security best practices. Create a dedicated user with minimal privileges rather than using the default root user. This approach protects your containerized application from privilege escalation attacks.
Configure environment variables and secrets management
Environment variables provide the flexibility needed for AWS container orchestration across different deployment stages. Design your application to read configuration from environment variables rather than hard-coded values.
ENV NODE_ENV=production
ENV PORT=3000
ENV LOG_LEVEL=info
Never include sensitive information like API keys, database passwords, or encryption keys directly in your Dockerfile or environment variables. Instead, prepare your application to receive these values through AWS Systems Manager Parameter Store or AWS Secrets Manager during ECS deployment.
Structure your environment configuration using a hierarchy that supports development, staging, and production environments:
| Environment Type | Configuration Source | Security Level |
|---|---|---|
| Development | .env files | Low |
| Staging | Parameter Store | Medium |
| Production | Secrets Manager | High |
Create a configuration loading mechanism in your application that checks for environment variables first, then falls back to secure parameter stores. This approach works seamlessly with ECS task definitions where you’ll specify secret ARNs.
Test your container locally before deployment
Local testing saves time and prevents deployment issues before pushing to AWS ECR. Build your container and run comprehensive tests to validate functionality, performance, and security configurations.
# Build your container
docker build -t myapp:local .

# Run basic functionality tests
docker run -p 3000:3000 --env-file .env.local myapp:local

# Test with resource constraints
docker run -m 512m --cpus="0.5" myapp:local

# Security scan
docker run --rm -v /var/run/docker.sock:/var/run/docker.sock \
  aquasec/trivy:latest image myapp:local
Run your container with resource limits that match your planned ECS task configuration. This testing reveals memory leaks, CPU bottlenecks, or other performance issues before they impact your production AWS ALB configuration.
Test network connectivity by running your container in an isolated network environment. Verify that your application handles connection failures gracefully, especially for RDS database connections and S3 integration points.
Optimize image size and security configurations
Image optimization directly impacts your ECS container deployment speed and storage costs. Each layer in your Dockerfile creates a new filesystem layer, so combine related commands to minimize layers.
# Bad - Creates multiple layers
RUN apt-get update
RUN apt-get install -y curl
RUN apt-get install -y git
RUN apt-get clean

# Good - Single layer
RUN apt-get update && \
    apt-get install -y curl git && \
    apt-get clean && \
    rm -rf /var/lib/apt/lists/*
Use .dockerignore files to exclude unnecessary files from your build context. Include common exclusions like:
node_modules
.git
.env*
*.md
tests/
docs/
Implement security scanning as part of your build process. Tools like Trivy, Snyk, or AWS Inspector can identify vulnerabilities in your base images and dependencies. Address critical and high-severity vulnerabilities before proceeding with your ECR ECS deployment tutorial.
Enable Docker content trust and image signing to ensure image integrity throughout your deployment pipeline. This practice becomes especially important when multiple team members push images to your ECR repository.
Consider using scratch or distroless base images for compiled languages like Go or Rust. These minimal images contain only your application binary and essential runtime dependencies, resulting in images under 10MB while maintaining full functionality for AWS container orchestration scenarios.
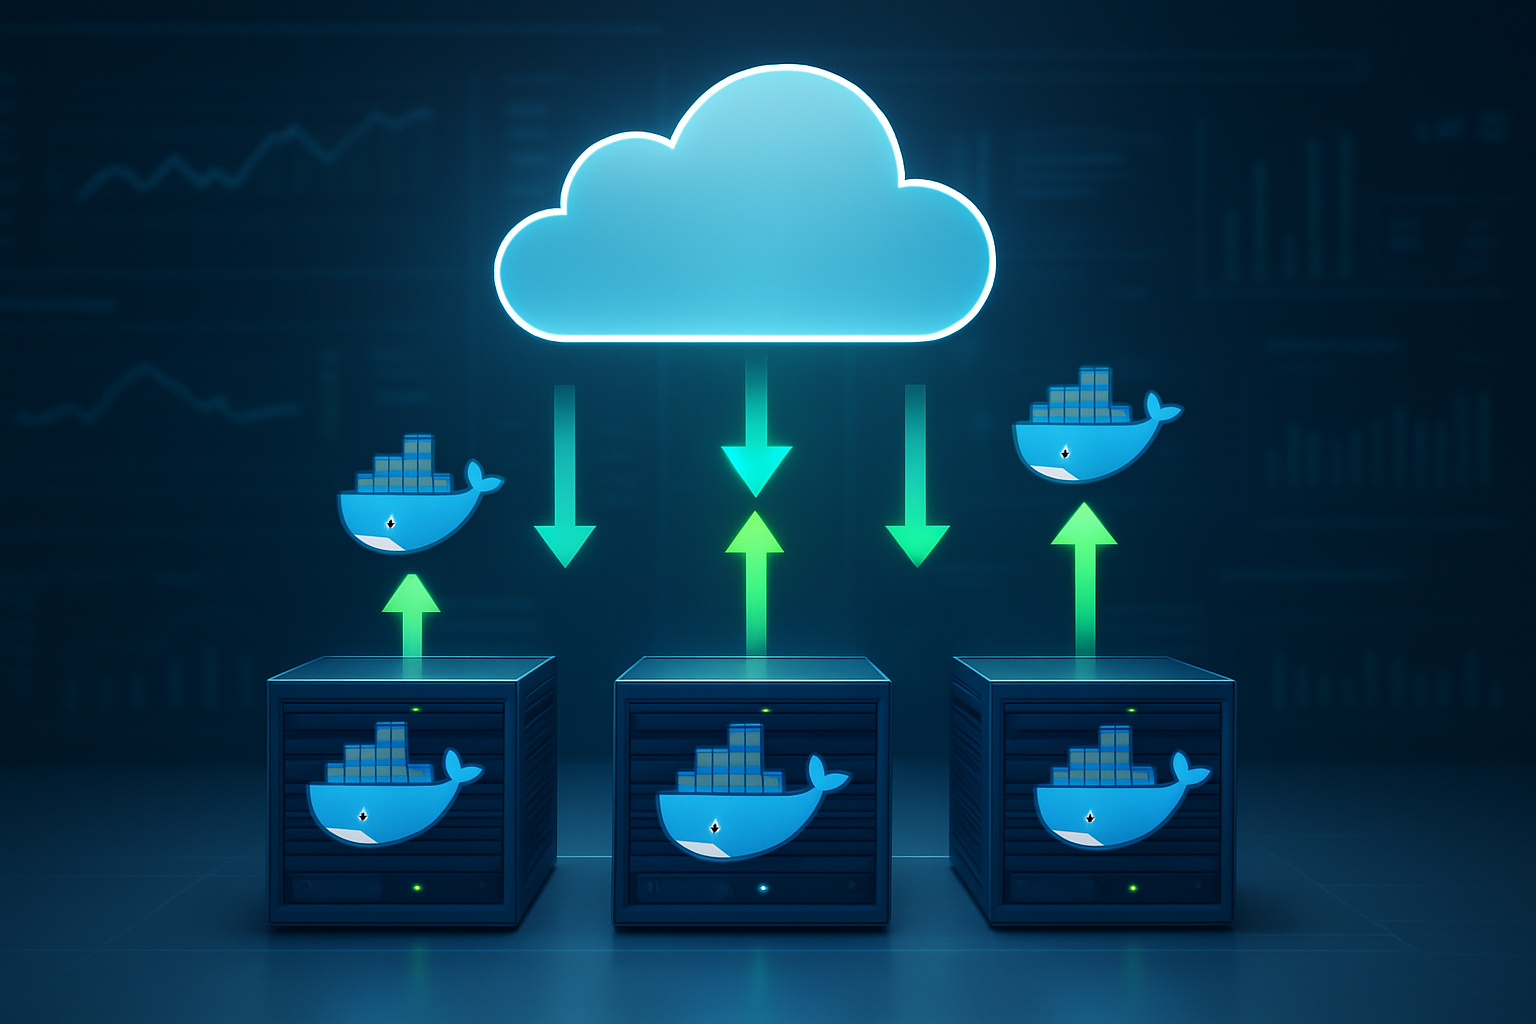
Push Your Container to Amazon ECR

Create and configure your ECR repository
Before you can start pushing your Docker container to AWS, you need to set up an ECR repository. Think of ECR as your private Docker registry in the cloud where your container images live safely.
Head to the AWS Management Console and navigate to the ECR service. Click “Create repository” and choose between a private or public repository. For most production applications, you’ll want a private repository to keep your container images secure. Give your repository a meaningful name that matches your application – something like my-app or web-service.
Configure the repository settings based on your needs. Enable image scanning to automatically check for security vulnerabilities in your container images. This feature scans your images using the Common Vulnerabilities and Exposures (CVE) database. You can also set up lifecycle policies to automatically clean up old images and save on storage costs. A simple policy might delete images older than 30 days or keep only the latest 10 versions.
Tag immutability is another useful setting that prevents overwriting existing image tags. When enabled, you can’t accidentally push a new image with the same tag, which helps maintain consistency across your deployments.
Authenticate Docker with your ECR registry
Your local Docker needs permission to push images to your ECR repository. AWS provides a temporary authentication token that expires after 12 hours, so you’ll need to refresh it regularly during development.
First, make sure you have the AWS CLI installed and configured with appropriate credentials. Your user or IAM role needs the AmazonEC2ContainerRegistryPowerUser policy or equivalent permissions.
Run this command to get the login token and authenticate Docker:
aws ecr get-login-password --region your-region | docker login --username AWS --password-stdin your-account-id.dkr.ecr.your-region.amazonaws.com
Replace your-region with your AWS region (like us-east-1) and your-account-id with your 12-digit AWS account number. You’ll see a “Login Succeeded” message when authentication works properly.
If you’re using Docker Desktop on macOS or Windows, make sure it’s running before attempting authentication. Some developers prefer creating a simple script to handle this authentication step since it needs to be repeated regularly.
Tag and push your container image to ECR
Now comes the exciting part – getting your Docker container into ECR. First, you need to tag your local image with the ECR repository URI. The tagging follows a specific format that includes your account ID, region, repository name, and image tag.
Get your repository URI from the ECR console or use this command:
aws ecr describe-repositories --repository-names your-repo-name --query 'repositories[0].repositoryUri' --output text
Tag your local image using the repository URI:
docker tag your-local-image:latest your-account-id.dkr.ecr.your-region.amazonaws.com/your-repo-name:latest
You can use any tag you want instead of latest – many teams use version numbers, git commit hashes, or environment names like v1.2.3 or prod-2024-01-15.
Push the tagged image to ECR:
docker push your-account-id.dkr.ecr.your-region.amazonaws.com/your-repo-name:latest
The push process uploads all the layers in your Docker image. Docker is smart about this – it only uploads layers that don’t already exist in the repository, which speeds up subsequent pushes. You’ll see progress bars showing the upload status for each layer.
Verify successful image upload and repository settings
After pushing your image, take a moment to verify everything worked correctly. Go back to the ECR console and refresh your repository page. You should see your newly uploaded image with details like:
- Image tag and URI
- Image size and creation date
- Vulnerability scan results (if enabled)
- Image manifest and layer information
Click on the image tag to see more details, including the full manifest and security scan results. If you enabled vulnerability scanning, wait a few minutes for the scan to complete. The results will show any known security issues in your image layers.
Test pulling the image from ECR to make sure it works:
docker pull your-account-id.dkr.ecr.your-region.amazonaws.com/your-repo-name:latest
This confirms that your image is properly stored and accessible. You can also check the repository permissions if you need to share access with other AWS accounts or set up cross-account deployments.
Keep track of your image tags and sizes, especially if you’re planning frequent deployments. ECR charges based on storage usage, so managing your image lifecycle becomes important as your application grows.
Configure Application Load Balancer for Traffic Distribution
Create Target Groups with Health Check Configurations
Target groups act as the foundation of your AWS ALB configuration, determining where traffic gets routed and how your application’s health is monitored. Start by navigating to the EC2 console and selecting “Target Groups” from the Load Balancing section.
When creating your target group, choose “IP addresses” as the target type since we’ll be working with ECS tasks. Set the protocol to HTTP or HTTPS depending on your application setup, and configure the port your Docker container exposes. The VPC selection should match where your ECS cluster will run.
Health check configuration requires careful attention to ensure reliable traffic distribution. Set the health check path to an endpoint that genuinely reflects your application’s status – avoid using the root path unless it performs actual health validation. Configure the health check interval between 15-30 seconds for responsive monitoring without overwhelming your container.
The healthy and unhealthy threshold settings determine how quickly the load balancer responds to changes. Setting healthy threshold to 2 and unhealthy threshold to 3 provides balanced responsiveness. Your health check timeout should be shorter than the interval, typically 5-10 seconds.
Configure advanced settings like the success codes (usually 200, but may include 201-299 for APIs) and the grace period for new targets. The deregistration delay should align with your application’s shutdown time – reduce it from the default 300 seconds if your container stops gracefully within 30-60 seconds.
Set Up Security Groups for Load Balancer Access
Security groups control network access to your ALB and require strategic planning for both public accessibility and backend security. Create two distinct security groups: one for the load balancer and another for your ECS tasks.
The ALB security group should allow inbound traffic on ports 80 and 443 from anywhere (0.0.0.0/0) to handle public web traffic. If you’re running a staging environment, restrict the source to your office IP ranges or VPN endpoints. Add outbound rules that allow the ALB to communicate with your target groups on the application port.
Your ECS task security group takes a more restrictive approach. Allow inbound traffic only from the ALB security group on your application port – this creates a secure communication channel between the load balancer and your containers. Never open your application port directly to the internet when using an ALB.
| Security Group | Direction | Port | Source | Purpose |
|---|---|---|---|---|
| ALB-SG | Inbound | 80 | 0.0.0.0/0 | HTTP traffic |
| ALB-SG | Inbound | 443 | 0.0.0.0/0 | HTTPS traffic |
| ALB-SG | Outbound | 8080 | ECS-SG | To application |
| ECS-SG | Inbound | 8080 | ALB-SG | From load balancer |
Consider adding rules for SSH access to your ECS instances if you’re using EC2 launch type, but restrict the source to your management network. For Fargate deployments, direct SSH isn’t available, simplifying your security posture.
Configure SSL Certificates and Domain Routing
SSL certificate management through AWS Certificate Manager (ACM) provides free certificates with automatic renewal. Request a certificate for your domain and any subdomains you plan to use. The validation process requires either DNS validation (preferred for automation) or email validation.
DNS validation works seamlessly with Route 53, but other DNS providers require manual CNAME record creation. Once validated, the certificate appears in ACM and can be attached to your load balancer listener.
Create HTTPS listeners on your ALB to handle encrypted traffic. The default action should forward to your target group, but you can configure multiple target groups based on path-based or host-based routing. Path-based routing directs traffic like /api/* to different target groups, while host-based routing uses different subdomains.
HTTP listeners should redirect to HTTPS for security. Configure a redirect action with status code 301 to ensure search engines and browsers remember the redirect. This maintains SEO rankings while enforcing encryption.
Host header routing enables multiple domains or subdomains to share the same load balancer. Add listener rules that check the host header and route accordingly. This proves cost-effective when running multiple applications or environments behind a single ALB.
Test Load Balancer Connectivity and Routing Rules
Testing your AWS ALB configuration ensures your Docker ECS deployment will receive traffic correctly. Start with basic connectivity by accessing your load balancer’s DNS name directly. The ALB takes several minutes to become active after creation, so wait for the state to show “active” before testing.
Use curl or browser developer tools to verify SSL certificate installation and HTTP-to-HTTPS redirects. Check that your health checks pass by monitoring the target group’s health status in the AWS console. Unhealthy targets indicate configuration problems with your application or security groups.
Test routing rules by sending requests to different paths or using different host headers. Tools like Postman or curl help verify that traffic reaches the correct target groups. Pay attention to response headers to confirm your application is responding, not the load balancer’s error pages.
Monitor CloudWatch metrics during testing to observe request counts, response times, and error rates. The ALB provides detailed metrics that help identify configuration issues or application problems. Set up basic CloudWatch alarms for high error rates or extended response times to catch issues early.
Load testing with tools like Apache Bench (ab) or Artillery.io validates that your ALB handles concurrent connections properly. Start with modest load and increase gradually while monitoring target group health and application performance. This testing reveals whether your health check configuration and target group settings work under realistic traffic conditions.
Deploy Container to ECS with Auto-Scaling Capabilities
Create ECS cluster and configure compute resources
Setting up your ECS cluster forms the backbone of your Docker ECS auto scaling infrastructure. Start by navigating to the ECS console and clicking “Create Cluster.” You’ll have two primary compute options: EC2 instances or AWS Fargate. Fargate simplifies management by handling the underlying infrastructure, while EC2 gives you more control over instance types and costs.
For production workloads, Fargate is typically the better choice because it eliminates server management overhead. When creating your cluster, choose a meaningful name that reflects your application’s purpose. The cluster acts as a logical grouping of compute resources where your containers will run.
Configure your VPC settings to match the subnets where you’ve placed your Application Load Balancer. This ensures proper networking between your containers and the ALB. If you’re using EC2 launch type, select appropriate instance types based on your application’s CPU and memory requirements. Consider using a mix of instance types with Auto Scaling Groups to optimize costs.
Define task definitions with resource allocations
Task definitions serve as blueprints for your containers, specifying exactly how they should run. Create a new task definition and select either EC2 or Fargate compatibility based on your cluster configuration. The task definition includes crucial settings like CPU and memory allocations, networking mode, and container configurations.
For AWS container orchestration, proper resource allocation prevents performance issues and ensures predictable scaling behavior. Set CPU units (1024 units = 1 vCPU) and memory in MB based on your application’s requirements. Underestimating these values can cause container failures, while overestimating wastes money.
Configure environment variables for database connections, S3 bucket names, and KMS key references. Use AWS Systems Manager Parameter Store or Secrets Manager for sensitive configuration data rather than hardcoding values. This approach improves security and makes your deployment more flexible across different environments.
Set up logging by configuring the awslogs driver to send container logs to CloudWatch. This creates a centralized location for monitoring application behavior and troubleshooting issues. Include health check commands to help ECS determine when your containers are running properly.
Set up ECS service with desired capacity and scaling policies
ECS services maintain your desired number of running tasks and handle deployments. Create a service within your cluster, selecting the task definition you just created. Start with a desired capacity that matches your expected baseline traffic – you can always adjust this later.
Configure Docker ECS auto scaling policies to handle traffic fluctuations automatically. ECS supports target tracking scaling, step scaling, and scheduled scaling. Target tracking works well for most applications – set it to maintain average CPU utilization around 70% or average memory utilization around 80%.
For step scaling, define CloudWatch alarms that trigger scaling actions based on specific thresholds. Create scale-out policies for high traffic periods and scale-in policies to reduce costs during low traffic. Be careful with scale-in policies to avoid thrashing – set longer cooldown periods to prevent rapid scaling actions.
Set minimum and maximum capacity limits to control costs and ensure availability. The minimum should handle your baseline load, while the maximum should accommodate peak traffic without breaking your budget. Consider using scheduled scaling if your traffic patterns are predictable, like increased load during business hours.
Connect your service to the Application Load Balancer
Integrating your ECS service with the ALB enables traffic distribution and health monitoring. During service creation, specify your target group in the load balancer configuration section. This tells ECS to register new tasks automatically with the ALB target group.
Configure health check settings that align with your application’s startup time and health endpoint. The ALB health check path should return a 200 status code when your application is ready to receive traffic. Set appropriate intervals and timeout values – too aggressive settings can mark healthy containers as unhealthy during temporary load spikes.
Use the ALB’s connection draining feature during deployments by setting a deregistration delay. This allows existing requests to complete before routing traffic to new task versions. A 30-60 second delay typically works well for web applications.
Monitor the target group health in the ALB console to verify that your containers are registering correctly. Healthy targets should show as “healthy” status, while containers that fail health checks will appear as “unhealthy” and won’t receive traffic until they recover.
Establish Secure RDS Database Connectivity
Create RDS instance with proper security group configurations
Setting up your RDS instance correctly is the backbone of secure database connectivity for your ECS containers. Start by launching an RDS instance in the same VPC as your ECS cluster to minimize latency and maximize security. Choose your preferred database engine – PostgreSQL, MySQL, or Aurora depending on your application’s needs.
The security group configuration makes or breaks your database security. Create a dedicated security group for your RDS instance that only allows inbound connections on the database port (typically 3306 for MySQL or 5432 for PostgreSQL) from your ECS security group. This approach creates a tight security boundary where only your containerized applications can reach the database.
Configure your RDS instance within private subnets spread across multiple Availability Zones for high availability. Enable encryption at rest using KMS keys to protect your data even if the underlying storage is compromised. Set up automated backups with a retention period that matches your business requirements – typically 7 to 30 days.
Consider enabling Multi-AZ deployments for production workloads to ensure automatic failover capabilities. This setup provides seamless database availability during maintenance windows or unexpected outages.
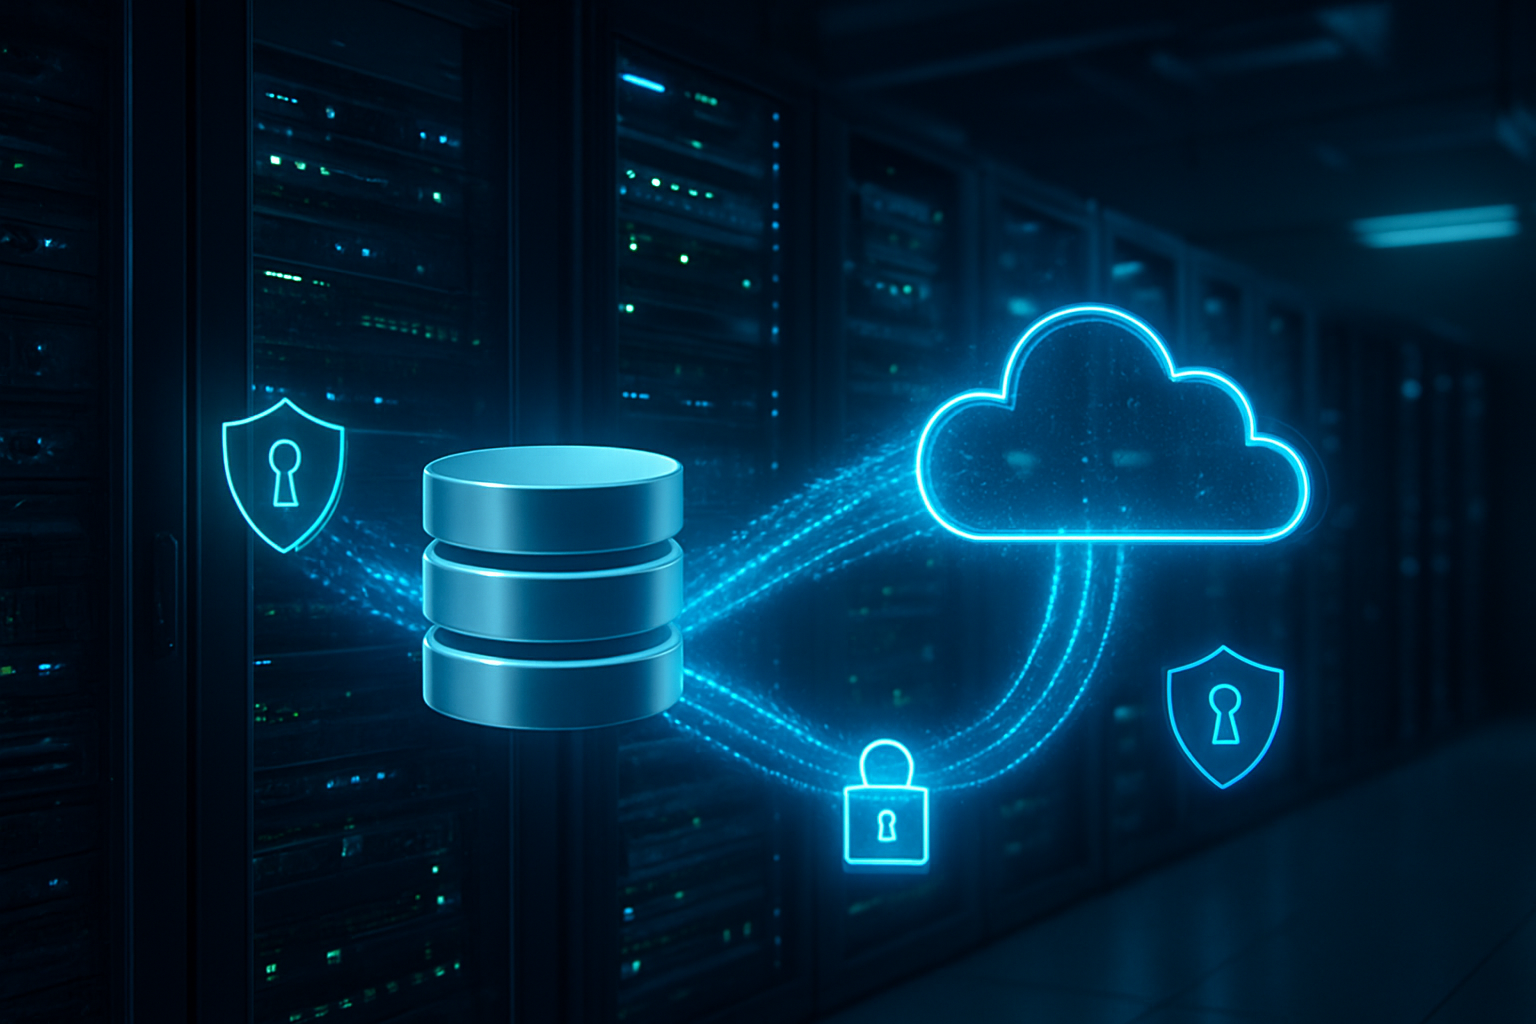
Configure database credentials using AWS Secrets Manager
Managing database credentials securely is critical for maintaining a robust security posture in your AWS container orchestration setup. AWS Secrets Manager eliminates the need to hardcode database passwords in your container images or environment variables, which could expose sensitive information.
Create a new secret in Secrets Manager to store your RDS credentials. Include the username, password, database endpoint, port, and database name. Secrets Manager automatically encrypts these values using KMS encryption, adding an extra layer of protection.
Configure your ECS task definition to retrieve credentials from Secrets Manager at runtime. Use the secrets parameter in your container definition rather than the environment parameter:
"secrets": [
  _PASSWORD",
    "valueFrom": "arn:aws:secretsmanager:region:account:secret:rds-db-credentials-abc123:password"
  },
  {
    "name": "DB_USERNAME",
    "valueFrom": "arn:aws:secretsmanager:region:account:account:secret:rds-db-credentials-abc123:username"
  }
]
Your ECS task execution role needs the secretsmanager:GetSecretValue permission to access these credentials. This setup allows your containers to authenticate with RDS without storing sensitive information in plain text.
Enable automatic rotation for your database passwords to maintain security best practices. Secrets Manager can automatically update RDS passwords on a schedule you define, typically every 30 to 90 days.
Test database connectivity from your ECS containers
Validating your RDS database connection from ECS containers ensures your entire infrastructure stack works together properly. Start by deploying a test container with database client tools installed to verify connectivity before deploying your actual application.
Create a simple test script that attempts to connect to your RDS instance using the credentials from Secrets Manager. This script should test basic operations like establishing a connection, creating a test table, inserting data, and retrieving results. Run this test container as an ECS task to simulate real-world connectivity conditions.
Monitor CloudWatch logs during your connectivity tests to identify any network or authentication issues. Common problems include security group misconfigurations, incorrect VPC routing, or IAM permission issues with Secrets Manager access.
Use the AWS CLI or SDK within your test container to verify that Secrets Manager integration works correctly:
aws secretsmanager get-secret-value --secret-id rds-db-credentials --query SecretString --output text
Check that your ECS containers can resolve the RDS endpoint hostname and establish TCP connections on the correct port. Network connectivity issues often stem from subnet routing problems or security group rules that are too restrictive.
Document your connection strings and test procedures for your development team. Create health check endpoints in your application that verify database connectivity, making it easier to monitor your deployment’s health over time.
Consider implementing connection pooling in your application to optimize database connections and handle traffic spikes effectively. Connection pools reduce the overhead of establishing new database connections and help manage concurrent access to your RDS instance.
Integrate S3 Storage for File Management
Create S3 buckets with appropriate access policies
S3 integration provides your Docker container with scalable file storage capabilities. Start by creating dedicated buckets for different purposes – one for application assets, another for user uploads, and a third for logging or backup data. This separation improves security and makes management easier.
Use the AWS CLI or Console to create your buckets with specific naming conventions that reflect their purpose. Enable default encryption during bucket creation to protect data at rest. Configure bucket policies that restrict access to your ECS tasks and specific IP ranges if needed.
{
  "Version": "2012-10-17",
  "Statement": [
    {
      "Effect": "Allow",
      "Principal": {
        "AWS": "arn:aws:iam::ACCOUNT-ID:role/ECS-TaskRole"
      },
      "Action": [
        "s3:GetObject",
        "s3:PutObject",
        "s3:DeleteObject"
      ],
      "Resource": "arn:aws:s3:::your-app-bucket/*"
    }
  ]
}
Block public access unless your application specifically needs public file serving. For public content, use CloudFront distribution instead of direct S3 access for better performance and security.
Configure IAM roles for ECS container S3 access
Your ECS tasks need proper IAM permissions to interact with S3 buckets. Create a task execution role and a separate task role – the execution role handles container startup, while the task role governs runtime permissions.
Attach a custom policy to your ECS task role that grants specific S3 permissions. Avoid using wildcard permissions; instead, specify exact bucket ARNs and required actions. This follows the principle of least privilege and reduces security risks.
{
  "Version": "2012-10-17",
  "Statement": [
    {
      "Effect": "Allow",
      "Action": [
        "s3:ListBucket"
      ],
      "Resource": "arn:aws:s3:::your-app-bucket"
    },
    {
      "Effect": "Allow",
      "Action": [
        "s3:GetObject",
        "s3:PutObject",
        "s3:DeleteObject"
      ],
      "Resource": "arn:aws:s3:::your-app-bucket/*"
    }
  ]
}
Update your ECS task definition to reference the IAM role. The AWS SDK in your application will automatically use these credentials without hardcoding access keys in your container.
Implement secure file upload and retrieval functionality
Build file handling capabilities into your application using AWS SDKs. Use pre-signed URLs for secure file uploads, which allows clients to upload directly to S3 without routing through your container. This reduces bandwidth costs and improves performance.
For file uploads, generate time-limited pre-signed URLs with specific content type restrictions. Set expiration times based on your application needs – typically 15 minutes for uploads is sufficient. Include file size limits and content type validation to prevent abuse.
import boto3
from botocore.exceptions import ClientError

def generate_presigned_url(bucket_name, object_name, expiration=3600):
    s3_client = boto3.client('s3')
    try:
        response = s3_client.generate_presigned_url(
            'put_object',
            Params={'Bucket': bucket_name, 'Key': object_name},
            ExpiresIn=expiration
        )
    except ClientError as e:
        return None
    return response
For file retrieval, implement streaming downloads for large files to avoid memory issues. Use multipart uploads for files larger than 5MB to improve reliability and enable parallel uploads.
Set up S3 bucket versioning and lifecycle policies
Enable versioning on your S3 buckets to protect against accidental deletion and provide rollback capabilities. Versioning stores multiple copies of objects, so implement lifecycle policies to manage storage costs.
Create lifecycle rules that transition older versions to cheaper storage classes like IA (Infrequent Access) after 30 days and Glacier after 90 days. Set up automatic deletion of non-current versions after a specified period to control costs.
{
  "Rules": [
    {
      "ID": "AppDataLifecycle",
      "Status": "Enabled",
      "Transitions": [
        {
          "Days": 30,
          "StorageClass": "STANDARD_IA"
        },
        {
          "Days": 90,
          "StorageClass": "GLACIER"
        }
      ],
      "NoncurrentVersionTransitions": [
        {
          "NoncurrentDays": 30,
          "StorageClass": "STANDARD_IA"
        }
      ],
      "NoncurrentVersionExpiration": {
        "NoncurrentDays": 365
      }
    }
  ]
}
Set up incomplete multipart upload cleanup to remove failed uploads after 7 days. This prevents storage charges for abandoned uploads. Configure CloudWatch metrics to monitor bucket usage and set up alerts for unusual activity patterns that might indicate security issues or application problems.
Implement KMS Encryption for Data Security

Create KMS keys for application data encryption
Setting up AWS Key Management Service (KMS) encryption starts with creating dedicated encryption keys for your application data. KMS provides centralized control over cryptographic keys used to protect your data across AWS services.
Navigate to the AWS KMS console and create a new customer-managed key. Choose “Symmetric” as the key type since most applications require symmetric encryption for data at rest and in transit. Define a clear key alias like myapp-production-data-key to easily identify the key’s purpose.
During key creation, configure the key policy to specify which AWS accounts and users can manage and use the key. The key policy acts as the primary access control mechanism for your encryption key. Include your ECS task execution role and any other services that need access to decrypt application data.
{
  "Version": "2012-10-17",
  "Statement": [
    {
      "Sid": "AllowECSTaskAccess",
      "Effect": "Allow",
      "Principal": {
        "AWS": "arn:aws:iam::YOUR-ACCOUNT:role/ecsTaskExecutionRole"
      },
      "Action": [
        "kms:Decrypt",
        "kms:GenerateDataKey"
      ],
      "Resource": "*"
    }
  ]
}
Consider creating separate keys for different data types or environments. For example, create one key for database encryption, another for S3 bucket encryption, and a third for application secrets. This separation provides granular control and reduces the blast radius if a key gets compromised.
Configure IAM permissions for KMS key usage
Proper IAM configuration ensures your Docker containers running on ECS can securely access KMS keys without exposing unnecessary permissions. Create specific IAM roles and policies that follow the principle of least privilege.
Start by creating an IAM policy that grants only the necessary KMS permissions your application requires:
{
  "Version": "2012-10-17",
  "Statement": [
    {
      "Effect": "Allow",
      "Action": [
        "kms:Decrypt",
        "kms:GenerateDataKey",
        "kms:GenerateDataKeyWithoutPlaintext"
      ],
      "Resource": [
        "arn:aws:kms:us-east-1:YOUR-ACCOUNT:key/YOUR-KEY-ID"
      ]
    }
  ]
}
Attach this policy to your ECS task role, not the task execution role. The task role provides permissions for your application code running inside the container, while the execution role handles container lifecycle operations.
Set up environment variables in your ECS task definition to pass the KMS key ARN to your application:
environment:
  - name: KMS_KEY_ARN
    value: arn:aws:kms:us-east-1:123456789012:key/abcd1234-a123-456a-a12b-a123b4cd56ef
Enable AWS CloudTrail logging for KMS operations to monitor key usage and detect any unauthorized access attempts. This provides audit trails for compliance requirements and security monitoring.
Integrate encryption and decryption in your application code
Implementing KMS encryption in your application code requires using the AWS SDK to encrypt sensitive data before storing it and decrypt it when needed. The integration should be seamless and not impact application performance significantly.
Here’s a Python example showing how to encrypt and decrypt data using KMS within your Docker container:
import boto3
import base64
import os

class KMSEncryption:
    def __init__(self):
        self.kms_client = boto3.client('kms')
        self.key_id = os.environ['KMS_KEY_ARN']

    def encrypt_data(self, plaintext_data):
        response = self.kms_client.encrypt(
            KeyId=self.key_id,
            Plaintext=plaintext_data
        )
        encrypted_data = base64.b64encode(response['CiphertextBlob']).decode()
        return encrypted_data

    def decrypt_data(self, encrypted_data):
        ciphertext_blob = base64.b64decode(encrypted_data.encode())
        response = self.kms_client.decrypt(CiphertextBlob=ciphertext_blob)
        return response['Plaintext'].decode()
Implement envelope encryption for large data payloads to improve performance. KMS has a 4KB limit for direct encryption, so use data keys for encrypting larger files before storing them in S3 or your database.
Cache decrypted data keys in memory when possible to reduce KMS API calls and improve application response times. However, implement proper key rotation and cache invalidation to maintain security standards.
For database integration, encrypt sensitive columns before inserting data and decrypt them when retrieving. This approach works well with RDS and ensures your sensitive data remains protected even if someone gains unauthorized database access.
Handle KMS errors gracefully in your application code. Network issues or permission problems can cause encryption operations to fail, so implement proper error handling and retry logic to maintain application availability.
Monitor and Troubleshoot Your Deployment

Set up CloudWatch logging for container monitoring
CloudWatch serves as your primary monitoring hub for AWS container orchestration. Configure CloudWatch log groups before launching your ECS service to capture comprehensive application logs. Create dedicated log groups for different components—one for your application logs, another for system metrics, and a separate group for ALB access logs.
aws logs create-log-group --log-group-name /ecs/my-app
aws logs create-log-group --log-group-name /aws/ecs/containerinsights/my-cluster/performance
Update your ECS task definition to include the awslogs driver configuration. Specify the log group name, region, and stream prefix to organize logs effectively. Your Docker containers will automatically stream stdout and stderr to CloudWatch, making debugging significantly easier.
Enable Container Insights for your ECS cluster to gain detailed performance metrics. This feature provides CPU, memory, network, and disk utilization data at both cluster and service levels. Navigate to CloudWatch Console and enable Container Insights for enhanced visibility into your containerized applications.
Configure health checks and alerting mechanisms
Implement multi-layered health checks starting with ELB target group health checks. Configure these to ping your application’s /health endpoint every 30 seconds. Set unhealthy threshold to 2 consecutive failures and healthy threshold to 2 consecutive successes.
{
  "HealthCheckPath": "/health",
  "HealthCheckIntervalSeconds": 30,
  "HealthyThresholdCount": 2,
  "UnhealthyThresholdCount": 2
}
Create CloudWatch alarms for critical metrics like CPU utilization above 80%, memory usage exceeding 85%, and error rates surpassing 5%. Set up SNS topics to notify your team via email or Slack when thresholds are breached. Don’t forget to monitor RDS connection pool exhaustion and S3 request errors.
Configure ECS service-level health checks that work alongside ALB health checks. These ensure containers restart automatically when they fail internal health validations, maintaining high availability for your Docker ECS deployment.
Test end-to-end functionality across all services
Create comprehensive test scripts that validate the entire application stack. Start with basic connectivity tests—verify your ALB responds to HTTP requests and properly routes traffic to healthy ECS tasks. Test database connections by executing simple queries against your RDS instance through the application.
Validate S3 integration by uploading, downloading, and deleting test files through your application endpoints. Confirm KMS encryption works correctly by encrypting sensitive data and verifying it’s stored encrypted in both RDS and S3. Use AWS CLI commands to inspect encrypted objects and database encryption status.
Perform load testing using tools like Apache Bench or JMeter to simulate real-world traffic patterns. Monitor how auto-scaling responds to increased demand and verify new container instances register properly with the ALB target group. Test failover scenarios by manually stopping ECS tasks and observing recovery behavior.
Run security tests to ensure your application properly handles authentication, validates SSL certificates, and maintains secure communication channels between all AWS services.
Implement backup and disaster recovery procedures
Establish automated RDS backups with point-in-time recovery enabled. Configure backup retention periods based on your recovery objectives—typically 7-30 days for most applications. Create automated snapshots before major deployments to enable quick rollbacks if needed.
Set up S3 versioning and cross-region replication for critical data. Enable S3 lifecycle policies to transition older objects to cheaper storage classes like Glacier for long-term retention. This approach balances cost efficiency with data availability requirements.
Document your ECR ECS deployment process thoroughly, including environment variables, secrets management, and configuration parameters. Store infrastructure as code (CloudFormation or Terraform templates) in version control for consistent environment recreation.
Create runbooks for common failure scenarios: container startup issues, database connectivity problems, and ALB health check failures. Test recovery procedures regularly by conducting planned failover exercises. Maintain an updated contact list for emergency response and establish clear escalation paths for different types of incidents.
Configure AWS Config to track configuration changes across your infrastructure, enabling you to identify what changed when problems occur and potentially roll back to known-good configurations.
Deploying a containerized application to AWS doesn’t have to feel overwhelming when you break it down into manageable steps. You’ve walked through setting up your development environment, building an optimized Docker container, and pushing it to ECR. From there, configuring an Application Load Balancer and deploying to ECS with auto-scaling gives your application the reliability and performance it needs to handle real-world traffic.
The real power comes from integrating the supporting AWS services that make your application production-ready. Connecting to RDS gives you a robust database solution, while S3 handles your file storage needs seamlessly. Adding KMS encryption keeps your sensitive data protected, and proper monitoring helps you catch issues before they impact users. Take some time to test each component thoroughly and set up proper alerts – your future self will thank you when everything runs smoothly in production.