Best Practices for Migrating from AWS Amplify Gen 1 to Gen 2
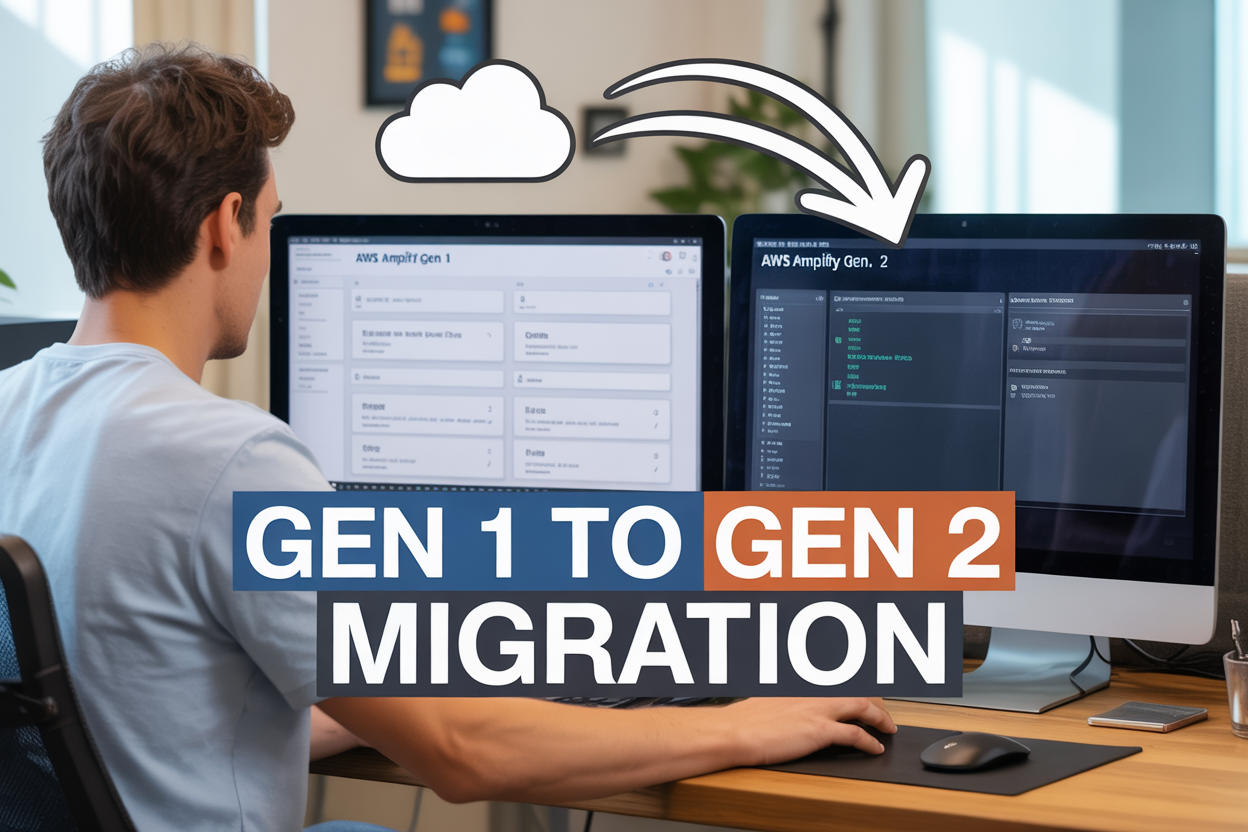
AWS Amplify Gen 2 brings major improvements to how you build and deploy full-stack applications, but making the jump from Gen 1 requires careful planning. This AWS Amplify migration guide is designed for development teams and individual developers who need to upgrade existing Amplify projects without breaking production systems or losing valuable functionality.
Migrating from AWS Amplify Gen 1 to Gen 2 isn’t just about copying files over – it’s a complete transformation of how your backend and frontend work together. You’ll need to understand the architectural changes, plan your migration timeline, and execute the move in stages to keep your application running smoothly.
In this comprehensive AWS Amplify upgrade tutorial, we’ll walk you through the essential steps for a successful migration. You’ll learn how to assess your current Gen 1 setup and create a solid pre-migration strategy that minimizes downtime. We’ll also cover proven AWS Amplify backend migration techniques for moving your core services like authentication, APIs, and databases, plus frontend migration approaches that keep your user experience intact throughout the transition.
Understanding Key Differences Between Gen 1 and Gen 2
Architectural Changes That Impact Your Migration Strategy
AWS Amplify Gen 2 migration brings fundamental shifts in how your application architecture is structured and managed. The most significant change moves from the CLI-based approach to a code-first methodology using AWS CDK (Cloud Development Kit). This means your backend infrastructure is now defined entirely in TypeScript code rather than through CLI commands and configuration files.
The new architecture eliminates the amplify folder structure you’re familiar with from Gen 1. Instead, Gen 2 organizes everything around a single amplify directory containing your backend definition. Your data models, authentication rules, and API definitions live in TypeScript files that compile directly to AWS CloudFormation templates.
Resource management also works differently. Gen 2 uses a more predictable deployment model where each developer gets their own sandbox environment by default. This replaces the shared environment challenges that often caused conflicts in Gen 1 projects. The new approach means better isolation during development and more reliable deployments.
New TypeScript-First Development Experience
Gen 2 transforms how you write and maintain your Amplify backend through a comprehensive TypeScript-first approach. Every aspect of your backend configuration – from GraphQL schemas to authentication rules – is now written in TypeScript with full type safety and IntelliSense support.
Your GraphQL schema definition moves from .graphql files to TypeScript schema builders. This change provides immediate feedback on schema validity and enables better refactoring capabilities. Type generation happens automatically, ensuring your frontend code stays synchronized with backend changes without manual intervention.
The resolver system receives a complete overhaul. Instead of VTL (Velocity Template Language) templates, you write JavaScript/TypeScript functions for custom business logic. These functions run in modern Node.js environments with better performance and debugging capabilities than their Gen 1 counterparts.
Enhanced Local Development and Testing Capabilities
Local development becomes significantly more powerful with AWS Amplify Gen 2 best practices. The new sandbox environment provides a complete local development experience that closely mirrors your production setup. Each developer can spin up their own isolated backend environment without affecting team members.
Hot reloading extends beyond frontend changes to include backend modifications. When you update your schema or authentication rules, the local environment reflects these changes almost instantly. This dramatically reduces the feedback loop that previously required full deployments to test backend changes.
Testing capabilities expand with built-in support for unit testing your backend functions. The new architecture makes it simple to write comprehensive tests for your resolvers and business logic. Integration testing also improves through better local environment simulation and more reliable mocking capabilities.
Updated Authentication and Authorization Models
Authentication configuration simplifies significantly while becoming more flexible. Gen 2 replaces the complex aws-exports.js configuration with straightforward TypeScript definitions. You define your authentication requirements directly in your backend code using intuitive builder patterns.
The authorization model gains more granular control options. Field-level authorization rules become easier to implement and understand. You can now define complex permission scenarios using TypeScript functions rather than string-based rule definitions, making authorization logic more maintainable and testable.
Social provider integration streamlines through improved configuration patterns. Setting up OAuth providers requires less boilerplate code and provides better error handling. The new system also supports more advanced authentication flows out of the box, including custom authentication challenges and multi-factor authentication scenarios.
Pre-Migration Planning and Assessment

Auditing Your Current Gen 1 Implementation
Start your AWS Amplify Gen 2 migration by taking a comprehensive inventory of your existing Gen 1 setup. Create a detailed map of all backend services currently in use, including authentication configurations, API endpoints, database schemas, storage buckets, and any custom Lambda functions. Document your amplify/backend folder structure, paying special attention to custom resolvers, triggers, and any manual CloudFormation modifications you’ve made over time.
Export your current schema definitions and note any GraphQL customizations or direct DynamoDB table modifications. Catalog your authentication providers, user pools, and any custom authentication flows. Don’t forget to document your storage configurations, including S3 bucket policies and any custom access patterns you’ve implemented.
Create a spreadsheet or documentation file that lists every resource, its current configuration, and its dependencies on other services. This audit becomes your migration roadmap and helps prevent overlooking critical components during the transition process.
Identifying Features That Require Code Refactoring
Gen 2’s TypeScript-first approach and new APIs mean certain patterns from your Gen 1 implementation won’t directly translate. Focus on areas where significant refactoring will be required rather than simple configuration changes.
Authentication flows represent one of the biggest refactoring challenges. Gen 1’s Auth category methods like Auth.signIn() need updating to work with Gen 2’s new authentication APIs. Custom authentication challenges, federated identity providers, and multi-factor authentication setups require careful attention during migration.
API implementations built with the old GraphQL Transform decorators need restructuring for Gen 2’s schema-first approach. Custom resolvers written in VTL (Velocity Template Language) must be converted to JavaScript or TypeScript. Direct AppSync resolver modifications and pipeline resolvers require special handling in the new architecture.
Storage operations using the Gen 1 Storage category need updating to align with Gen 2’s new APIs and security model. File upload patterns, access control mechanisms, and any custom storage triggers will need refactoring.
Frontend code using Amplify UI components may need updates to work with the latest component versions and new theming systems. Any custom hooks or utilities built around Gen 1 APIs require modification to work with Gen 2’s client libraries.
Setting Up Your Migration Timeline and Milestones
Break your AWS Amplify Gen 2 migration into manageable phases spread over 4-8 weeks, depending on your application’s complexity. Start with a development environment migration before touching staging or production systems.
Phase 1 (Week 1-2): Environment Setup and Backend Core
Set up your new Gen 2 development environment and migrate essential backend services like authentication and basic API functionality. This phase focuses on getting your development team familiar with the new tooling and architecture patterns.
Phase 2 (Week 2-3): Data Layer and Advanced APIs
Migrate your database schemas, custom resolvers, and complex API logic. Test data migration processes and ensure all backend functionality works correctly with the new Gen 2 architecture.
Phase 3 (Week 3-4): Frontend Integration
Update your frontend code to work with Gen 2 client libraries, migrate UI components, and test the complete user experience. Run comprehensive testing across different user scenarios and device types.
Phase 4 (Week 4-5): Staging Environment and Performance Testing
Deploy to staging environment, conduct load testing, and validate that performance meets or exceeds your Gen 1 implementation. This phase includes user acceptance testing and final bug fixes.
Phase 5 (Week 5-6): Production Migration
Execute your production migration strategy, which might involve blue-green deployment, gradual rollout, or maintenance window approaches depending on your application’s requirements.
Plan buffer time between each phase for unexpected issues and thorough testing. Create rollback procedures for each milestone in case you need to revert changes quickly. Document all migration steps and maintain clear communication with stakeholders about progress and any potential impacts on users.
Setting Up Your Gen 2 Development Environment
Installing and Configuring Amplify CLI v12+
Before starting your AWS Amplify Gen 2 migration, you need the right tools in place. The first step involves upgrading to Amplify CLI version 12 or higher, which includes essential Gen 2 features and improved migration capabilities.
Start by uninstalling your existing Amplify CLI if you’re running an older version:
npm uninstall -g @aws-amplify/cli
Install the latest version using npm or yarn:
npm install -g @aws-amplify/cli@latest
After installation, verify your CLI version and configure your AWS credentials:
amplify --version
amplify configure
The configuration process guides you through setting up IAM user permissions and AWS profile settings. Make sure your IAM user has adequate permissions for creating and managing AWS services like Lambda, DynamoDB, S3, and Cognito.
Creating Your New Gen 2 Project Structure
Amplify Gen 2 setup follows a different project architecture compared to Gen 1. The new structure emphasizes Infrastructure as Code (IaC) principles and provides better developer experience through TypeScript-first configuration.
Create your new Gen 2 project using the CLI:
npm create amplify@latest
This command initializes a fresh project with the modern file structure:
my-amplify-app/
├── amplify/
│   ├── backend.ts
│   ├── auth/
│   ├── data/
│   └── storage/
├── src/
├── package.json
└── tsconfig.json
The amplify/backend.ts file serves as your main configuration entry point, replacing the previous amplify/backend/ directory structure. This approach gives you better type safety and IntelliSense support when defining your backend resources.
Key differences in the new structure include:
- Centralized Configuration: All backend definitions live in TypeScript files
- Resource Definitions: Each service (auth, data, storage) has its own directory with typed schemas
- Environment Management: Simplified branch-based deployments
- Local Development: Improved local testing and debugging capabilities
Establishing Version Control Best Practices
Setting up proper version control practices becomes even more critical during AWS Amplify Gen 2 migration. The new architecture generates different files and requires updated .gitignore patterns.
Create or update your .gitignore file with Gen 2-specific patterns:
# Amplify Gen 2
amplify/backend/backend-config.json
amplify/backend/backend-environment.json
.amplify/
node_modules/
dist/
.env
.env.local
Establish branching strategies that align with Amplify’s environment management:
| Branch Type | Purpose | Amplify Environment |
|---|---|---|
main |
Production releases | prod |
develop |
Integration testing | staging |
feature/* |
Feature development | dev or ephemeral |
The Gen 2 approach supports better CI/CD integration through its declarative configuration. Each environment maintains its own backend configuration, making it easier to manage different stages of your application lifecycle.
Consider implementing pre-commit hooks to validate your Amplify configuration:
npm install --save-dev @aws-amplify/backend-cli
This ensures your backend definitions remain valid before committing changes to your repository.
Setting Up Local Testing Infrastructure
Local development capabilities have significantly improved in Amplify Gen 2 setup. The new architecture supports local testing of backend services, reducing development cycles and improving debugging efficiency.
Start your local development environment:
npx ampx sandbox
This command spins up local versions of your backend services, including:
- GraphQL API: Local AppSync simulator
- Authentication: Local Cognito user pools
- Storage: Local S3 bucket simulation
- Functions: Local Lambda execution environment
The sandbox environment automatically watches for changes in your amplify/ directory and hot-reloads your backend configuration. This gives you immediate feedback when modifying your data models, authentication rules, or storage policies.
Configure your frontend application to connect to the local backend by updating your configuration:
import { Amplify } from 'aws-amplify';
import outputs from '../amplify_outputs.json';

Amplify.configure(outputs);
The amplify_outputs.json file gets automatically generated and updated based on your backend configuration. This file contains all the necessary connection details for your frontend to communicate with both local and deployed environments.
For testing purposes, you can also run individual services in isolation:
npx ampx generate graphql-client-code
npx ampx generate forms
These commands help you generate type-safe client code and form components, streamlining your AWS Amplify migration guide implementation process.
Migrating Core Backend Services

Converting API Gateway and Lambda Functions
The API Gateway and Lambda function migration represents one of the most significant changes in your AWS Amplify Gen 2 migration. Gen 2 introduces a completely different approach to API definitions using TypeScript-first schemas instead of GraphQL SDL files.
Start by analyzing your existing Gen 1 API structure. Review your schema.graphql file and identify all types, queries, mutations, and subscriptions. In Gen 2, you’ll recreate these using the new defineData function with TypeScript models. Each GraphQL type becomes a TypeScript interface, and your resolvers transform into function handlers.
Lambda functions in Gen 2 follow a more streamlined approach. Instead of separate function directories, you’ll define functions directly within your schema using the defineFunction utility. Custom business logic that previously lived in VTL resolvers now moves to JavaScript/TypeScript functions, offering better debugging capabilities and type safety.
Key Migration Steps:
- Export your Gen 1 schema and resolver mappings
- Create corresponding TypeScript models in Gen 2
- Rewrite VTL resolvers as JavaScript functions
- Update Lambda function configurations to match Gen 2 patterns
- Test each API endpoint individually before proceeding
The authorization rules also change format. Gen 1’s @auth directives become explicit access patterns in your Gen 2 schema definition. Pay special attention to complex authorization scenarios involving multiple user pools or custom authorization logic.
Updating Database Schemas and Data Access Patterns
Database migration requires careful planning since Gen 2 handles DynamoDB table management differently. While Gen 1 automatically created tables based on GraphQL types, Gen 2 gives you more control over table structure and indexing patterns.
Your existing DynamoDB data remains intact during migration, but you’ll need to update how your application accesses it. Gen 2 introduces improved data access patterns through the new client libraries, which provide better TypeScript support and more intuitive API calls.
Review your current table structure and identify any custom indexes or complex access patterns. Gen 2’s data modeling approach might require adjustments to your query patterns, especially if you relied heavily on GSI (Global Secondary Index) configurations that were auto-generated in Gen 1.
Migration Checklist:
- Document current table schemas and relationships
- Map Gen 1 field types to Gen 2 equivalents
- Update client-side data access code
- Verify index configurations match requirements
- Test data consistency across old and new access patterns
Consider running both Gen 1 and Gen 2 APIs in parallel during transition to ensure data integrity. This approach lets you validate that your new data access patterns return identical results to your existing implementation.
Migrating Authentication Flows and User Management
Authentication migration involves updating both backend configurations and frontend client code. Gen 2 simplifies auth configuration through the new defineAuth function, but the underlying Cognito services remain largely compatible.
Your existing user pools and identity pools can continue working with Gen 2, but you’ll need to update how your application initializes and interacts with authentication services. The new Amplify client libraries provide improved error handling and better TypeScript support for auth operations.
Review your current authentication flows, including sign-up, sign-in, password reset, and MFA configurations. Gen 2 offers more granular control over these processes, allowing you to customize user experiences more easily than before.
Auth Migration Process:
- Extract current Cognito configurations from Gen 1
- Recreate auth settings using
defineAuthin Gen 2 - Update frontend auth initialization code
- Test all authentication flows thoroughly
- Migrate any custom auth challenges or triggers
Social sign-in providers require special attention during migration. Verify that your OAuth configurations transfer correctly and that redirect URLs remain functional throughout the transition.
Adapting Storage and File Handling Services
Storage migration focuses on updating how your application handles file uploads, downloads, and management through Amazon S3. Gen 2 introduces improved storage APIs with better error handling and progress tracking capabilities.
Your existing S3 buckets and stored files remain accessible, but you’ll need to update the client-side code that interacts with storage services. The new storage client provides more intuitive methods for common operations like uploading files with progress callbacks and generating presigned URLs.
Access control patterns for storage also evolve in Gen 2. Instead of path-based permissions in Gen 1, you now define storage access rules more explicitly through the configuration, providing better security and clearer intent.
Storage Migration Tasks:
- Inventory current S3 bucket configurations and access patterns
- Update storage client initialization in your application
- Migrate file upload/download logic to new API methods
- Test access control rules with different user roles
- Verify file URLs and CDN configurations remain functional
Pay particular attention to any custom storage triggers or Lambda functions that process uploaded files. These integrations may require updates to work seamlessly with Gen 2’s storage implementation.
Frontend Code Migration Strategies

Updating Client-Side Authentication Integration
The authentication experience changes significantly with Amplify Gen 2, requiring careful attention to how your frontend handles user sessions. Your existing Auth module imports need updating from @aws-amplify/auth to the new unified client structure. Start by replacing Auth.signIn() calls with the new signIn() function from the Gen 2 client.
Authentication state management becomes more streamlined in Gen 2. Instead of manually tracking user sessions through multiple Auth API calls, leverage the built-in useAuthenticator hook for React applications or the equivalent state management tools for other frameworks. This reduces boilerplate code and provides better error handling out of the box.
Password reset flows and social provider integrations require syntax updates. Your existing Auth.forgotPassword() calls become resetPassword(), and social sign-in methods now use consistent naming conventions across all providers. Update your OAuth configuration in the new schema-based approach rather than the previous CLI-driven setup.
Multi-factor authentication (MFA) handling also shifts to new method signatures. Replace Auth.confirmSignIn() with the updated MFA confirmation flow, ensuring your UI components can handle the new response structures.
Refactoring API Calls and Data Fetching Logic
GraphQL API integration transforms dramatically in your Amplify Gen 2 migration. The previous API.graphql() pattern gives way to generated client methods that provide better type safety and developer experience. Your existing queries and mutations need restructuring to work with the new client architecture.
Replace manual GraphQL string construction with the auto-generated client functions. Where you previously wrote API.graphql(graphqlOperation(listTodos)), you’ll now use direct method calls like client.models.Todo.list(). This change eliminates common syntax errors and provides compile-time validation for your API calls.
Real-time subscriptions receive significant improvements in Gen 2. Your existing subscription setup using API.graphql() with subscription operations becomes simpler through the new client’s built-in subscription methods. The connection management, error handling, and cleanup processes are now handled automatically.
Data caching strategies need adjustment as well. The new client provides enhanced caching mechanisms that work differently from Gen 1. Review your existing cache invalidation logic and update it to work with the improved caching system that comes with Gen 2’s unified client approach.
Adapting UI Components for New SDK Methods
UI component integration requires systematic updates across your application. Start with form components that handle user input for API operations. Your existing form submission handlers need updating to use the new client methods instead of the previous API module structure.
Loading states and error handling patterns change with Gen 2’s improved async operation management. The new client methods return promises with enhanced error information, allowing for more granular error handling in your UI components. Update your loading indicators and error message displays to work with the new response formats.
Data binding in list components becomes more straightforward with Gen 2’s model-based approach. Replace your existing data fetching logic with the new list operations that provide built-in pagination and filtering capabilities. This reduces the custom logic needed in your components.
State management libraries like Redux or Context API need updates to work with the new data flow patterns. The Gen 2 client’s built-in state management reduces the need for complex external state solutions, but existing implementations require careful migration to avoid data consistency issues during the transition period.
Testing and Validation Throughout Migration

Implementing Automated Testing for Backend Services
Your backend services need rock-solid testing during the AWS Amplify Gen 2 migration to catch issues before they reach production. Start by setting up comprehensive unit tests for your Lambda functions and API endpoints using frameworks like Jest for JavaScript or pytest for Python. These tests should cover all business logic, error handling, and edge cases.
Create integration tests that verify your services work together correctly. This means testing the entire flow from API Gateway through to your Lambda functions and database operations. Use tools like AWS SAM CLI or the Amplify CLI to spin up local testing environments that mirror your cloud infrastructure.
Don’t forget about your GraphQL schema and resolvers. Implement automated tests that validate your schema changes and ensure backward compatibility. Use libraries like GraphQL Code Generator to automatically generate TypeScript types and validation logic from your schema.
Set up continuous integration pipelines that run your test suites automatically on every code change. GitHub Actions or AWS CodePipeline work great for this. Make sure your tests run in isolated environments that don’t interfere with each other.
Mock external dependencies and third-party services during testing. This keeps your tests fast and reliable while preventing accidental charges or rate limiting issues. AWS provides excellent mocking libraries for their services.
Validating Frontend Functionality Across Environments
Your frontend validation strategy should cover every environment where your application runs. Start with component-level testing using React Testing Library or Vue Test Utils. These tests ensure your UI components render correctly and handle user interactions properly.
Build end-to-end tests using Cypress or Playwright that simulate real user journeys through your application. These tests should cover critical paths like user authentication, data fetching, and form submissions. Run these tests against both your development and staging environments to catch environment-specific issues.
Cross-browser testing becomes crucial during Amplify Gen 2 migration since you’re potentially changing how your app bundles and loads. Test your application across Chrome, Firefox, Safari, and Edge. Use tools like BrowserStack or Sauce Labs to automate this process.
Mobile responsiveness testing shouldn’t be overlooked. Your Gen 2 migration might introduce subtle CSS changes or JavaScript behavior differences. Test your app on various device sizes and orientations.
Create visual regression tests using tools like Percy or Chromatic. These catch unexpected UI changes that might slip through functional testing. Screenshots from before and after your migration help identify any visual inconsistencies.
Performance Testing and Optimization Verification
Performance testing during your Amplify Gen 2 migration helps you verify that your new architecture performs as expected or better than Gen 1. Start with load testing your API endpoints using tools like Artillery or K6. Gradually increase the load to identify bottlenecks and breaking points.
Monitor your Lambda function cold start times and execution duration. Gen 2’s architecture might change how your functions initialize, so establish baseline metrics and compare them throughout the migration. Use AWS X-Ray to trace requests and identify performance bottlenecks across your distributed system.
Frontend performance metrics matter just as much. Use Lighthouse CI to automatically test your page load times, Core Web Vitals, and accessibility scores. Set up performance budgets that fail your build if metrics regress beyond acceptable thresholds.
Database query performance often changes during migration due to new data access patterns or schema modifications. Use AWS CloudWatch to monitor RDS or DynamoDB metrics. Set up alerts for slow queries or high read/write capacity consumption.
Bundle size analysis helps catch performance regressions early. Use tools like webpack-bundle-analyzer to track how your JavaScript bundles change during migration. Ensure tree shaking still works correctly with your new dependencies.
Security and Access Control Validation
Security validation becomes critical during AWS Amplify Gen 2 migration since authentication and authorization mechanisms often change significantly. Start by auditing all your IAM policies and ensuring they follow the principle of least privilege. Gen 2’s resource-based approach might require different permission structures.
Test your authentication flows thoroughly across all user types and scenarios. This includes sign-up, sign-in, password reset, and multi-factor authentication. Use automated testing tools to simulate various authentication states and verify that protected resources remain secure.
API security testing should cover both GraphQL and REST endpoints. Verify that your resolvers properly validate user permissions before accessing data. Test for common vulnerabilities like SQL injection, cross-site scripting, and unauthorized data access.
Run penetration testing tools like OWASP ZAP against your application to identify security vulnerabilities. Schedule these scans regularly during your migration process to catch issues early.
Validate your Content Security Policy headers and CORS configurations. Gen 2 might change how these are configured, potentially opening security gaps. Use browser developer tools to verify that your security headers are properly set.
Data encryption validation ensures your sensitive data remains protected during migration. Test encryption at rest for your databases and encryption in transit for all API communications. Verify that your SSL/TLS certificates are properly configured and haven’t expired.
Deployment and Go-Live Strategies

Staging Environment Setup and Testing
Setting up a proper staging environment serves as your safety net during the AWS Amplify Gen 2 migration process. Create a staging environment that mirrors your production setup as closely as possible, including the same AWS region, similar data volumes, and comparable traffic patterns.
Start by deploying your migrated Gen 2 application to a separate AWS environment using Amplify’s built-in staging capabilities. Configure environment-specific variables and ensure all backend services like AppSync APIs, Lambda functions, and Cognito user pools are properly isolated from production.
Run comprehensive end-to-end testing in staging before proceeding with your AWS Amplify Gen 2 migration. Test all critical user flows, authentication processes, and data operations. Pay special attention to API endpoints that changed during migration and verify that all frontend components interact correctly with the new Gen 2 backend architecture.
Load testing becomes crucial at this stage. Use tools like AWS Load Testing solution or third-party services to simulate production traffic levels. This helps identify potential performance bottlenecks and ensures your migrated application can handle real-world usage patterns.
Don’t skip user acceptance testing in the staging environment. Have key stakeholders and power users interact with the migrated application to catch any functional issues that automated tests might miss.
Production Deployment with Zero-Downtime Approach
Achieving zero-downtime during your AWS Amplify deployment strategies requires careful orchestration of your migration timeline. The blue-green deployment pattern works exceptionally well for Amplify Gen 2 migrations, allowing you to maintain the old Gen 1 environment while bringing the new Gen 2 environment online.
Begin by setting up your Gen 2 production environment in parallel to your existing Gen 1 setup. Configure DNS routing to gradually shift traffic from the old environment to the new one. AWS Route 53 weighted routing policies enable you to start with a small percentage of traffic (like 5-10%) routed to Gen 2 while monitoring for any issues.
Database migration requires special attention during this phase. If you’re migrating data stores, consider using AWS DMS (Database Migration Service) for continuous replication during the transition period. For DynamoDB tables, implement dual-write patterns temporarily to keep both environments synchronized.
Plan your migration during low-traffic periods when possible. Even with zero-downtime strategies, having fewer active users reduces complexity and potential impact. Create detailed rollback procedures and keep your Gen 1 environment ready for quick restoration if needed.
Monitor key metrics throughout the deployment process, including API response times, error rates, and user authentication flows. Set up automated alerts to catch issues immediately as traffic shifts to the new environment.
Post-Migration Monitoring and Performance Tracking
Once your AWS Amplify Gen 2 setup goes live, establishing robust monitoring becomes your top priority. AWS CloudWatch provides comprehensive insights into your application’s performance, but you’ll want to track specific metrics that indicate migration success.
Set up custom dashboards focusing on critical performance indicators like API latency, Lambda function duration, and Cognito authentication success rates. Compare these metrics against your Gen 1 baseline to ensure performance hasn’t degraded during migration.
User experience monitoring should extend beyond technical metrics. Track user session duration, page load times, and error rates from the frontend perspective. Tools like AWS X-Ray help trace requests across your distributed Gen 2 architecture, making it easier to identify performance bottlenecks.
Create alerting rules for anomalies that might indicate migration-related issues. This includes sudden spikes in 4xx or 5xx error rates, unusual patterns in database query performance, or authentication failures that weren’t present in Gen 1.
Keep your rollback plan active for at least two weeks post-migration. Monitor user feedback channels and support tickets for any issues that surface after the initial deployment. Document any problems encountered and their solutions to improve future migration processes.
Regular performance reviews during the first month help identify optimization opportunities specific to Gen 2’s architecture. Many teams discover new performance gains possible with Gen 2’s improved infrastructure that weren’t available in the original Gen 1 setup.

Migrating from AWS Amplify Gen 1 to Gen 2 doesn’t have to be overwhelming when you break it down into manageable steps. By understanding the key differences between versions, planning your migration carefully, and setting up a proper development environment, you’re already ahead of the game. The systematic approach to moving your backend services and frontend code, combined with thorough testing at each stage, helps ensure a smooth transition without unexpected surprises.
The real payoff comes from Gen 2’s improved developer experience, better performance, and enhanced flexibility. Take your time with the migration process, test everything thoroughly, and don’t rush the go-live phase. Your future self will thank you for doing the migration right the first time rather than trying to fix issues after deployment. Start with a clear assessment of your current setup, follow the migration steps methodically, and you’ll be running on Gen 2 with confidence.


