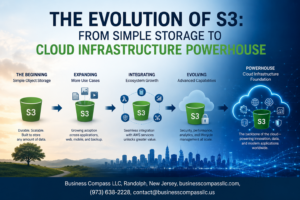
Managing AWS S3 buckets manually through the console gets messy fast when you’re dealing with multiple environments or complex configurations. Terraform for AWS S3 changes the game by letting you define your entire S3 infrastructure as code, making bucket management repeatable, version-controlled, and error-free.
This guide is perfect for DevOps engineers, cloud architects, and developers who want to automate their S3 bucket management with Terraform instead of clicking through the AWS console every time they need to make changes.
We’ll walk through creating and configuring S3 buckets with Terraform, showing you how to set up buckets with the right permissions from day one. You’ll also learn how to implement S3 bucket policies through Infrastructure as Code, so your security settings stay consistent across all environments. Finally, we’ll cover S3 versioning with Terraform and other advanced features that’ll make your S3 setup bulletproof.
By the end, you’ll have a solid Terraform AWS S3 configuration that you can replicate anywhere and modify with confidence.
Setting Up Terraform for AWS S3 Management

Installing and configuring Terraform for AWS integration
Before you can start managing AWS S3 resources with Terraform, you’ll need to get Terraform installed and ready for AWS integration. Head over to the official Terraform website and download the appropriate binary for your operating system. Once downloaded, extract the executable and add it to your system’s PATH environment variable.
To verify your installation worked correctly, open a terminal or command prompt and run:
terraform version
This should display the installed Terraform version. For AWS S3 management, you’ll want Terraform version 1.0 or higher to take advantage of the latest AWS provider features.
Next, you’ll need the AWS CLI installed on your system. This tool helps manage AWS credentials and makes authentication smoother when working with Terraform AWS S3 configurations. Download and install the AWS CLI from Amazon’s official documentation, then verify it’s working with:
aws --version
Establishing AWS provider credentials and permissions
Getting your AWS credentials configured properly is crucial for successful Terraform S3 bucket management. You have several options for authentication, each with its own advantages.
The most straightforward approach uses AWS CLI configuration. Run the following command and enter your access key, secret key, default region, and output format:
aws configure
Your credentials get stored in ~/.aws/credentials (or %USERPROFILE%\.aws\credentials on Windows). Terraform automatically picks up these credentials when connecting to AWS.
For enhanced security, especially in production environments, consider using IAM roles instead of hardcoded credentials. If you’re running Terraform from an EC2 instance, you can attach an IAM role with the necessary S3 permissions.
Your IAM user or role needs specific permissions for S3 bucket management Terraform operations:
s3:CreateBuckets3:DeleteBuckets3:GetBucketPolicys3:PutBucketPolicys3:GetBucketVersionings3:PutBucketVersionings3:GetBucketAcls3:PutBucketAcl
Create a custom IAM policy with these permissions rather than using overly broad policies like AmazonS3FullAccess.
Creating your first S3 resource configuration file
Now comes the exciting part – writing your first Terraform AWS S3 configuration. Create a new directory for your project and add a file called main.tf. This file will contain your Infrastructure as Code S3 definitions.
Start with the AWS provider configuration:
terraform {
  required_providers {
    aws = {
      source  = "hashicorp/aws"
      version = "~> 5.0"
    }
  }
}

provider "aws" {
  region = "us-west-2"
}
The required_providers block ensures you’re using a compatible AWS provider version. Specifying ~> 5.0 means Terraform will use version 5.x but won’t automatically upgrade to version 6.x, preventing potential breaking changes.
Now add your first S3 bucket resource:
resource "aws_s3_bucket" "example" {
  bucket = "my-terraform-s3-bucket-unique-name"
}
Remember that S3 bucket names must be globally unique across all AWS accounts. Consider adding random suffixes or your organization’s identifier to avoid naming conflicts.
Initialize your Terraform working directory by running:
terraform init
This command downloads the AWS provider and prepares your environment. You’ll see Terraform create a .terraform directory and a lock file to track provider versions.
Verify your configuration syntax with:
terraform validate
Preview the changes Terraform will make:
terraform plan
This AWS S3 Terraform tutorial approach helps you catch potential issues before making actual changes to your AWS infrastructure.
Creating and Configuring S3 Buckets with Terraform

Defining basic S3 bucket resources with essential properties
Creating an S3 bucket with Terraform starts with the fundamental aws_s3_bucket resource. This resource defines your bucket’s core identity and establishes the foundation for all additional configurations.
resource "aws_s3_bucket" "main_bucket" {
  bucket = "my-terraform-managed-bucket"

  tags = {
    Name        = "Main Storage Bucket"
    Environment = "production"
    ManagedBy   = "terraform"
  }
}
The bucket name serves as a globally unique identifier across all AWS accounts, so choosing wisely prevents conflicts. Tags play a crucial role in resource management, enabling cost tracking and automated operations.
Beyond the basic bucket creation, you’ll typically configure several essential properties through separate resources. The aws_s3_bucket_acl resource controls access permissions, while aws_s3_bucket_lifecycle_configuration manages object lifecycle rules for cost optimization.
Implementing bucket naming conventions and regional deployment
Establishing consistent naming conventions prevents confusion and enables automated operations. A well-structured naming pattern includes environment indicators, application identifiers, and purpose descriptors.
locals {
  bucket_name = "${var.company_name}-${var.environment}-${var.application_name}-${random_string.bucket_suffix.result}"
}

resource "random_string" "bucket_suffix" {
  length  = 8
  special = false
  upper   = false
}

resource "aws_s3_bucket" "app_bucket" {
  bucket = local.bucket_name

  tags = merge(var.common_tags, {
    Purpose = "application-storage"
  })
}
Regional deployment considerations affect both performance and compliance requirements. Terraform’s AWS provider automatically creates buckets in your configured region, but you can explicitly specify regions for multi-region deployments:
# Primary region bucket
resource "aws_s3_bucket" "primary" {
  provider = aws.us-east-1
  bucket   = "${local.bucket_name}-primary"
}

# Secondary region bucket for disaster recovery
resource "aws_s3_bucket" "secondary" {
  provider = aws.us-west-2
  bucket   = "${local.bucket_name}-secondary"
}
Setting up server-side encryption for enhanced security
Server-side encryption protects your data at rest and satisfies most compliance requirements. Terraform AWS S3 configuration supports multiple encryption methods through the aws_s3_bucket_server_side_encryption_configuration resource.
resource "aws_s3_bucket_server_side_encryption_configuration" "bucket_encryption" {
  bucket = aws_s3_bucket.main_bucket.id

  rule {
    apply_server_side_encryption_by_default {
      sse_algorithm     = "AES256"
    }
    bucket_key_enabled = true
  }
}
For organizations requiring more control over encryption keys, AWS Key Management Service (KMS) integration provides advanced capabilities:
resource "aws_kms_key" "s3_key" {
  description             = "KMS key for S3 bucket encryption"
  deletion_window_in_days = 7

  tags = {
    Name = "S3-Encryption-Key"
  }
}

resource "aws_s3_bucket_server_side_encryption_configuration" "kms_encryption" {
  bucket = aws_s3_bucket.main_bucket.id

  rule {
    apply_server_side_encryption_by_default {
      kms_master_key_id = aws_kms_key.s3_key.arn
      sse_algorithm     = "aws:kms"
    }
    bucket_key_enabled = true
  }
}
The bucket_key_enabled parameter reduces KMS API calls and associated costs by generating a time-limited bucket key for encryption operations.
Configuring public access block settings for compliance
Public access blocks prevent accidental exposure of sensitive data and help maintain security posture. The aws_s3_bucket_public_access_block resource provides granular control over public access scenarios:
resource "aws_s3_bucket_public_access_block" "security_block" {
  bucket = aws_s3_bucket.main_bucket.id

  block_public_acls       = true
  block_public_policy     = true
  ignore_public_acls      = true
  restrict_public_buckets = true
}
Each setting addresses specific security concerns:
| Setting | Purpose | Recommended Value |
|---|---|---|
block_public_acls |
Prevents new public ACLs | true |
block_public_policy |
Blocks public bucket policies | true |
ignore_public_acls |
Ignores existing public ACLs | true |
restrict_public_buckets |
Restricts public bucket access | true |
For buckets that legitimately need public access, such as static website hosting, you can selectively disable specific restrictions while maintaining others:
resource "aws_s3_bucket_public_access_block" "website_bucket_block" {
  bucket = aws_s3_bucket.website_bucket.id

  block_public_acls       = false
  block_public_policy     = false
  ignore_public_acls      = false
  restrict_public_buckets = false
}
These S3 bucket Terraform examples demonstrate how Infrastructure as Code principles create consistent, secure, and maintainable storage solutions that scale with your organization’s needs.
Mastering S3 Bucket Policies Through Infrastructure as Code

Writing JSON policies directly within Terraform configurations
Managing S3 bucket Terraform policy configurations becomes straightforward when you embed JSON policies directly into your Terraform code. The aws_s3_bucket_policy resource accepts policy documents as JSON strings, allowing you to define comprehensive access controls alongside your infrastructure definitions.
resource "aws_s3_bucket_policy" "example" {
  bucket = aws_s3_bucket.my_bucket.id

  policy = jsonencode({
    Version = "2012-10-17"
    Statement = [
      {
        Sid       = "PublicReadGetObject"
        Effect    = "Allow"
        Principal = "*"
        Action    = "s3:GetObject"
        Resource  = "${aws_s3_bucket.my_bucket.arn}/*"
      }
    ]
  })
}
The jsonencode() function transforms HCL syntax into valid JSON, making policies more readable and maintainable. This approach eliminates the need for separate policy files and keeps everything in your Terraform AWS S3 configuration. You can reference bucket ARNs and other resources dynamically, ensuring policies stay synchronized with your infrastructure changes.
Implementing cross-account access controls and permissions
Cross-account S3 access requires careful policy design that balances security with functionality. AWS S3 Terraform configuration makes this process repeatable and version-controlled.
resource "aws_s3_bucket_policy" "cross_account" {
  bucket = aws_s3_bucket.shared_bucket.id

  policy = jsonencode({
    Version = "2012-10-17"
    Statement = [
      {
        Sid    = "CrossAccountAccess"
        Effect = "Allow"
        Principal = {
          AWS = [
            "arn:aws:iam::123456789012:root",
            "arn:aws:iam::987654321098:user/DataAnalyst"
          ]
        }
        Action = [
          "s3:GetObject",
          "s3:PutObject",
          "s3:DeleteObject"
        ]
        Resource = "${aws_s3_bucket.shared_bucket.arn}/*"
      }
    ]
  })
}
Cross-account policies should follow the principle of least privilege. Grant specific permissions only to the accounts and users that need them. Consider implementing conditions based on IP addresses, request time, or MFA requirements for sensitive buckets.
| Permission Type | Use Case | Security Level |
|---|---|---|
| Full Access | Development environments | Low |
| Read-Only | Reporting systems | Medium |
| Conditional Access | Production data | High |
Creating dynamic policy templates using Terraform variables
Terraform S3 best practices include creating reusable policy templates that adapt to different environments and requirements. Variables make your policies flexible and maintainable across multiple deployments.
variable "allowed_accounts" {
  description = "List of AWS account IDs allowed access"
  type        = list(string)
  default     = []
}

variable "bucket_permissions" {
  description = "Map of permissions for different user types"
  type = map(list(string))
  default = {
    read_only = ["s3:GetObject", "s3:ListBucket"]
    read_write = ["s3:GetObject", "s3:PutObject", "s3:DeleteObject"]
  }
}

locals {
  policy_statements = [
    for account_id in var.allowed_accounts : {
      Sid    = "Account-${account_id}"
      Effect = "Allow"
      Principal = {
        AWS = "arn:aws:iam::${account_id}:root"
      }
      Action   = var.bucket_permissions.read_write
      Resource = "${aws_s3_bucket.dynamic_bucket.arn}/*"
    }
  ]
}

resource "aws_s3_bucket_policy" "dynamic" {
  bucket = aws_s3_bucket.dynamic_bucket.id

  policy = jsonencode({
    Version   = "2012-10-17"
    Statement = local.policy_statements
  })
}
This approach lets you customize policies for different environments by changing variable values. Development might allow broader access while production restricts permissions to specific service accounts.
Validating and testing policy configurations before deployment
Policy validation prevents costly mistakes and security vulnerabilities in your S3 bucket management Terraform workflows. AWS provides several tools for testing policies before they go live.
Use terraform plan to review policy changes before applying them. The output shows exactly what permissions will be granted or revoked:
terraform plan -var-file="production.tfvars"
AWS Policy Simulator helps test specific scenarios:
# Use data source to validate policy syntax
data "aws_iam_policy_document" "validation" {
  statement {
    sid    = "TestStatement"
    effect = "Allow"

    principals {
      type        = "AWS"
      identifiers = var.allowed_accounts
    }

    actions   = ["s3:GetObject"]
    resources = ["${aws_s3_bucket.test_bucket.arn}/*"]
  }
}
Automated testing with tools like conftest or custom validation rules catches policy errors early. Set up CI/CD pipelines that validate policies against your organization’s security standards before deployment.
Consider implementing policy versioning and gradual rollouts for critical buckets. This approach minimizes the impact of policy errors and provides rollback capabilities when needed.
Implementing Version Control for S3 Objects

Enabling versioning on existing and new S3 buckets
S3 versioning Terraform configuration provides a safety net for your data by keeping multiple versions of objects in the same bucket. When you enable versioning, S3 automatically creates a unique version ID for each object upload, allowing you to recover from accidental deletions or modifications.
For new buckets, add versioning configuration directly to your Terraform S3 bucket resource:
resource "aws_s3_bucket" "example" {
  bucket = "my-versioned-bucket"
}

resource "aws_s3_bucket_versioning" "example" {
  bucket = aws_s3_bucket.example.id
  versioning_configuration {
    status = "Enabled"
  }
}
Enabling versioning on existing buckets requires careful planning. Terraform AWS S3 configurations can modify existing buckets without data loss:
resource "aws_s3_bucket_versioning" "existing_bucket" {
  bucket = "existing-production-bucket"
  versioning_configuration {
    status = "Enabled"
  }
}
You can also suspend versioning when needed. Suspended versioning stops creating new versions but preserves existing ones:
versioning_configuration {
  status = "Suspended"
}
Configuring lifecycle policies to manage object versions automatically
AWS S3 automation Terraform becomes essential when managing multiple object versions, as storage costs can accumulate quickly. Lifecycle policies automatically transition or delete older versions based on your defined rules.
Create comprehensive lifecycle policies using Terraform S3 best practices:
resource "aws_s3_bucket_lifecycle_configuration" "example" {
  bucket = aws_s3_bucket.example.id

  rule {
    id     = "version_management"
    status = "Enabled"

    noncurrent_version_transition {
      noncurrent_days = 30
      storage_class   = "STANDARD_IA"
    }

    noncurrent_version_transition {
      noncurrent_days = 90
      storage_class   = "GLACIER"
    }

    noncurrent_version_expiration {
      noncurrent_days = 365
    }

    abort_incomplete_multipart_upload {
      days_after_initiation = 7
    }
  }
}
This Infrastructure as Code S3 approach automatically moves non-current versions to cheaper storage classes after 30 days, then to Glacier after 90 days, and permanently deletes them after one year. You can customize these timeframes based on your business requirements and compliance needs.
Setting up MFA delete protection for critical versioned objects
MFA delete protection adds an extra security layer for critical versioned buckets. This feature requires multi-factor authentication before permanently deleting object versions or disabling versioning, preventing accidental or malicious data loss.
Enable MFA delete through Terraform AWS S3 configuration:
resource "aws_s3_bucket_versioning" "critical_bucket" {
  bucket = aws_s3_bucket.critical.id
  versioning_configuration {
    status     = "Enabled"
    mfa_delete = "Enabled"
  }
}
Important considerations for MFA delete:
- Only the bucket owner can enable MFA delete
- MFA delete requires AWS CLI or API calls with MFA authentication
- Terraform cannot directly perform MFA-protected operations during apply
- Plan your MFA delete implementation carefully for production environments
For production S3 bucket management Terraform workflows, consider implementing MFA delete selectively on buckets containing sensitive data, financial records, or compliance-critical information. Regular buckets with less sensitive content can use standard lifecycle policies without MFA requirements.
Remember that MFA delete protection applies to the entire bucket versioning configuration, not individual objects. Design your bucket strategy accordingly, potentially separating critical and non-critical data into different buckets based on security requirements.
Advanced S3 Features and Terraform Best Practices

Managing Cross-Region Replication with Terraform Modules
Cross-region replication stands as a critical disaster recovery and compliance strategy for AWS S3. Using Terraform modules makes this complex configuration manageable and repeatable across multiple environments.
The replication configuration requires careful orchestration of source and destination buckets, IAM roles, and replication rules. Here’s how to structure a comprehensive module:
resource "aws_s3_bucket_replication_configuration" "main" {
  role   = aws_iam_role.replication.arn
  bucket = aws_s3_bucket.source.id

  rule {
    id     = "replicate-everything"
    status = "Enabled"

    destination {
      bucket        = aws_s3_bucket.destination.arn
      storage_class = var.destination_storage_class

      encryption_configuration {
        replica_kms_key_id = var.destination_kms_key_id
      }
    }
  }
}
Creating reusable modules for cross-region replication involves parameterizing region configurations, storage classes, and encryption settings. This approach lets teams deploy consistent replication setups across different AWS accounts and regions without duplicating code.
Implementing Bucket Notifications and Event Triggers
S3 bucket notifications transform static storage into reactive infrastructure. Terraform AWS S3 configuration for notifications requires connecting S3 events to Lambda functions, SQS queues, or SNS topics.
The notification setup involves multiple AWS services working together. Your Terraform S3 configuration should handle the necessary permissions and event mappings:
resource "aws_s3_bucket_notification" "bucket_notification" {
  bucket = aws_s3_bucket.main.id

  lambda_function {
    lambda_function_arn = aws_lambda_function.processor.arn
    events              = ["s3:ObjectCreated:*"]
    filter_prefix       = "uploads/"
    filter_suffix       = ".jpg"
  }

  depends_on = [aws_lambda_permission.s3_invoke]
}
Event filtering becomes crucial for high-volume buckets. Rather than triggering on every object change, filter by prefixes, suffixes, or specific event types to reduce costs and processing overhead. This selective approach prevents unnecessary Lambda invocations and keeps your infrastructure efficient.
Organizing Terraform Code with Modules for Reusability
Terraform S3 best practices emphasize modular architecture for maintainability and consistency. Breaking down S3 configurations into focused, reusable modules prevents code duplication and standardizes deployments.
A well-structured module hierarchy might include:
| Module Type | Purpose | Key Resources |
|---|---|---|
| Base S3 | Core bucket creation | aws_s3_bucket, basic policies |
| Security | Encryption and access control | KMS keys, bucket policies, ACLs |
| Lifecycle | Object management | Lifecycle rules, versioning |
| Monitoring | Logging and metrics | CloudTrail, access logging |
Each module should accept variables for customization while maintaining sensible defaults. This pattern allows teams to create standardized S3 setups while accommodating specific requirements for different projects or environments.
Version your modules using Git tags or a private Terraform registry. This versioning strategy ensures reproducible deployments and allows gradual rollouts of module updates across environments.
Planning State Management and Team Collaboration Workflows
Terraform state management becomes critical when multiple team members work with AWS S3 automation Terraform configurations. Remote state storage with proper locking prevents conflicts and maintains consistency across deployments.
Configure remote state using S3 backend with DynamoDB locking:
terraform {
  backend "s3" {
    bucket         = "terraform-state-bucket"
    key            = "s3-infrastructure/terraform.tfstate"
    region         = "us-west-2"
    dynamodb_table = "terraform-locks"
    encrypt        = true
  }
}
Workspace strategies help manage multiple environments without state conflicts. Create separate workspaces for development, staging, and production environments, each maintaining isolated state while using the same configuration code.
Team workflows should include pull request reviews for Terraform changes, automated plan generation in CI/CD pipelines, and clear approval processes for production deployments. These practices prevent accidental modifications to critical S3 infrastructure and maintain audit trails for compliance requirements.

Managing AWS S3 buckets doesn’t have to be a manual headache when you have Terraform in your toolkit. From creating buckets and setting up policies to enabling versioning and implementing advanced features, Infrastructure as Code makes everything repeatable, traceable, and less prone to human error. You’ll save countless hours and avoid those late-night troubleshooting sessions that come with manual configurations.
Ready to take your AWS S3 management to the next level? Start small by converting one of your existing buckets to Terraform, then gradually expand your infrastructure as code approach. Your future self will thank you when you can deploy consistent S3 configurations across multiple environments with just a few commands, and your team will appreciate the clear documentation that comes built-in with your Terraform files.